background image

57

58

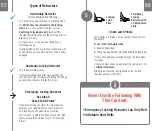
Types of Retractors

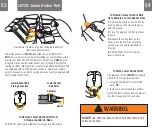
Automatic Locking Retractor

This retractor always locks.
It will automatically lock after slowly pulling the 

seat belt out at least halfway and letting the belt go 

back into the retractor 

1-2 in. 

(2.5-5 cm). 

Emergency Locking Retractor

See Step 5

“Check Latch Plates”

If the retractor does not lock, it is most likely an 

Emergency Locking Retractor. These retractors 

only lock during a sudden stop or collision. 
You will need to determine if your seat belt’s latch 

plate can lock the belt. See step 5, “Check Latch 

Plates”.

Switchable Retractor 

(most vehicles have this type)

This retractor can be switched to a locking mode. 
You 

MUST have the retractor in the locking 

mode

 to use the seat belt with this car seat.

Switching to locking mode

: Slowly pull the 

shoulder belt all the way out, then let it go back in 

1-2 in. 

(2.5-5 cm). 

As it goes back in, you will most likely hear a 

ratcheting sound. 
Gently pull the belt to see if it has locked. You will 

not be able to pull any more belt out if the lock has 

engaged.

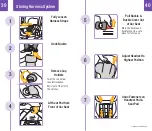
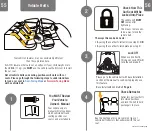
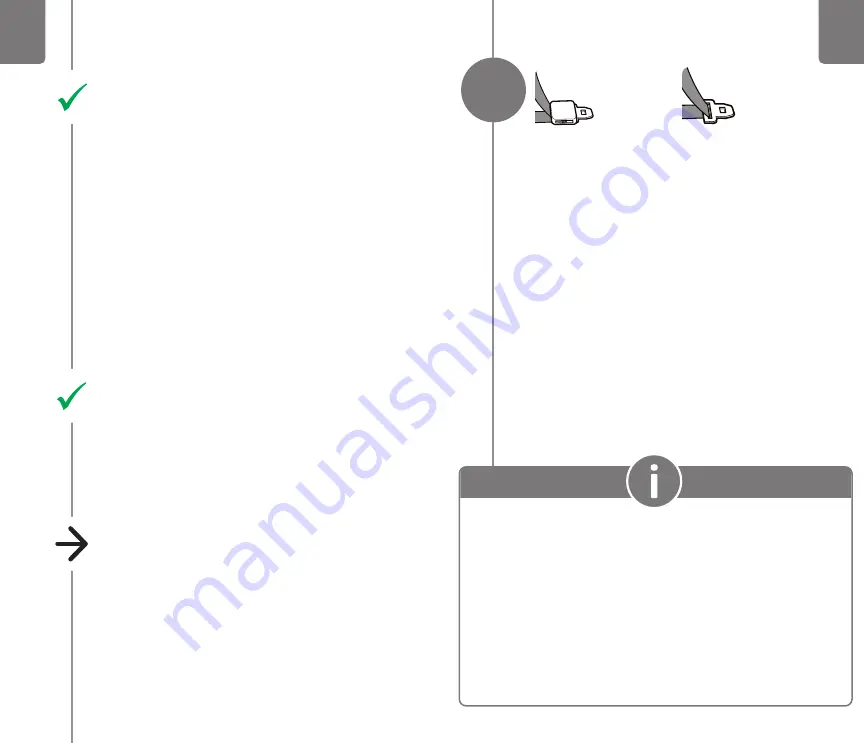
Check Latch Plates

Latch plates are the part of the seat belt that goes into 

the buckle.

To see if the latch plate locks

:

1.

 Buckle Vehicle Belt

2.

 Firmly Tug Lap Portion of Seat Belt While Pulling It Up

If the vehicle belt does not slide through the latch plate, 

it’s locked.
If the latch plate slides up and down the vehicle belt, it is 

sliding latch plate

.

Sliding latch plates easily slip between the lap and  

shoulder portions of the belt. 

Locking 

Latch 

Plate

Emergency 

Locking 

Retractor with 

a Sliding Latch 

Plate

Never Use the Following With 

This Car Seat:

• Emergency Locking Retractor Lap Only Belt
• Inflatable Seat Belts

5

Содержание Emme 360

Страница 1: ...22 Buckle Assembly Seat Pad Set Removable Cup Holder s Lower Anchor Belt Top Tether Locking Clip Instructions For parts availability and questions call text or chat If requested color is not available...

Страница 2: ...ormation If at any point you would like assistance please feel free to reach out to us Welcome to the Maxi Cosi Family Thank you for choosing this car seat also known as a child restraint To help you...

Страница 3: ...C V Gabriel Mancera No 1041 Col Del Valle Benito Ju rez C P 03100 M xico Ciudad de M xico R F C DJG140305GN9 Tel 55 67199202 Contents 1 Getting Started 1 Parts of Car Seat 3 Accessory Use 5 Installing...

Страница 4: ...truction Manual Storage Inside of pocket on backside of headrest pad Top Tether Strap Headrest Harness Adjustment Handle 1 2 Parts of Car Seat ClipQuikTM Chest Clip Buckle Harness Straps Your model ma...

Страница 5: ...d Facing Mode Wedge Pillow on select models Only For Use in Rear Facing Mode MUST be used with the head body pillows Toddler Pad on select models For Use in Rear Facing Mode or Forward Facing Mode To...

Страница 6: ...he buckle position for your child See page 23 for Rear Facing buckle positions See page 30 for Forward Facing buckle positions Once the car seat is installed you will not be able to adjust the buckle...

Страница 7: ...stalled If it is not installed see steps 7 8 2 Belt Tension Indicators Completely Green If they are not green see steps 3 6 3 Car Seat Cradle Side Facing As Shown If it is not side facing squeeze the...

Страница 8: ...child See page 23 for Rear Facing buckle positions See page 30 for Forward Facing buckle positions Once the car seat is installed you will not be able to adjust the buckle position Review Vehicle Owne...

Страница 9: ...es 43 44 6 Locate Vehicle Tether Anchors Locations vary by vehicle Review your vehicle owner s manual for top tether anchor locations and how to route the belt when there are vehicle headrests 1 2 3 1...

Страница 10: ...ce they have outgrown their forward facing car seat children should use a belt positioning booster seat until the vehicle s lap and shoulder seat belt fits properly This is often when they have reache...

Страница 11: ...here LATCH lower anchor seating positions are located in your vehicle The Car Seat Cradle MUST BE Side Facing to attach or remove the car seat from the base To recline car seat see page 18 DO NOT use...

Страница 12: ...tion Handle To Recline Squeeze the recline handle and push the top of the car seat back For More Upright Squeeze the recline handle and pull the top of the car seat forward Recline Handle There are 3...

Страница 13: ...least 1 year old and weighs 22 lb 10 kg Do not use this chest clip with children who have an implanted electronic medical device A magnet is used to help secure the chest clip locking mechanism togeth...

Страница 14: ...ding the buttons in pull the right top half of the clip apart from the left bottom half to release the magnet and separate the chest clip Fully Loosen Harness Straps Push down on the harness release l...

Страница 15: ...ake sure padding is still in place and the belt is tight To secure child in car seat see pages 33 35 To change the harness strap height see page 46 To change the buckle position see pages 46 47 To lea...

Страница 16: ...d Facing Section continued on next page In this car seat your child can remain harnessed Forward Facing until they outgrow any one of the following Weight Limit 65 lb 29 kg OR Height Limit 49 in 125 c...

Страница 17: ...cured to the vehicle with the lower anchor belt or with the vehicle seat belt In this child restraint your child MUST be at least 1 year old and weigh 22 lb 10 1 kg before they sit forward facing Do n...

Страница 18: ...d be flat against the car seat Place Child in Car Seat 1 2 3 Undo Chest Clip Hold the chest clip with both hands and press in on the top and bottom buttons with your index finger and thumb as shown Wh...

Страница 19: ...kle Position Is your child s buckle in the correct position See step 7 Vehicle Belt Install See page 5 LATCH Lower Anchor Install See Page 9 FINISHED 9 Push Car Seat towards the Back of the base The c...

Страница 20: ...information before using this chest clip continued on next page Securing Child in Car Seat Place Child in Car Seat Your child s bottom and back should be flat against the car seat Buckle Harness Pull...

Страница 21: ...n tight with the buckle securely locked DO NOT use this car seat 2 If your harness twists Straighten the harness each time you put your child in the car seat Lock the buckle and tighten the harness so...

Страница 22: ...ing Harness System Page 39 Booster Seat Use in Vehicle Page 43 40 100 lb 18 1 45 4 kg and 43 52 in 110 1 132 1 cm DO NOT use the harness system when using as a booster seat Use ONLY the vehicle s lap...

Страница 23: ...Pull it out of the slot in the car seat Lift Seat Pad from Front of Car Seat Storing Harness System continued on next page 5 6 7 Adjust Headrest to Highest Position Undo Fasteners on Headrest Pad Seat...

Страница 24: ...st the cup holder clockwise Wrap Headrest Pad Around Top of Headrest Attach the fasteners on the headrest pad and the seat pad 11 12 8 9 Pull Headrest Pad Off Top of Headrest Thread Harness Straps int...

Страница 25: ...for you to install 5 in 12 7 cm Position Lap Belt on Child Route the lap belt portion of the vehicle belt through the Booster Seat Belt Path as shown The lap belt should lay snugly across your child...

Страница 26: ...eir chest 7 Fully Loosen Harness Straps Push down on the harness release lever through the opening in the pad while pulling out on the harness straps as shown Adjust Headrest Harness Height 1 Squeeze...

Страница 27: ...is secured The buckle MUST NOT pull out Push Buckle Strap Down Pull One Side of Buckle Strap to Center Place buckle strap into desired buckle slot Push the other side of buckle strap into the buckle...

Страница 28: ...at DO NOT fully pull the harness strap out of the car seat Leave it threaded in the hip harness slots If removed you will not be able to rethread it To remove accessories see pages 3 4 2 1 3 Gently Pu...

Страница 29: ...cloth Spilled food and liquids on the car seat may result in mold or bacterial growth over time These spills could also attract insects or rodents Cleaning Buckle Car Seat Spot clean using warm sudsy...

Страница 30: ...hicles that have the lower anchor bars installed in designated seating positions Most vehicles manufactured after September 2002 are equipped with LATCH lower anchor bars Check your vehicle owner s ma...

Страница 31: ...vehicle belt The vehicle belt MUST NOT loosen after tightening This means there needs to be a way to lock the vehicle belt Check Retractor Retractors pull seat belts into stored positions and lock the...

Страница 32: ...seat Switching to locking mode Slowly pull the shoulder belt all the way out then let it go back in 1 2 in 2 5 5 cm As it goes back in you will most likely hear a ratcheting sound Gently pull the belt...

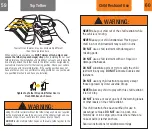
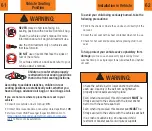
Страница 33: ...in a hot child restraint may result in burns DO NOT use a child restraint with damaged or missing parts DO NOT use a child restraint with cut frayed or damaged harnesses DO NOT substitute parts or try...

Страница 34: ...booster seat could injure occupants To avoid your child being seriously burned take the following precautions Park in the shade or where the sun does not directly hit the car seat Cover the car seat w...

Страница 35: ...car seat was not damaged AND No passengers were injured AND Airbags did not deploy AND There is no visible damage to the car seat If the crash your car seat was involved in meets ALL the criteria you...

Страница 36: ...plied warranties of the merchantability and fitness for a particular purpose shall be limited to the duration and terms of the express written warranty Some states do not allow limitations as to how l...

Отзывы: