Page
15
of 18
Copyright 2015 – PT17 / S150209
101.
Attach a clevis and threaded rod at anchor point #6. Uses crimp tubes to install the remaining left-side wing wire(s) from
anchor points 6 through 8.
102.
In the same manner as used for the left-side wires, install wing wire(s) between the
right side‟s wing panels.
103.
When all wing wires are in position and the wire‟s tension adjusted equally, secure
all threaded rods into their clevises by applying epoxy onto the rod‟s threads and
inside each clevis.
104.
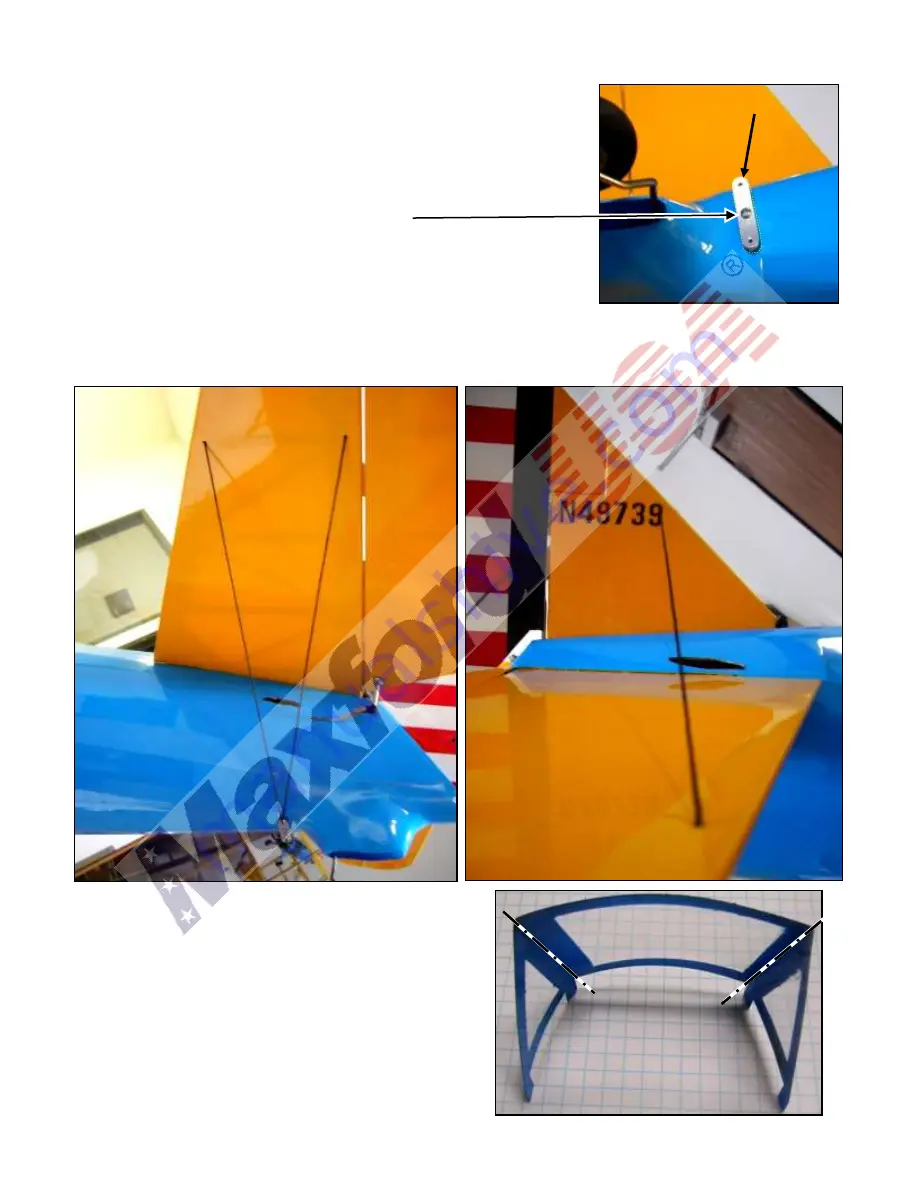
As pictured at the right, use a wood screw to attach a plastic anchor point in front
of the tail wheel to the bottom-center of the fuselage.
105.
Install the empennage wires (black string): If necessary, open six small holes
under the Mylar in the tail section (2 near the top of the vertical stabilizer and 2 in
each half of the horizontal stabilizer at approx. 9 inches from the fuselage).
106.
Tie one end of the supplied black string to either side of the anchor point.
107.
As pictured below, guide the free end of the string from the anchor point: up through the horizontal stabilizer; through the
vertical stabilizer; down through the horizontal stabilizer; through the open hole in the anchor point; up through the
horizontal stabilizer; through the vertical stabilizer; down through the horizontal stabilizer; and back to the anchor point.
108.
Pull the string snug around the tail section and tie it to the anchor point.
109.
Apply CA adhesive to secure the knots, then cut off and discard
the remaining length of excess string.
110.
Form 2 sharp bends in each windshield as shown at the right.
111.
Center the supplied template in front of the coaming at each
cockpit. (NOTE: Be sure to position the top edges of the
windshields to visually align with the top wing.)
Plastic anchor point
for installing
black string
around the tail


