background image

- 2 -

Safety Precautions

Please read the following recommended safety pre-
cautions carefully for your safety

1. Power Source

The set should be operated only from a

220-240V

AC, 50 Hz.

outlet. Please check your household

voltage is the same as the rated voltage of the set,
or if in doubt consult a qualified electrician.

2. Power Cord

Do not place the set, a piece of furniture,etc. on the
power cord (mains lead) or pinch the cord. Handle the
power cord by the plug. Do not pull out the plug by
tugging the cord and never touch the power cord when
your hands are wet as this could cause a short circuit
or electric shock. Never make a knot in the cord or tie it
with other cord. The power cord should be placed in
such a way that they are not likely to be stepped on.

A damaged power cord can cause fire or give you
an electric shock. When it is damaged and need to be
changed, it should be done by qualified technician.

3. Moisture and Water

Do not use this equipment in a humid and damp place
(avoid the bathroom, the sink in the kitchen, and near
the washing machine). Do not expose this equipment
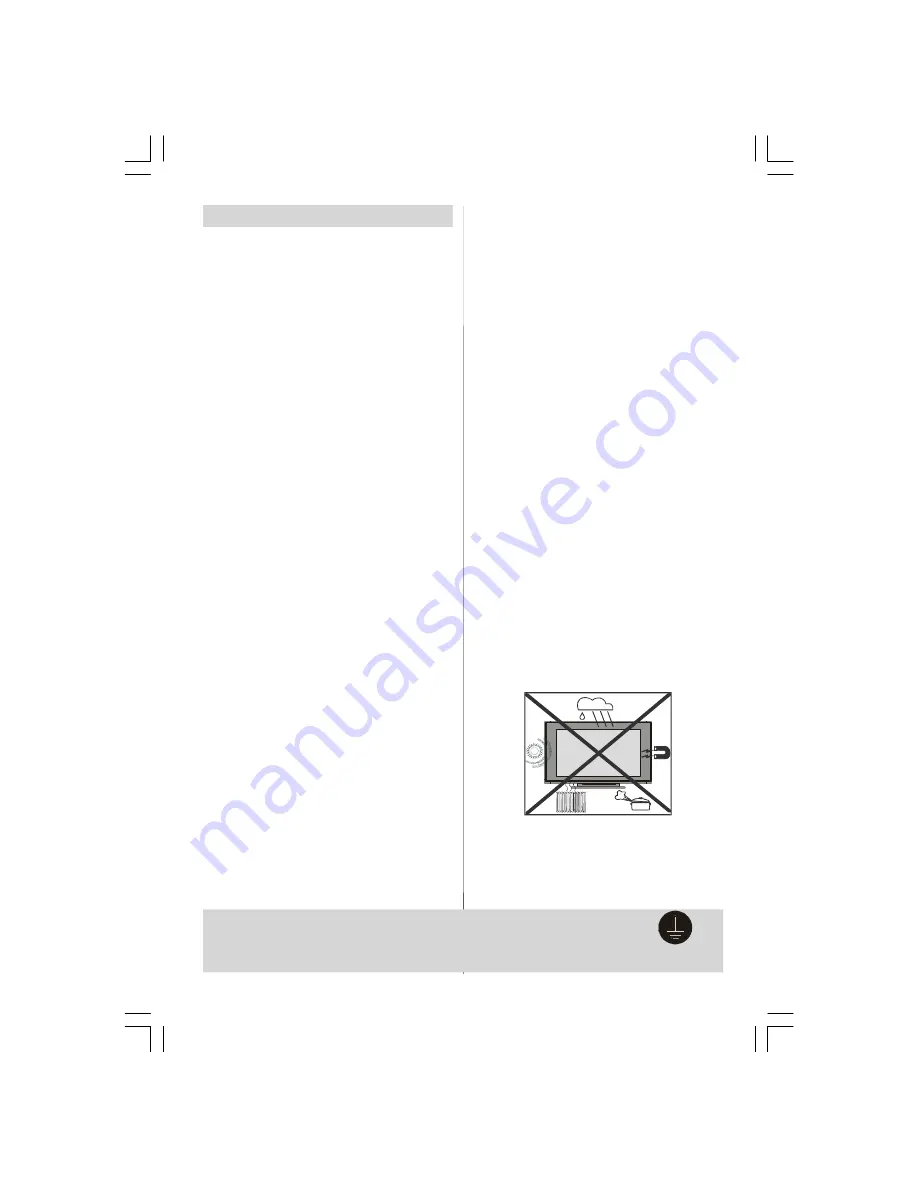
to rain or water, as this may be dangerous and do not
place objects filled with liquids,such as flower vases
on top of the set. Avoid from dripping or splashing.

If any solid object or liquid falls into the cabinet, unplug
the set and have it checked by qualified personnel
before operating it any further

4. Cleaning

Before cleaning, unplug the set from the wall outlet. Do
not use liquid or aerosol cleaners. Use soft and dry cloth.

5. Ventilation

The slots and openings on the back cover are in-
tended for ventilation and to ensure reliable opera-
tion. To prevent overheating, these openings must
not be blocked or covered in anyway.

6.Heat and Flames

The set should not be placed near to naked flames
and sources of intense heat, such as an electric
heater. Ensure that no naked flame sources, such
as lighted candles, are placed on top of the set

7. Lightning

In case of storm and lightning or when going on holi-
day, disconnect the power cord from the wall outlet.

8. Replacement Part

When replacement parts are required, be sure the ser-
vice technician has used replacement parts which are
specified by the manufacturer or have the same speci-
fications as the original one. Unauthorised substitutions
may result in fire, electrical shock, or other hazards.

9 . Servicing

Please refer all servicing to qualified technician. Do
not remove the cover yourself as this may result in
an electric shock.

WARNING:

When the device is not in use for a

long time, disconnect from power.

Instructions for waste disposal:

• Packaging and packaging aids are recyclable and

should principally be recycled. Packaging materials,
such as foil bag, must be kept away from children.

• Battery, including those which is heavy metal-free,

should not be disposed of with household waste.
Please dispose of used battery in an environmen-
tally sound manner. Find out about the legal regu-
lations which apply in your area.

• Cold cathode fluoresant lamp in LCD PANEL con-

tains a small amount of mercury, please follow local
ordinates or regulations for disposal.

• The mains plug is used to disconnect the TV

from the mains and therefore it shall remain
readily operable.

Warning:

To prevent injury, this device must be

securely attached to the floor/wall in ac-
cordance with the installation instrutions.

“DO NOT LEAVEYOUR TVATSTAND-BYOR OPER-
ATINGWHENYOULEAVEYOURHOUSE”

"The LCD panel is very high technology product
with about a million thin film transistors, giving you
fine picture details. Occasionally, a few non-active
pixels may appear on the screen as a fixed point of
blue, green or red. Please note that this does not
affect the performance of your product."

Be sure to ground the connection properly.

Connect the ground terminal of TV with the ground terminal provided at the power
outlet using the enclosed power cord. If the provided plug does not fit your outlet,
consult an electrician for replacement of the obsolete outlet.

Surely connect

the ground wire.

01-ENG-37737W-42737W-1072 UK-37-42 INCH 17MB15 OEM-(HD READY)(WO VGA-WO PIP)(S)-50101853.p65

02.04.2007, 11:17

2

Содержание MAT37LW507E

Страница 1: ...EΓ XPΩMH THΔ EOPAΣ H FARVE TV MED FJERNETJENING OPERATING INSTRUCTIONS Oδ η γ ί ε ς Xρ ή σ ως BRUKSANVISNING FÖR BETJENINGSVEJLEDNING MAT37LW507E MAT42LW507E 01 ENG 37737W 42737W 1072 UK 37 42 INCH 17MB15 OEM HD READY WO VGA WO PIP S 50101853 p65 02 04 2007 11 17 1 ...

Страница 2: ... storm and lightning or when going on holi day disconnect the power cord from the wall outlet 8 Replacement Part When replacement parts are required be sure the ser vice technician has used replacement parts which are specified by the manufacturer or have the same speci fications as theoriginal one Unauthorised substitutions may result in fire electrical shock or other hazards 9 Servicing Please r...

Страница 3: ...tions 2 TV Accessory 3 Preparation 4 Before Switching On Your TV 4 LCD TV 5 Remote Control Buttons 5 Peripheral Equipment Connections 6 Switching The TV ON OFF 7 Initial Settings 7 Operating The TV 8 Menu System 8 Other Features 13 Teletext 14 Connect Peripheral Equipment 16 Tips 17 Specifications 18 Aerial Connection 19 01 ENG 37737W 42737W 1072 UK 37 42 INCH 17MB15 OEM HD READY WO VGA WO PIP S 5...

Страница 4: ...Input 3D Comb Filter Audio Line Out Before Switching On Your TV Power Connection IMPORTANT The TV set is designed to operate on 220 240V AC 50 Hz After unpacking allow the TV set to reach room tem perature before you connect the set to the mains Connections To The Aerial Input Socket VHF UHF 75 REAR OF THE TV CABLE TV NOTE Connect the aerial or cableTV plug to theAerial input socket located at the...

Страница 5: ...ATURE INSTALL PC ABC DEF GHI STU VWX YZ EXIT PQR JKL MNO TV A V DTV P P LCD TV TV AV MENU P CH TV AV ME NU P C H Stand By TV AV Menu Program Volume S L R L R SUB OUT Headphone Cursor Right OK SELECT Okay FreezePicture Cursor Down M Main Menu Cursor Left I II Mono Stereo Dual A B INFO Info P Programme Down Mute V Volume Down P P Previous Programme WIDE Wide Expand No Function Mix Teletext Time Subp...

Страница 6: ...EXT 2 SCART 1 EXT 1 HDMI Input EXT 5 Component Audio Inputs s Component Video YPbPr Inputs Subwoofer Out EXT 4 EXT 3 Peripheral Equipment Connections T V AV ME NU P CH S L R L R SUB OUT S L R L R S UB O U T O J 220V 240V AC 50 Hz POWER 01 ENG 37737W 42737W 1072 UK 37 42 INCH 17MB15 OEM HD READY WO VGA WO PIP S 50101853 p65 02 04 2007 11 17 6 ...

Страница 7: ...wer down the TV completely press On Off switch or unplug the power cord from the mains socket Initial Settings Initial APS Automatic Programming System The following menu will be displayed on the screen when you turn your TV on for the first time APS searches and sorts all channels and stores them automatically on your TV according to the trans mission of programme systems in your area AUTO PROGRA...

Страница 8: ... control panel at the top of the TV Volume Setting Press the VOLUME button to decrease volume or the VOLUME button to increase volume so a volume level scale slider will be displayed at the bottom of the screen Programme Selecting Press the P CH button to select the next programme or the P CH button to select the pre vious programme Entering The Menu Press the M button on the control panel at the ...

Страница 9: ... pressing or button select Noise Re duction Press or button to set Noise re duction level to Off Low Medium or High Film Mode Films are recorded at a different number of frames per second to normal television programmes By pressing or button select Film Mode Press or button to set this feature On or Off Turn this feature on when you are watching films to see the fast motion scenes clearly 3D Comb ...

Страница 10: ...n to change the mode You can select Mono Stereo Dual A or Dual B mode onlyif theselectedchannel supports that mode In case of bilingual broadcast Dual Sound you can select original or dubbed language using mode option AVL Automatic Volume Limiting AVL function adjusts the sound to obtain fixed output level between pro grams having different sound levels Pressing or button will turn this feature on...

Страница 11: ...xt 2 Out By pressing or button select Ext 2 Out You can set Ext 2 Out to TV EXT 1 EXT 3 EXT 4 or EXT 5 by pressing or button Note Only audio output is available for EXT 3 and EXT 5 The other options have both audio and video outputs Default Zoom By pressing or button select Default Zoom You can set Default Zoom to Panoramic 4 3 or 14 9 Zoom by pressing or button If there is no WSS or aspect ratio ...

Страница 12: ...will be displayed on the screen Program menu By pressing or button select the fifth icon Program menu appears on the screen 01 ITV 02 ZDF 03 CH5 04 C 02 05 C 05 06 C 06 07 C 08 08 C 21 09 C 23 10 C 35 11 C 43 12 C 64 13 C 68 14 S 40 15 16 17 18 19 20 Name Insert Delete APS PROGRAM By moving the cursor in four directions you can reach 20 programmes in the same page You can scroll the pages up or do...

Страница 13: ...n and the second one is increasing decreasing the volume level Freeze Picture You can freeze the picture on the screen by press ing the OK button ZoomModes Zoom mode can be changed by pressing the WIDE button You can change the screen size according to the picture aspect ratio Select the optimum one from the following ZOOM modes Auto When a WSS Wide Screen Signalling signal which shows the aspect ...

Страница 14: ...SOUND PICTURE FEATURE INSTALL PC To Select A Page Of Teletext Press the appropriate digit buttons for the re quired Teletext page number The selected page number is displayed in the top left corner of the screen The Teletext page counter searches until the selected page number is located the desired page is then displayed on the screen Press the or P button to move the Tele text screen forward one...

Страница 15: ...ext will be displayed on the screen If the programme being watched does not have Teletext transmission no information will be dis played Fastext Your TV supports the 1000 page Teletext system When the page number of any of the 1000 pages in memory is entered the system will not search for the requested page instead it will display the page automatically If the requested page is not in memory the s...

Страница 16: ...g decoder unit to allow the programmes to be unscrambled For further information ask your dealer See also the booklet supplied with your decoder Connect a decoder with an aerial socket to the TV Connect the aerial cable Connect a decoder without an aerial socket to the TV Connect the decoder to the TV with a SCART cable to SCART 1 TV And Video Recorder Connect the aerial cables Better picture qual...

Страница 17: ...ot use abrasive solvents as they may damage the TV screen coating layer Poor Picture Have you selected the correct TV system Is your TV set or house aerial located too close to non earthed audio equipment or neon lights etc Mountains or high buildings can cause double pic tures or ghost images Sometimes you can improve the picture quality by changing the direction of the aerial Is the picture or T...

Страница 18: ...n headphone connection either connect the aerial straight to your TV Aerial RF Socket wall socket Aerial RF Lead or connect the aerial through a VCR Aerial RF Socket wall socket Aerial RF Lead Aerial RF Socket VCR Optimal Scart Lead TV to VCR RF connector RF connector lead VCR to TV DC IN IN OU T A VIN OUT OUT Headphone It is recommended that a scart lead should be fitted between your TV and VCR t...

Страница 19: ...IMENSIONS mm Weight kg With foot Without foot 250 128 1062 1062 646 607 21 2 19 4 PANEL 16 9 display 42 Screen Size POWER CONSUMPTION W 210 W 1 3 W Stand by D L H DIMENSIONS mm Weight kg With foot Without foot 285 124 1185 1185 744 693 29 2 26 4 HDMI DisplayModes List Horizontal pixels x Vertical Scan Line Front Rate Aspect Ratio 1920x1080i 60Hz 16 9 1920x1080i 50Hz 16 9 1280x720p 60Hz 16 9 1280x7...

Отзывы: