Quick Start Guide
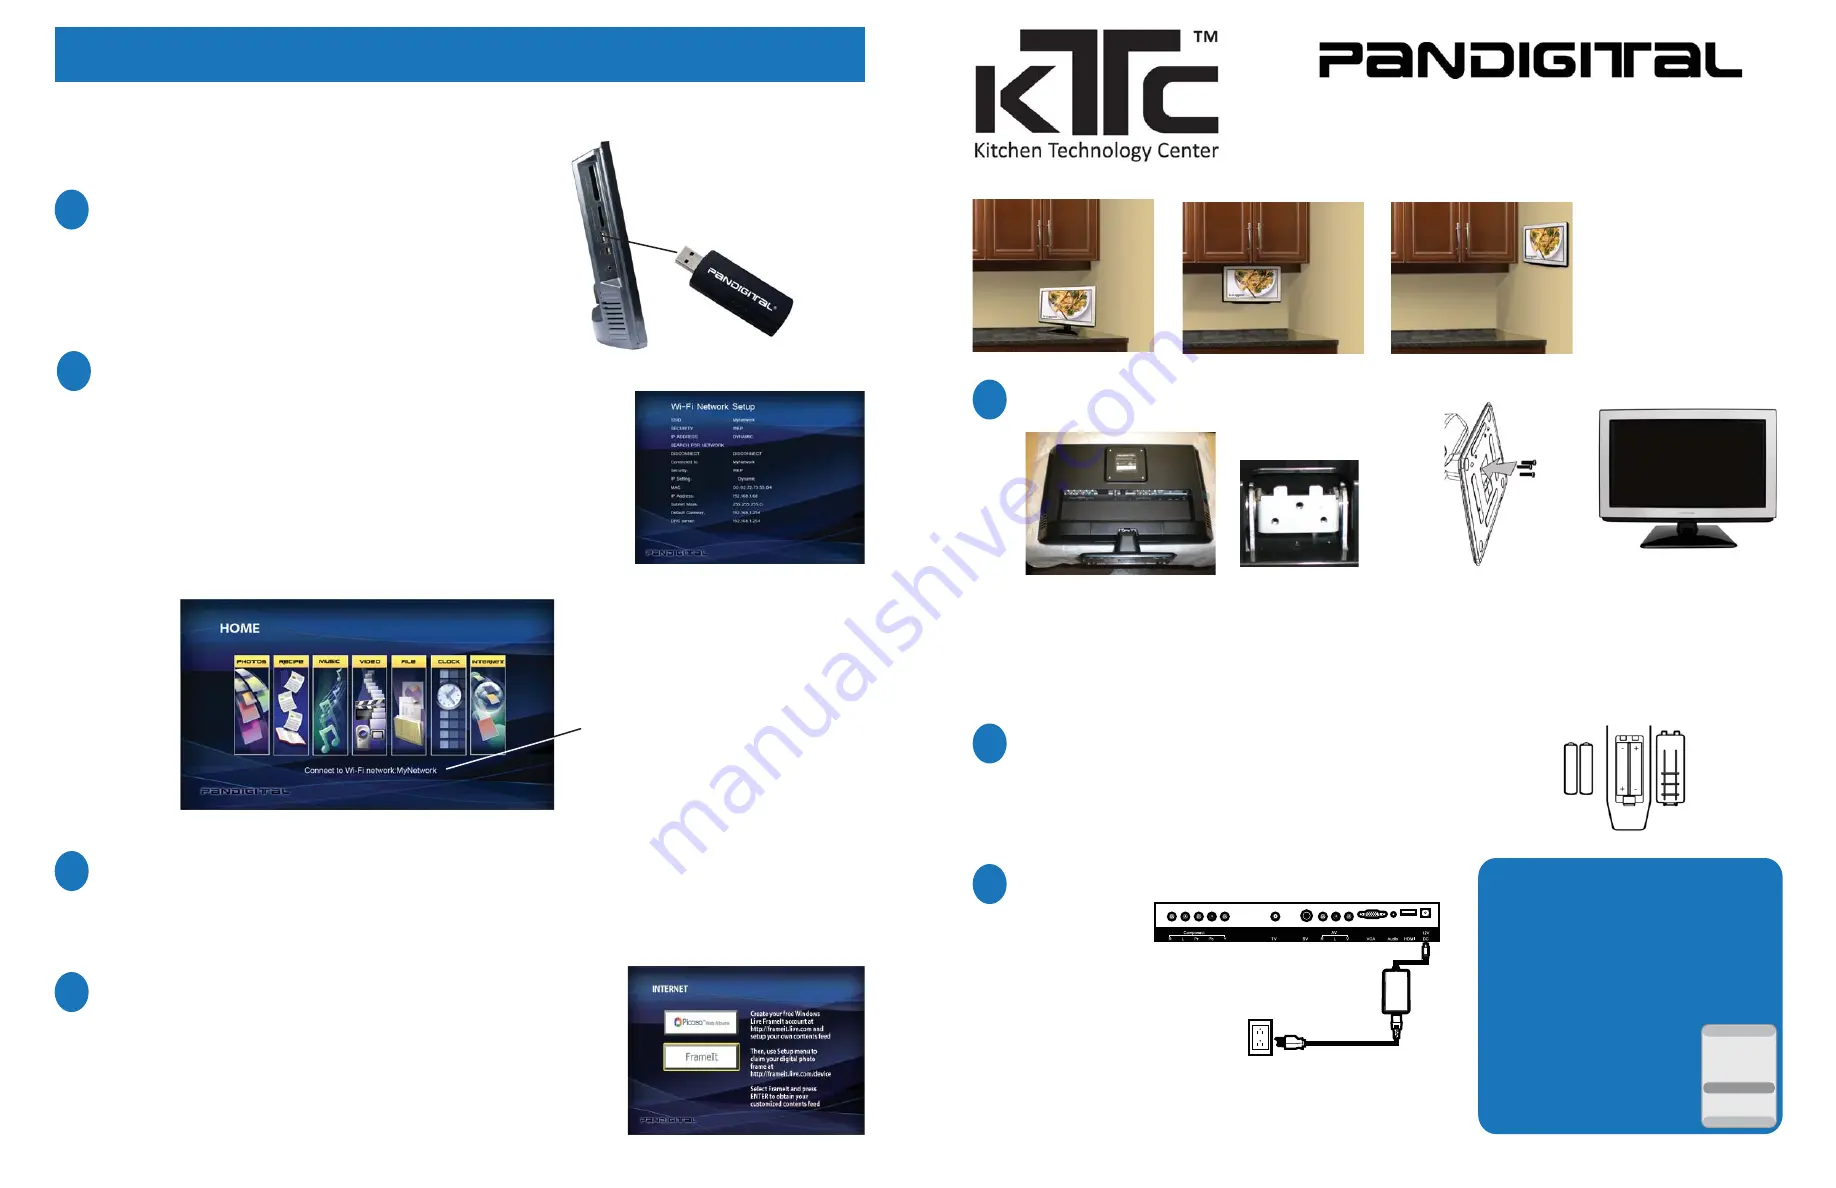
1. Place the KTC monitor face
down on a so
ft
cloth with
the bo
tt
om edge of the
monitor facing you along
the edge of the
fl
at surface.
Tilt stand slightly to insert
A
tt
ach the
Countertop
Stand
®
the two tabs on the
stand assembly into
the slots on stand,
and then lower stand
so it lays
fl
at against
the stand assembly.
2. Use a Phillips head
screwdriver to insert
three small screws
from bo
tt
om
and hand
ti
ghten.
3. Turn the KTC upright
and remove the
protec
ti
ve plas
ti
c sheet
from the front of the
monitor.
To mount on Wall or
Under Cabinet
Use the wall mount kit and
‘
Flat Panel TV Moun
ti
ng’s
Installa
ti
on and Assembly
’
instruc
ti
ons
(separate doc)
.
Plug in and Power On KTC
1. Plug the power adapter into a wall outlet and then
into the power connector on the back of the KTC.
Wireless Wi-Fi Setup
for Internet Access
1
Remove the back ba
tt
ery cover and insert two AAA ba
tt
eries (included) into the remote
control, matching the (+) and (-) symbols.
Install Ba
tt
eries in Remote Control
2
3
4
Since you have not yet connected to the
TV source, you may see these messages
the
fi
rst
ti
me you power ON the KTC.
To clear, press the
SOURCE
bu
tt
on on the remote control,
Use
CH+
or
CH-
to highlight
DPF
, and then press
ENTER
.
2. Press the
POWER
bu
tt
on on the remote control or the power bu
tt
on
on the KTC located in the middle of the speaker bar on the bo
tt
om of
the KTC screen.
IMPORTANT:
‘Proceed with Auto Scan’ or
‘No Signal’ Messages
1
Insert the wireless Wi-Fi USB Adapter into the USB host port
on the le
ft
side of the KTC.
Connect the Wireless Wi-Fi USB Adapter
INPUT SOURCE
TV
AV
S-Video
Component
DPF
HDMI
PC
2
3
1. With the HOME screen displayed, press
SETUP
.
2. Use the arrows to highlight
Network Setup
, and then press
ENTER
.
3. Use the arrows to highlight
Search for Network
, and then press
ENTER
.
4. Select the desired wireless network, and then press
ENTER
.
5. Enter your wireles network
Password
; use the arrows to navigate the
virtual keyboard and press
ENTER
to select highlighted characters.
6. Select
Done
.
7. When your MAC and IP addresses appear on the screen, setup is
complete. Press
EXIT
un
ti
l you return to the HOME screen.
Set up Wireless Network on KTC
Establish accounts with Google Picasa
TM
and Windows Live FrameIt
Visit
h
tt
p://picasaweb.google.com
to set up an account, create folders, and upload your photos.
Visit
h
tt
p://frameit.live.com
to set up an account, create folders, and assign desired RSS feed content.
Connect to the Internet and Access Picasa and FrameIt
1. With the HOME screen displayed, use the arrows to highlight
INTERNET
, and then press
ENTER
.
2. Refer to the
INTERNET
sec
ti
on in the KTC User Guide for full
setup instruc
ti
ons and usage for both Picasa and FrameIt.
The wireless network to which
you are connected should be
displayed at the bo
tt
om of the
menu op
ti
ons.


