67
9.19 oVerlay / keyPad rePlaCemeNT - CoNTiNUed
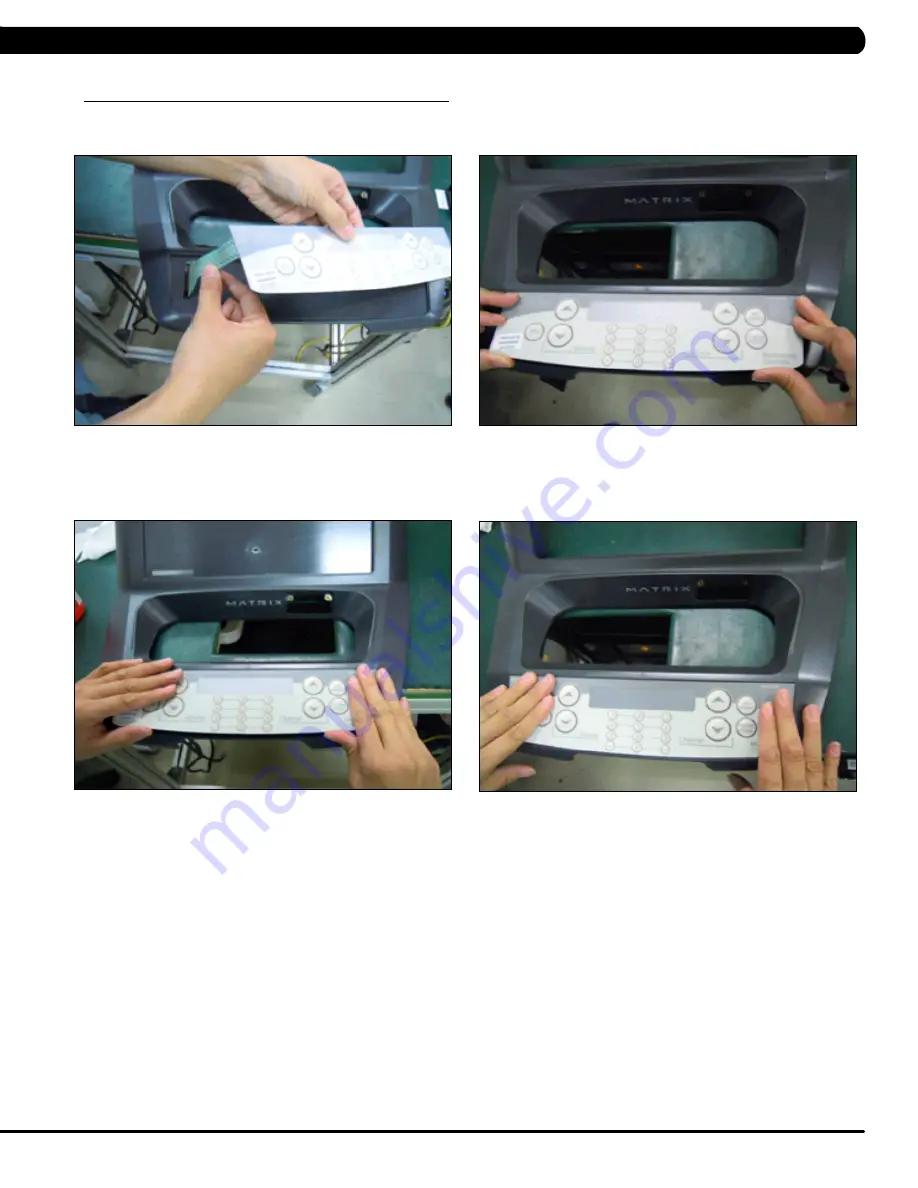
6) Push the overlay / keypad ribbon cable through the hole in the console and plug it in to the open pins on the UCB (Figure E).
7) Match the overlay / keypad to the cutout on the console (Figure F).
8) Press down on the corners of the new overlay / keypad to keep it in place, and then remove the protective film (Figure G).
9) Once the overlay / keypad is in the correct position, press down on the overlay / keypad to adhere it in place (Figure H).
10) Follow the same procedure to replace any additional faulty overlays.
NOTE:
Overlays can not be reused.
fiGUre H
fiGUre f
fiGUre G
fiGUre e
CHaPTer 9: ParT rePlaCemeNT GUide
Содержание T7xe-04
Страница 1: ...T 7 x e 0 4 T r e a d m i l l S ER V I C E MA N U A l...
Страница 4: ...1 1 1 Serial Number Location Chapter 1 Serial number Location...
Страница 30: ...27 8 1 Electrical DiagramS Chapter 8 Troubleshooting...
Страница 32: ...29 8 1 Electrical Diagrams CONTINUED UCB Little Board Wire Chapter 8 Troubleshooting Hand Pulse Wire...
Страница 82: ...79 NOTES...


