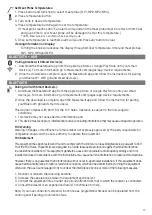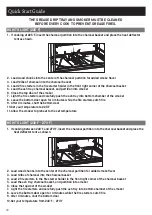
1. If cooking at 275
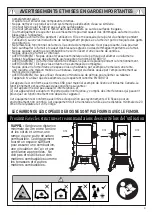
°
F and above, do not use the charcoal partition, place the heat deflector
tent as shown.
2. Load 16lbs of charcoal into the charcoal basket
3. Load 2 fire starters in the smoker. One in the fire starter holder, one in the back corner of the basket
4. Load the ash tray, and charcoal basket into the smoker
5. Close the top door of the smoker
6. Light the fire starters and carefully push the tray into bottom chamber of the smoker
7. Leave the bottom door open for 3 minutes while the fire starters catch fire
8. After 3 minutes, shut the bottom door
9. Set your temperature to 275
°
F or above
10. Allow the smoker to preheat to the set temp
THINGS TO KNOW:
1. The smoker has a temperature range from 225
°
F to 400
°
F
2. The smoker cannot get cooler during a cook. If you set the temperature to 300
°
F and allow it to preheat,
you cannot lower the temperature to 225
°
F during the cook.
3. If you have the charcoal partition inserted into the charcoal basket, the unit will not reach a temperature
above 275
°
F.
4. For faster preheat time, allow the unit to preheat without the heat deflector tent installed. Once the
smoker reaches the set temperature, insert the heat deflector tent in the proper location
.
CLEANING AND STORAGE
ALWAYS MAKE SURE SMOKER IS COOL TO THE TOUCH BEFORE CLEANING AND STORING.
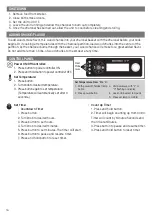
• Once the unit is completely cooled, remove the ash tray from the smoker. Remove all the ash and
charcoal from the ash tray
• Wipe out the inside of the smoker
• Vacuum out any ash buildup in the burn chamber
• Wipe down and clean your cooking racks and water bowl (both dishwasher safe)
• Remove your power cord – do not store this in the weather
• Cover your smoker
• Store in cool dry place
HOW TO LIGHT (275
°
F AND ABOVE)
19
Содержание MB20060321
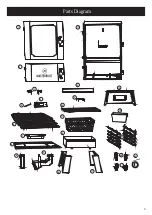
Страница 5: ...Parts Diagram 1 2 3 4 5 6 7 8 9 10 11 12 13 14 15 16 17 18 19 20 21 23 3 3 15 22 5...
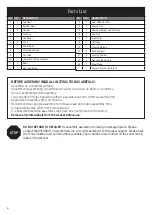
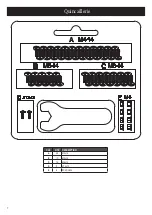
Страница 7: ...Hardware KEY QTY DESCRIPTION A 24 M4X14 B 10 M5X14 C 14 M6X14 D 2 ST3X12 E 8 M4 NUT 7...
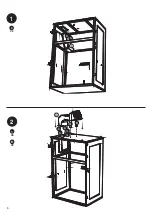
Страница 8: ...1 A X2 9 A A 2 A X6 10 A A A A B B A A B X2 8...
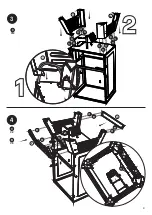
Страница 9: ...4 19 12 C X2 B X8 B B B B C B B B B C C B B B B 18 17 3 C X12 C C C C C C C C C C C C 17 9...
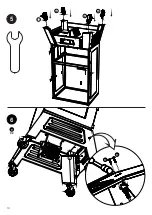
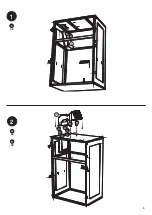
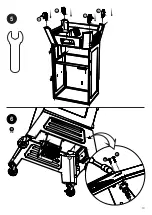
Страница 10: ...5 21 22 21 22 6 D X2 4 D D 10...
Страница 11: ...7 8 13 14 11...
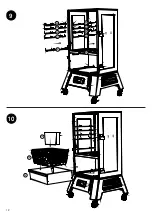
Страница 12: ...9 20 20 20 20 20 20 20 20 20 20 10 15 16 15 12...
Страница 13: ...11 7 8 12 6 6 6 6 13...
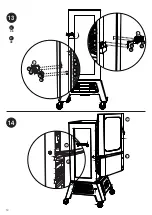
Страница 14: ...13 14 A X8 E X8 1 2 3 A E E E E A A A A A A A E E E E 1 2 3 14...
Страница 26: ...Sch ma des pi ces 1 2 3 4 5 6 7 8 9 10 11 12 13 14 15 16 17 18 19 20 21 23 3 3 15 22 5...
Страница 28: ...Quincaillerie CL QT DESCRIPTION A 24 M4 14 B 10 M5 14 C 14 M6 14 D 2 ST3 12 E 8 CROU M4 7...
Страница 29: ...1 A X2 9 A A 2 A X6 10 A A A A B B A A B X2 8...
Страница 30: ...4 19 12 C X2 B X8 B B B B C B B B B C C B B B B 18 17 3 C X12 C C C C C C C C C C C C 17 9...
Страница 31: ...5 21 22 21 22 6 D X2 4 D D 10...
Страница 32: ...7 8 13 14 11...
Страница 33: ...9 20 20 20 20 20 20 20 20 20 20 10 15 16 15 12...
Страница 34: ...11 7 8 12 6 6 6 6 13...
Страница 35: ...13 14 A X8 E X8 1 2 3 A E E E E A A A A A A A E E E E 1 2 3 14...
Страница 47: ...Diagrama de partes 1 2 3 4 5 6 7 8 9 10 11 12 13 14 15 16 17 18 19 20 21 23 3 3 15 22 5...
Страница 49: ...Accesorios CLAVE CANT DESCRIPCI N A 24 M4X14 B 10 M5X14 C 14 M6X14 D 2 ST3X12 E 8 TUERCA M4 7...
Страница 50: ...1 A X2 9 A A 2 A X6 10 A A A A B B A A B X2 8...
Страница 51: ...4 19 12 C X2 B X8 B B B B C B B B B C C B B B B 18 17 3 C X12 C C C C C C C C C C C C 17 9...
Страница 52: ...5 21 22 21 22 6 D X2 4 D D 10...
Страница 53: ...7 8 13 14 11...
Страница 54: ...9 20 20 20 20 20 20 20 20 20 20 10 15 16 15 12...
Страница 55: ...11 7 8 12 6 6 6 6 13...
Страница 56: ...13 14 A X8 E X8 1 2 3 A E E E E A A A A A A A E E E E 1 2 3 14...
Страница 63: ......

