Installation & Operation Manual | MI-WAVE3D
©
MASTERIMAGE 3D, Inc.
52
4. Highlight the
Input/Output
option and
Send Message
, and then click the
Add
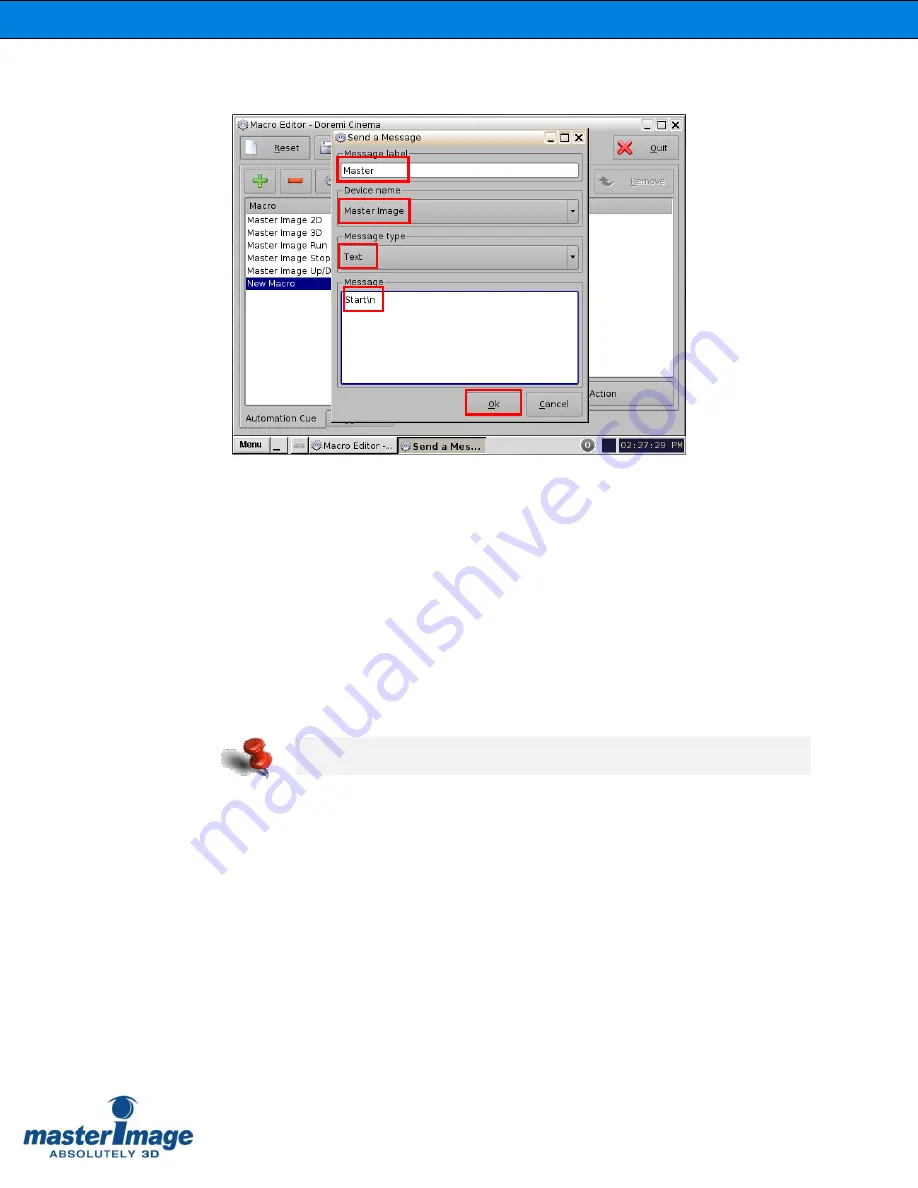
button. The following configuration window will appear:
5. In this window, choose the device
MasterImage
from the
Device
name
dropdown list and type in the Message label of
MasterImage Start
. Ensure the
Message type is Text and type
Start\n
in the Message box. After all fields have
been completed click the
OK
button.
6. Repeat this step for the remaining four macros entering the corresponding
message text:
MasterImage Stop
Stop\n
MasterImage 2D
PFD DOWN\n
(or
2D\n
)
MasterImage 3D
PFD UP\n
(or
3D\n
)
MasterImage Up/Down Stop
PFD Stop\n
(or
LCM Stop\n
)
7. Once all message text has been added, click the
Save
button from the main
Macro Editor screen.
8. Now when you return to the CineLister screen and click the
Refresh
button, the
macros will all display in the
Automation Cues
section (shown below) and can
be added to future playlists as required.
At the end of each command, add the text “\n” to complete the command
Содержание MI-WAVE3D
Страница 54: ...Installation Operation Manual MI WAVE3D MASTERIMAGE 3D Inc 54...
Страница 66: ...Installation Operation Manual MI WAVE3D MASTERIMAGE 3D Inc 66 Actuator...
Страница 67: ...Installation Operation Manual MI WAVE3D MASTERIMAGE 3D Inc 67 Mounting Frame Assembly for Short Projector Lens...
Страница 68: ...Installation Operation Manual MI WAVE3D MASTERIMAGE 3D Inc 68 Mounting Frame Assembly for Long Projector Lens...


