Assembly and adjustments
(continued)
WARNING:
to reduce the risk of injury:
•
When carrying the saw, hold it close to your body to avoid injury to your back. Bend your knees
when lifting the saw.
•
Carry the saw by the base. Do not carry the saw by the power cord.
•
Secure the saw in a position where people cannot stand, sit, or walk behind it. Debris thrown
from the saw could injure people standing, sitting, or walking behind it.
•
Secure the saw on a firm, level surface where the saw cannot rock and there is adequate room for
handling and properly supporting the workpiece.
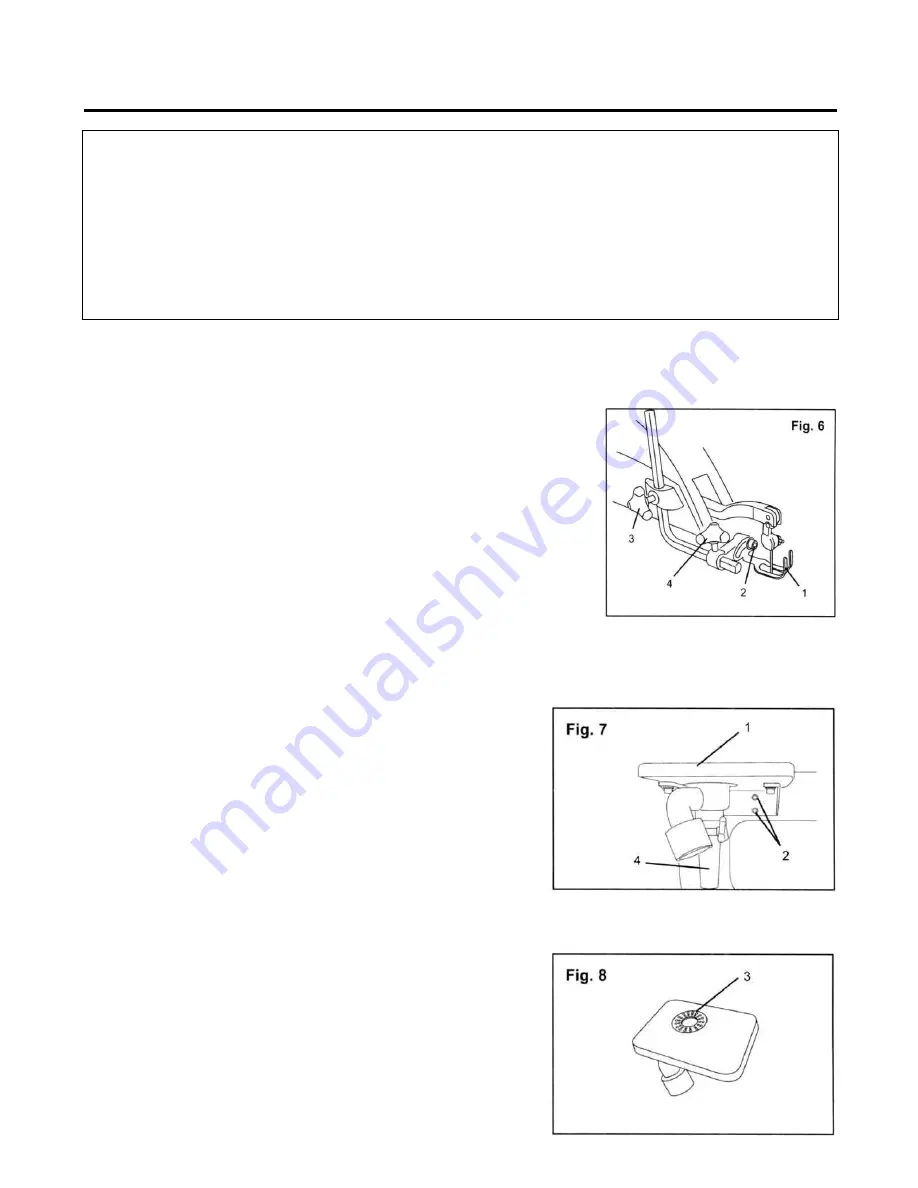
Blade guard foot adjustment
(Fig. 6)
When cutting at angles, the blade guard foot should be adjusted so it is parallel to the table and rests flat
above the workpiece.
1.
To adjust, loosen the screw (2), tilt the foot (1) so it is parallel to the
table, and tighten the screw.
2.
Loosen the height adjustment knob to raise or lower the foot until it
just rests on top of the workpiece. Tighten the knob.
3.
Loosen the horizontal adjustment knob (4) and move the foot
forward or backward as needed.
Attach the rotary tool table
(Fig. 7 and 8)
1.
Secure the rotary tool table (1) to the side of the saw using the four hex screws (2) and washers provided
with the table.
2.
Place the rotary table insert (3) in the opening on the rotary
table.
Note: The rotary tool (4) attaches to the clamp located below the
rotary tool table.
240-0041
12
(888)315-3080


