


Exterior Projection 500 User Manual
25
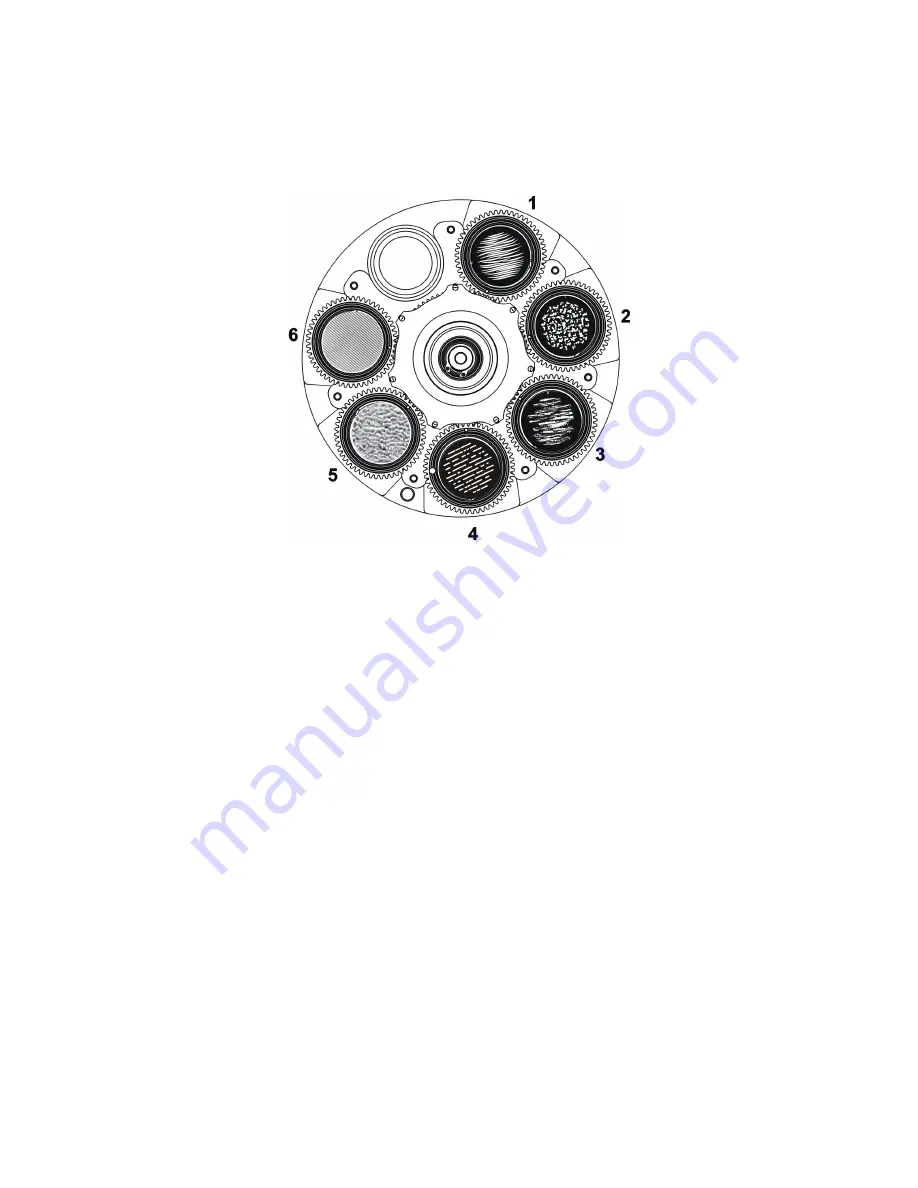
Gobos
The fixture contains a rotating gobo wheel with the six rotating glass gobos shown below, viewed
from the front glass side (front of the fixture):
Rotating gobo wheel
Gobo 1: Grass Lines
Gobo 4: Light Lines
Gobo 2: Organic Delight
Gobo 5: Ripple Structure Glass
Gobo 3: Brush It
Gobo 6: Lined Effect Glass
The gobos can be set to indexed positions and rotated continuously with variable speed and
direction.
To project a gobo, select the gobo and action type (indexed angle or rotation) on channel 5, then
adjust the indexed angle or direction and speed of rotation on channels 6 and 7 until you obtain
the projection you want. Using two channels for adjustment gives 16-bit control.
Gobos are user-replaceable. You can replace them with custom gobos made to your own design
provided that the gobos meet the quality and specifications of the Martin gobos supplied with the
fixture (see ‘Gobos’ on page 54).
Gobo indexing angles
Mechanical tolerances mean that there can be small changes in the indexing angles (rotational
angles) of gobos if you move them and then return them to the initial indexing angle.
From firmware version 1.7.0 (available mid-2018), a ‘Precise gobo indexing’ mode is available on
the fixture settings DMX channel 13. This mode returns gobos more accurately to their original
position after a move. If you require the tightest possible gobo indexing angle repeatability and the
fixture is running firmware version 1.6.0 or earlier, we recommend that you update to firmware
v. 1.7.0 or later and enable ‘Precise gobo indexing’.
In ‘Precise gobo indexing’ mode, the fixture always moves gobos to their programmed angles from
a counterclockwise direction (as seen when looking at the projection). If you enable ‘Precise gobo
indexing’, you should also always move gobos to indexing angles from a counterclockwise
direction while you are programming a show on a DMX controller or programming a stand-alone
Содержание Exterior Projection 500
Страница 1: ...Exterior Projection 500 User Manual...
Страница 57: ......
Страница 58: ......
Страница 59: ......
Страница 60: ...www martin com Olof Palmes All 18 8200 Aarhus N Denmark Tel 45 8740 0000 Fax 45 8740 0010...


