•
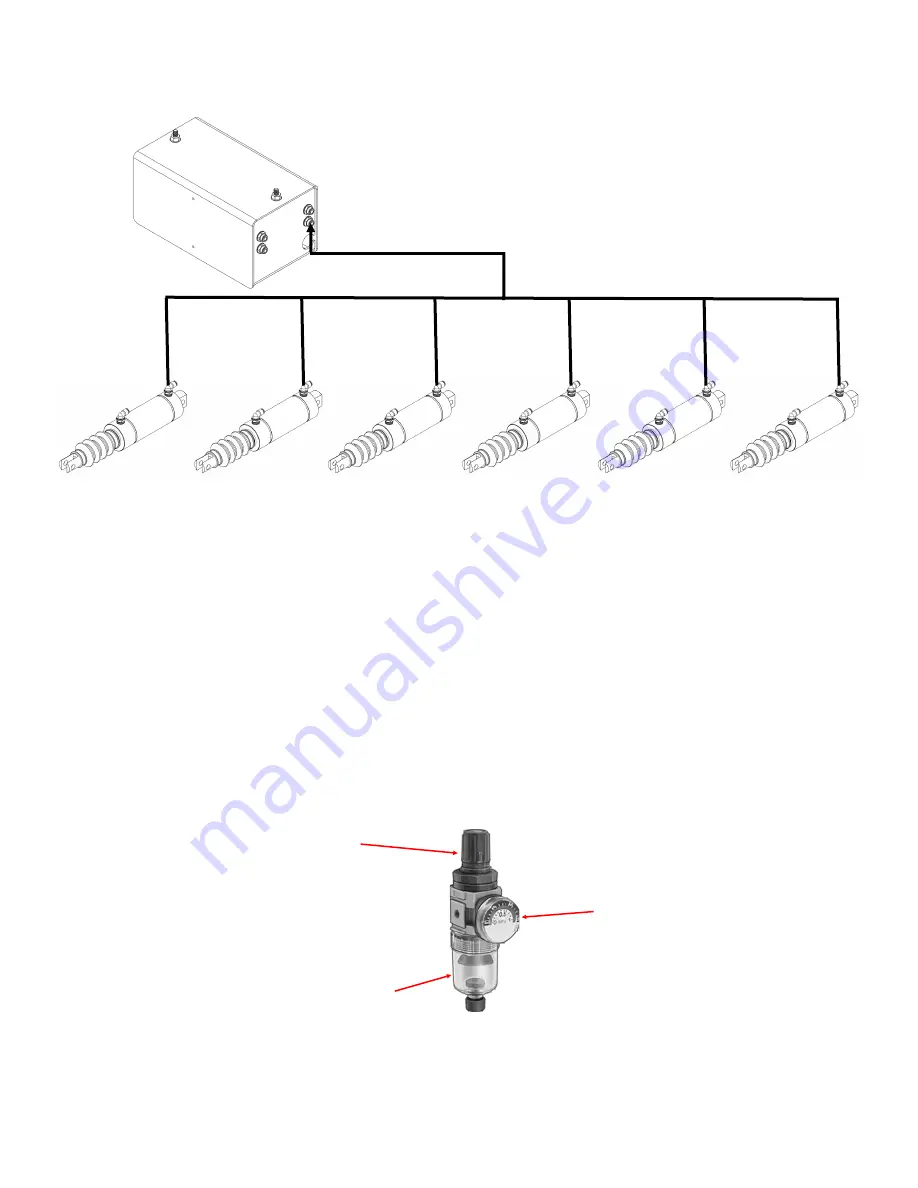
Use different colored tubing for the up and down circuits. Connect
the box
’
s
“
Down
”
air out-
let to either the extend or retract end of the cylinder and use the other color for the opposite
end.
Filtered dirt container
Pressure adjustment knob
Pressure gage
7
•
Connect the air preparation filter/regulator
’
s outlet port to the air inlet of the control box us-
ing the provided black
1/4”
tubing.
•
Turn on the air supply, then lift up the top knob on the filter/regulator and rotate it to adjust
the air pressure shown on the gage to 120 PSI max.
•
If your planter is equipped with airbags and you ordered the double valve plumbing box with
additional airbag valve(SC
-
ASSEMBLY
-
2), connect the box
’
s
“
Airbag
”
outlet to the airbags
circuit using the
1/4”
tubing and tee fittings provided.
•
Use the provided zip ties to secure the tubes.
•
Make sure that the tubes will not be stretched or sharply bent during planter movement or
folding/unfolding. It is highly recommended to follow the possible existing wiring harnesses
or airbag tubing routes.
•
To make tubing easier, you can start by connecting the very first air cylinder to the very last
air cylinder ( for both inlets) , then cut the tube at any conjunction and take branches for
middle air cylinders and plumbing box by adding Tee connections.
•
Connect the air preparation filter/regulator (SC
-
FILTER) to your air supply. You can use your
own air compressor or buy the optional compressor (SC
-
AC
-
12). Look at the air flow arrow
shown on the filter/regulator and connect the air supply to the inlet port of the filter/
regulator.


