background image

12

On Screen Menu

Access and navigate the main menu using the RotoMenu

knob:

Using the RotoMenu knob

Press the

RotoMenu

knob to enter the main menu.

Rotate the knob to scroll up or down in the main menu or each submenu.

Press the

RotoMenu

knob to enter a submenu or choose a setting.

To return to main menu from submenu, select ‘Back’ and press the

RotoMenu

.

The menu timeout can be set in the OSD Timeout section of the OSD Config submenu.

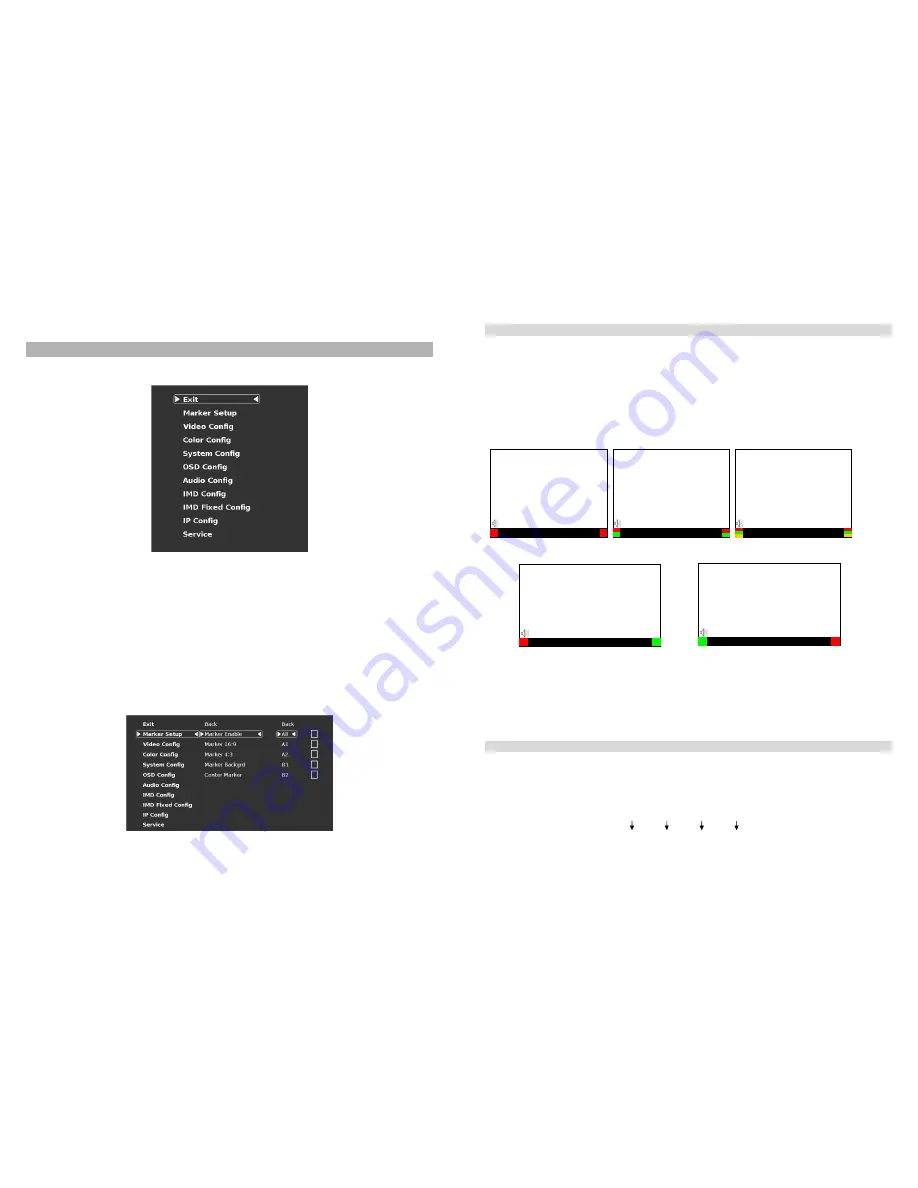
Making Changes to an Individual input channel

The Quad-Viewer RotoMenu allows for Video, Color, System, OSD and IMD Configuration changes to be made to
individual channels in the Quad-Viewer system. Items in the menu that can be changed for each individual channel will
have a A1, A2, B1, B2 indicator on the right side of the menu and a small white box for each individual channel, as shown
below:

Main Menu

21

■ 

OSD Tally

Use this setting to choose how tally is displayed on the screen. The available OSD Tally options depend on the Tally
Source selected in the IMD Configuration submenu.

When the Tally Source is set to Standard (contact closure), OSD Tally can be set to

Off

,

RGY

,

RG

, or

GR

:

Off

On-screen tally is disabled

RGY

Red, yellow, or green tally signals are indicated at both the bottom left and bottom right corners of

the screen. Two or three colors are shown simultaneously by subdividing each tally indicator

RG

Red tally is shown at the bottom left of the screen, and green is shown at the bottom right.

GR

Green tally is shown at the bottom left of the screen, and red is shown at the bottom right.

The following diagrams show RGY, RG, and GR OSD Tally modes:

When the Tally Source is set to TSL/MEI 422, OSD Tally can be set to

Off

or

IMD

:

Off

On-screen tally is disabled

IMD

Red, yellow, and green tally is displayed according to the protocol commands. Green, red, and yellow

colors are shown individually on either the bottom left or right of the screen.

■ 

Anc. Time Code 

Use this setting to enable time code display on the screen. Time code is de-embedded from the vertical ancillary data
(VANC) within the HD/SDI signal. Two types of time code can be selected to display on the screen:

LTC (linear time

code)

or

VITC (vertical interval time code)

.

The position of the time code display varies based on the aspect ratio setting and presence of IMD text

00:00:00:00

Time Code display

Hours

Minutes

Seconds

Frames

IMD Text

00:00:00:00

RG Mode: both colors activated

(red)

(red)

IMD Text

00:00:00:00

GR Mode: both colors activated

(red)

(red)

IMD Text

00:00:00:

IMD Text

00:00:00:

(red)

(red)

IMD Text

00:00:00:

(red)

(green)

(yellow)

(red)

(green)

(yellow)

RGY mode: single color
activated

RGY mode: two colors
activated

RGY mode: three colors
activated

(red)

(gree

n)

(red)

(gree

n)

Содержание QVW-2710

Страница 1: ...se abnormal handling alterations or modifications in design or construction void this warranty It is considered normal for a minimal amount of pixels not to exceed three to fail on the periphery of th...

Страница 2: ...2 Intentionally Left Blank 31...

Страница 3: ...30 Dimensions 3 Intentionally Left Blank...

Страница 4: ...ver if a static image is left on the screen for 48 hours there may be a 10 to 20 minute recovery period for the panel During recovery a very faint image may be retained on the display Put up a white i...

Страница 5: ...ou may wish to refer to this value when setting up your network Service Submenu Software Version Display This submenu will give you access to Software versions for each of the key components of the sy...

Страница 6: ...ay static IMD text on the screen This setting is used to enter IMD text locally when a serial protocol is not used for remote control The IMD Fixed String is saved after power cycle The IMD Fixed Stri...

Страница 7: ...menu 7 Front Controls POWER Control Power going to the front panel A B Input buttons Press the A or B to select which module input to display on the screen Each press of an input button cycles between...

Страница 8: ...ompatibility MEI Use the MEI protocol setting when controlling the QVW 2710 using the Marshall Network Controller box or when connecting to the display s Ethernet port This protocol allows remote cont...

Страница 9: ...face using several industry standard protocols including TSL v4 0 and Image Video Multiple QVW 2710 monitors can be looped together and each addressed individually via the protocol All menu features o...

Страница 10: ...able layout Default Quad Layout Quad Layout 2 23 Audio Config Submenu Use the Audio Configuration submenu to configure Audio channel selection for the headphone jack audio level and on screen audio di...

Страница 11: ...the SDI stream Menu Timeout Select how long the Menu will remain active on the screen Choose between None no Menu timeout to 30 Seconds in 5 second increments Menu Background Select the transparency o...

Страница 12: ...tom right corners of the screen Two or three colors are shown simultaneously by subdividing each tally indicator RG Red tally is shown at the bottom left of the screen and green is shown at the bottom...

Страница 13: ...a specific function in that submenu Marker Enable by highlighting it with the RotoMenu and pressing the knob to confirm your selection Your current position in the menu is indicated by the white highl...

Страница 14: ...the Function 1 Function 4 menu items to define each function button on the front panel of the monitor The following options are available for each button Marker Enable and rotate amongst marker settin...

Страница 15: ...ble Monochrome mode Enable Blue Only mode and adjust the Color knob so that the outermost bars white and blue appear to match in brightness Pixel to Pixel Mode Use this setting to enable Pixel to Pixe...

Страница 16: ...that have been stored on the monitor via CalMan 5 2 0 1355 software or other compatible software 17 Color Configuration Submenu Use the Color Configuration submenu to adjust the Red Green and Blue Of...

Отзывы: