background image

11

INDUSTRIAL PRINTER QUICK START GUIDE

8. 

When the fiber is under tension on the spool, remove the tape from inside the spool and set it aside for 

later use. We recommend taping it to the front face of the spool.  

9. 

At the end of the Load Fiber routine, remove the cut piece of fiber from the print head.

SET UP YOUR PRINT BED

Before printing a part, you will need to level your print bed and apply glue to the region of the bed where the 

parts will print. Leveling the print bed provides the best chance of print success and minimizes warping. 

Applying glue keeps the part attached to the bed during printing and allows for easier part removal.

1. 

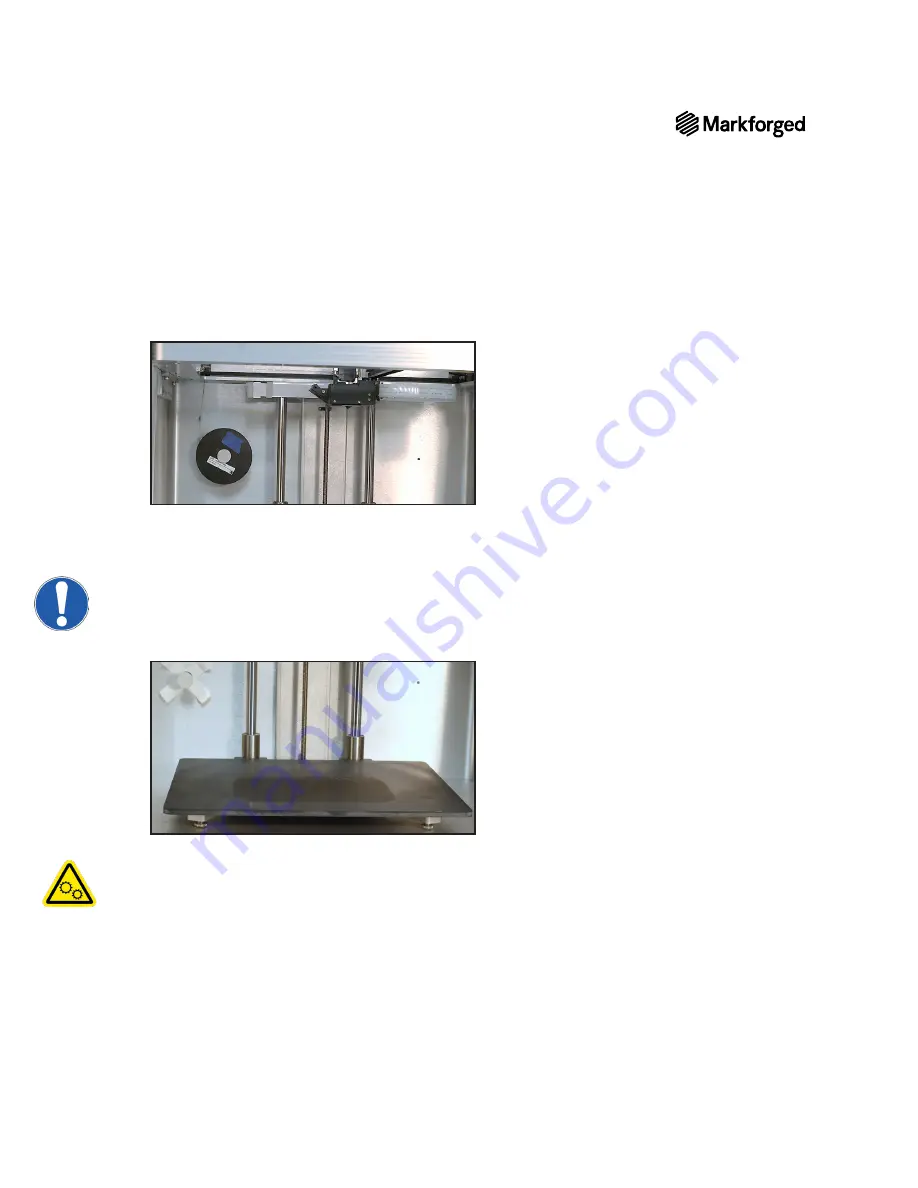
Install the print bed on the printer.  

2. 

Run the Laser Bed Level utility by selecting 

Menu > Bed Level > Laser Bed Level

 on your printer’s 

touchscreen and following the onscreen instructions. 

Note: The print head will move autonomously during this utility. 


When prompted, adjust the thumbscrews (see above image) indicated by the utility until the onscreen 

arrow points to the green region of the 

Laser Reading

 bar.


If the utility displays an error, you may need to adjust the Z-offset. To do so, select the menu icon from 

the dashboard and navigate to 

Bed Level > Adjust Print Bed Z Offset

, then follow the onscreen 

instructions.

Содержание Onyx

Страница 1: ...1 INDUSTRIAL PRINTER QUICK START GUIDE INDUSTRIAL PRINTER QUICK START GUIDE ...

Страница 2: ...ment visit our support website Copyright 2019 Markforged Inc All rights reserved Changesareperiodicallymadetotheinformationherein which will be incorporated in revised editions of this publication Markforged may make changes or improvements to the product s described in this publication at any time and without notice Version 1 2 January 2020 ...

Страница 3: ...3 INDUSTRIAL PRINTER QUICK START GUIDE TABLE OF CONTENTS USER NOTES 4 UNBOXING AND ASSEMBLY 5 QUICK START GUIDE 7 NETWORK REQUIREMENTS 15 ...

Страница 4: ... cleaned with a microfiber cloth and non abrasive window cleaner as other cleaning agents could permanently fog or scratch the surface Please follow instructions below Reducing Burn Risks when cleaning your printer REDUCING BURN RISKS Do not touch the nozzles or print head when hot unless explicitly instructed to do so by Markforged documentation or personnel During a print run leave all doors clo...

Страница 5: ...nstalled 5 fiber PTFE tubes Fiber nozzle torque bit 10mm Plastic nozzle torque bit 7mm Torque wrench Plastic feed tube USB A to USB B cable and cable extender Tweezers Glue stick applied to print bed before each print Anti Seize applied to plastic fiber nozzles when installing Lens cleaning wipes used to clean laser lens 3 plastic nozzles Wi Fi antenna Scraper Scale 1g precision used for metered m...

Страница 6: ... cable into the Ethernet port 8 Manually move the print head to the back left corner of the print chamber Download a tuning app on your mobile device see note Place your phone s microphone close to but not touching the belts underneath the Y rail and pluck the belt opposite the print head like a guitar string Use a 3mm hex key to adjust the belt tensioner until the app reads a frequency of 82 84Hz...

Страница 7: ...line via Wi Fi or Ethernet This guide will walk you through the setup necessary for online printing If you experience network issues or cannot print online at any point a version of this guide for offline printing can be made available Supplies Drybox Plastic feed tube Unopened bag of plastic filament Unopened spool of fiber filament if applicable Tweezers Glue stick Leveling shims in envelope Scr...

Страница 8: ...ndle cap and spindle body apart 2 Remove the blue tinted plastic feed tube from the accessory kit Insert one end of the tube through the opening in the back of the cabinet and into the adapter in the back of the drybox Feed the other end of the tube through the opening in the back of your printer between the stepper motor and printer casing and through the clip attached to the printer casing indic...

Страница 9: ...replacing filament 9 Run the Load Plastic routine by selecting Menu Materials Load Plastic Meter Load on your printer s touchscreen Input the type of plastic that you are loading and select Full Spool Follow the onscreen instructions to load plastic before moving on to the next section A Wait for the plastic nozzle to heat up before feeding filament into the plastic extruder B Once the extruder mo...

Страница 10: ...ube until it reaches the fiber extruder 6 Run the Load Fiber routine by selecting Menu Materials Load Fiber Meter Load on your printer s touchscreen Input the type of fiber that you are loading and select 50cc Full or 150cc Full depending on the spool size Follow the onscreen instructions to load fiber As the fiber is loading follow steps 7 and 8 below to place your fiber spool on the spindle with...

Страница 11: ...izes warping Applying glue keeps the part attached to the bed during printing and allows for easier part removal 1 Install the print bed on the printer 2 Run the Laser Bed Level utility by selecting Menu Bed Level Laser Bed Level on your printer s touchscreen and following the onscreen instructions Note The print head will move autonomously during this utility When prompted adjust the thumbscrews ...

Страница 12: ...oceed to step 2 If you do not yet have an Eiger account and wish to register your printer to an existing Eiger organization request an invitation from the organization s administrator Follow the instructions in the invitation email to create your Eiger account then proceed to step 1 In the unusual event that you need to switch organizations before registering your printer you must first delete you...

Страница 13: ...d Reinforcement Material drop down menus in that same panel Note This part can be printed with any combination of fiber and plastic If you have loaded materials other than the defaults for this part please update the materials field in Eiger If you print this part in nylon consider changing the name of the part in the top left corner of the page to reflect the material change 6 Click Save 7 Click ...

Страница 14: ...m the printer and use the provided scraper to remove the part from the print bed Warning The scraper provided with Markforged printers is sharp and can cause injury if used incorrectly Tip Always scrape away from your body When removing a part brace the bed in a vertical position against a sturdy level surface Slide the scraper under the corner of the part Always keep fingers or other body parts o...

Страница 15: ...ns to services at the following hostnames on the given ports no inbound connections are needed HOSTNAME PORT PROTOCOL REQUIRED REASON s3 amazonaws com mfeiger production s3 amazonaws com 443 TCP yes Downloading MFP part files produced by Eiger and consumed by printers cdn eiger io 443 TCP yes Device operation www eiger io 443 TCP yes Connecting to Eiger required for viewing printer status queuing ...

Страница 16: ...these services have time limited validity and the printer s time must fall within this window Currently NTP Network Time Protocol on UDP port 123 is the only supported mechanism for time synchronization and Markforged printers will attempt to connect to four different servers within the global public NTP server pool determined by querying hostnames ending in pool ntp org Markforged printers also s...

Отзывы: