4
INSTALLATION
READ BEFORE INSTALLING
Clearance:
When installing against combustible surfaces; rear - 4” (
102mm
) and sides - 15” (
381mm
) clearance is
required. When installing ovens against non-combustible surfaces (
rear or side walls
) 0” clearance is
required.
The area around the appliance must be kept free and clear of combustibles such as solvents, cleaning
liquid, broom, rags, etc. Proper clearances must be provided at the front of the appliance for servicing
and proper operation.
Leveling:
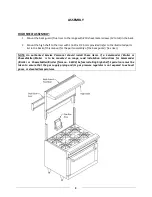
A carpenter’s spirit level should be placed on the oven’s center baking rack and the unit leveled both
front-to-back and side-to-side. If it is not level, cakes, casseroles, and any other liquid or semi-liquid
batter will not bake evenly, burner combustion may be erratic, and the unit will not function efficiently.
If the floor is relatively smooth and level, the unit may be further leveled with adjustment in the foot of
the leg. Units with casters must be leveled with shims. A unit will probably not return to the same
position after being moved, requiring re-leveling after each and every move.
Rating Plate:
The rating plate is located in front of the range below the oven section. Information on this plate
includes the model, and serial number, BTU / hour input of the burners, operating gas pressure in inches
WC, and whether the appliance is orificed for Natural or Propane gas. Pilot lighting instructions are also
located in the same area.
UNIT MUST BE CONNECTED ONLY TO THE TYPE OF GAS IDENTIFIED ON THE RATING PLATE!
Electrical Connection:
Oven requires a 120 volt supply to operate the ignition system and blower. The supply cord provided
along with the appliance is equipped with a three prong (
grounding
) plug for protection against shock
hazard. The electrical service in the building must be equipped with a properly grounded three prong
receptacle, in accordance with local codes, or in the absence of local codes, with the national electrical
code, ANSI/NFPA 70-1987, in Canada, conform with Canadian electrical codes, CSA-C22.1.
Do not cut or remove the grounding prong from this plug
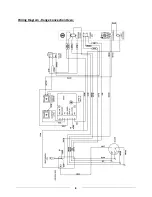
. Wiring diagram is located on the backside of
the appliance.
Disconnect power supply before cleaning or servicing.
NOTE:
This appliance is not capable of being operated in the event of power failure. No attempt should
be made to operate this appliance during power failure.
Gas Connection:
The gas supply (
service
) line must be the same size or greater than the inlet line of appliance. Oven uses
a 3/4” NPT inlet. Sealant on all pipe joints must be resistive to LP gas.
Содержание R-R10
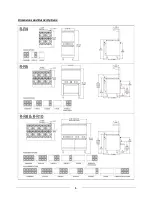
Страница 6: ...5 Dimensions and Burner Options ...
Страница 9: ...8 Wiring Diagram Range Convection Oven ...
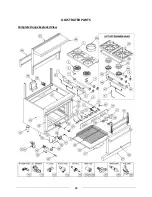
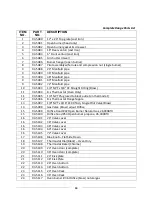
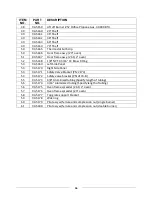
Страница 14: ...13 ILLUSTRATED PARTS Complete Range Exploded View ...
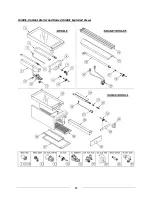
Страница 18: ...17 Griddle Radiant Broiler and Raised Griddle Exploded Views ...
Страница 21: ...20 Convection Oven Exploded View ...


