


3-27
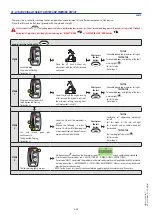
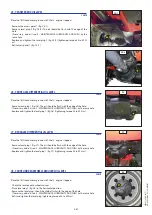
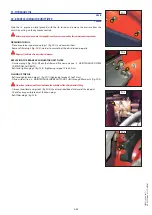
E3 - SEAT BELT
CHECK
SEAT BELT WITH TWO ANCHORING POINTS
- Check the following points:
• Fixing of the anchoring points on the seat.
• Cleanness of the strap and the locking mechanism.
• Triggering of the locking mechanism.
• Condition of the strap (cuts, curled edges).
REELED SEAT BELT WITH TWO ANCHORING POINTS
- Check the points listed above together with the following points:
• The correct winding of the belt.
• Condition of the reel guards.
• Roller locking mechanism when the strap is given a sharp tug.
NOTE: After an accident, replace the seat belt.
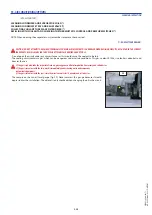
In no event should the lift truck be used if the seat belt is defective (fixing, locking, cuts, tears, etc.). Repair or replace the seat belt immediately.
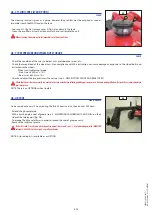
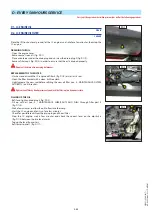
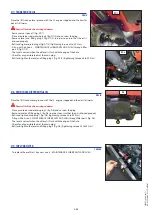
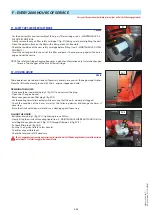
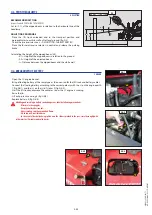
E4 - REAR AXLE DIFFERENTIAL OIL
DRAIN
Place the lift truck on level ground with the I.C. engine stopped and the d oil still warm.
Dispose of the drain oil in an ecological manner.
- Place a container under drain plug 1 (fig. E4) and unscrew them.
- Remove level and filling plug 2 (fig. E4) to ensure that the oil is drained properly.
- Refit and tighten drain plug 1 (fig. E4) (tightening torque 34 to 49 N.m).
- Fill up with oil (see: 3 - MAINTENANCE: LUBRICANTS AND FUEL) through filler port 2 (fig. E4).
- The level is correct when the oil level is flush with the edge of the hole.
- Check for any possible leaks at the drain plug.
- Refit and tighten level and filling plug 2 (fig. E4) (tightening torque 34 to 49 N.m).
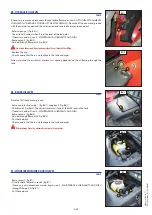
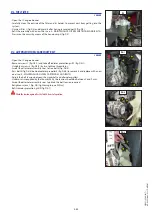
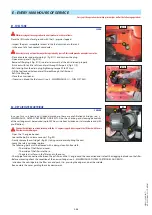
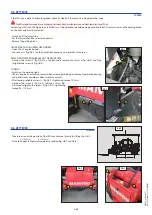
E5 - FRONT AND REAR WHEELS REDUCERS OIL
DRAIN
Place the lift truck on level ground with the I.C. engine stopped and the reducers oil still warm.
Dispose of the drain oil in an ecological manner.
- Drain and change the oil of each wheel reducer.
- Place drain plug 1 (fig. E5) in position A.
- Place a container under the drain plug and unscrew the plug.
- Let the oil drain fully.
- Place the drain port in position B, i.e. in a level port.
- Fill up with oil (see: 3 - MAINTENANCE: LUBRICANTS AND FUEL) through level port 1 (fig. E5).
- The level is correct when the oil level is flush with the edge of the hole.
- Refit and tighten the drain plug (tightening torque 34 to 49 N.m).
E5
B
A
1
E4
1
2
647421
(22/08/2017)
MT-X
625
Série
2-E3
+
COMFORT
Содержание MT-X 625 2-E3 Series
Страница 5: ...1 1 1 OPERATING AND SAFETY INSTRUCTIONS 647421 22 08 2017 MT X 625 S rie 2 E3 COMFORT...
Страница 6: ...1 2 647421 22 08 2017 MT X 625 S rie 2 E3 COMFORT...
Страница 32: ...1 28 647421 22 08 2017 MT X 625 S rie 2 E3 COMFORT...
Страница 33: ...2 1 2 DESCRIPTION 647421 22 08 2017 MT X 625 S rie 2 E3 COMFORT...
Страница 34: ...2 2 647421 22 08 2017 MT X 625 S rie 2 E3 COMFORT...
Страница 45: ...2 13 647421 22 08 2017 MT X 625 S rie 2 E3 COMFORT...
Страница 69: ...2 37 647421 22 08 2017 MT X 625 S rie 2 E3 COMFORT...
Страница 71: ...2 39 647421 22 08 2017 MT X 625 S rie 2 E3 COMFORT...
Страница 77: ...3 1 3 MAINTENANCE 647421 22 08 2017 MT X 625 S rie 2 E3 COMFORT...
Страница 78: ...3 2 647421 22 08 2017 MT X 625 S rie 2 E3 COMFORT...
Страница 83: ...3 7 647421 22 08 2017 MT X 625 S rie 2 E3 COMFORT...
Страница 91: ...3 15 647421 22 08 2017 MT X 625 S rie 2 E3 COMFORT...
Страница 107: ...3 31 647421 22 08 2017 MT X 625 S rie 2 E3 COMFORT...
Страница 112: ...3 36 647421 22 08 2017 MT X 625 S rie 2 E3 COMFORT...
Страница 114: ...3 38 647421 22 08 2017 MT X 625 S rie 2 E3 COMFORT...
Страница 115: ...4 1 4 OPTIONAL ATTACHMENTS FOR USE WITH THE RANGE 647421 22 08 2017 MT X 625 S rie 2 E3 COMFORT...
Страница 116: ...4 2 647421 22 08 2017 MT X 625 S rie 2 E3 COMFORT...
Страница 118: ...4 4 647421 22 08 2017 MT X 625 S rie 2 E3 COMFORT...
Страница 129: ...5 1 5 SPECIFIC AUSTRALIA Seealsotheoperator smanualsupplement 647065AU 647421 22 08 2017 MT X 625 S rie 2 E3 COMFORT...
Страница 130: ...5 2 647421 22 08 2017 MT X 625 S rie 2 E3 COMFORT...
Страница 132: ...5 4 647421 22 08 2017 MT X 625 S rie 2 E3 COMFORT...


