5
6
7
Removing and installing the timing case
113
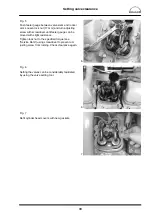
Fig. 5
Remove the timing case.
Fitting the timing case
Fig. 6
Clean residues of seals from the seating surface
on the crankcase.
Stick the new seal on with a little grease.
Guide timing case on to the alignment pins and
bolt it into place.
In doing so, examine the oil pan seal; replace if
necessary.
Fig. 7
Tighten the timing case bolts.
Tightening torque: 75 Nm
Tighten the mounting bolts of the oil pan.
Tightening torque: 30 Nm
Clean gasket residues from the sealing surface of
the timing case cover.
Screw the timing case cover on with a new seal.
Coat seal on both sides with “Loctite 5900” liquid
sealing agent.
Secure the timing case cover with the prescribed
torque and tightening sequence (see “Service
Data”).
Secure the oil and coolant lines.
Fit all removed components.
Содержание D 2840 LE 301
Страница 1: ......
Страница 2: ......
Страница 16: ...Notes 14...
Страница 20: ...Engine views 18 Engine views D 2842 LE 301 9 10 11 12 9 8 6 5 4 3 2 1 13 14 15 16 17 18 6 7 8...
Страница 150: ...Notes 148...
Страница 151: ...149 Service Data...
Страница 179: ...177 Special tools...
Страница 180: ...Special tools 178 2 3 4 5 6 7 8 1 6 1 6 2 6 3 9 1 9 2 9 3 9...
Страница 182: ...Special tools 180 10 11 16 14 14 1 12 13 18 18 1 12 1 12 2 15 5 15 4 15 1 15 1 15 2 15 3 15 3 15 6 15 7 15 17...
Страница 184: ...Special tools 182 21 22 25 25 2 24 25 1 26 27 1 27 2 27 20 1 19 2 19 1 20 2 19 20 28 23...
Страница 186: ...Special tools 184 30 29 32 31 33...
Страница 189: ...Special tools 187 2843 Pressing mandrel for cap dia 50 1 mm Pressing mandrel for cap dia 62 1 mm...
Страница 193: ......
Страница 194: ......


