Mammoth MAFABioS18W Скачать руководство пользователя страница 9

7

(800) 858-5374 | www.mammothome.com

UV-C LAMP REPLACEMENT

To Remove Old UV Lamp:

1.


Turn OFF fixture and unplug the 24V DC Adaptor from the wall power supply outlet.

2.

 Remove the screws holding the fixture onto the air duct. 

3.

 Pull out both UV lamps (we recommend installing both new UV lamps at the same time)

To Install New UV Lamp: 

1.

 Insert the new UV Lamp into the Lamp Socket. 

2.

 With the 4 metal screws, re-screw the fixture onto the air duct. 

3.

 Plug in the power supply and turn device ON.

NOTE

Do not attempt to remove or install UV lamp while the Mammoth UV Air 
Sanitizer is on.  Turn 

OFF AND UNPLUG power before servicing the fixture. 

LED INDICATOR LIGHTS

The LED’s indicate that the UV lights are ON. If the left or right light is NOT on, the LED 
in the front will NOT be on. The indicator light might not be working due to no bulb is 
inserted, the bulb is defective or the ballast inside is defective. To verify if you need to 
replace the ballast or the bulb, switch the bulb first to a new bulb or bulb you know 
works. If it does, no further action is needed. If it does not, the ballast should be replaced. 

Once the issue has been resolved, there is no need to reset the fixture. The fixture will 
automatically detect the problem has been resolved and user can confirm by ensuring 
the LED light is solid ON. 

Содержание MAFABioS18W

Страница 1: ...UV AIR SANITIZER USER GUIDE MAFABioS18W 800 858 5374 www mammothome com Read before use Improper use can cause damages ...

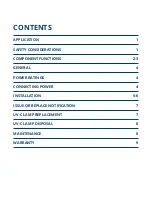
Страница 2: ...TION 1 SAFETY CONSIDERATIONS 1 COMPONENT FUNCTIONS 2 3 GENERAL 4 POWER RATINGS 4 CONNECTING POWER 4 INSTALLATION 5 6 ISSUE OR REPLACE NOTIFICATION 7 UV C LAMP REPLACEMENT 7 UV C LAMP DISPOSAL 8 MAINTENANCE 8 WARRANTY 9 ...

Страница 3: ...instructions and guide at the intended site drill two holes and mount the fixture and plug it to a suitable wall outlet Fixture is meant to operate continuously to avoid growth of mold and bacteria etc under optimum conditions even when A C Heating unit itself is off APPLICATION SAFETY CONSIDERATIONS Improper installation adjustment alteration service maintenance or use can cause fire electrical s...

Страница 4: ...2 Mammoth Home SelectionTM COMPONENT FUNCTION FRONT Parts Description Lamp Socket Fits Mammoth 9W UV Lamps UV Lamp Two 2 9 Watt UV Lamps must use Mammoth Bulbs Lamp Socket UV Lamp ...

Страница 5: ...screws LED Indicators Signals the left right light is on functioning Power Cord 24V low voltage power adaptor LED Indicator Lights Power Cord Mounting Hole 800 858 5374 www mammothome com DISCONNECT FROM POWER SUPPLY BEFORE SERVICING WARNING Left Right TM BIOSHIELDTM Ultraviolet Air Treatment System UV Light ON ...

Страница 6: ...tallation hole can be drilled without affecting any of these or other components the Mammoth UV Air Sanitizer can be installed near any of those components Mammoth Home Selection is not responsible for any damage to HVAC if installation is installed in Advanced Installation areas 2 Check first for power availability of an 110V 240V wall socket POWER RATINGS The Mammoth UV Air Sanitizer is rated at...

Страница 7: ... to locate position to cut hole 2 Use the drill or metal shear to cut the openings for the UV lamps 3 Double check to ensure proper fitment of the unit 4 Install the screws to affix the Air Sanitizer as per Photo E 5 Plug in the power for the fixture and power on the device Airflow Direction Airflow Direction CAUTION Do not drill into refrigerant line or fan etc After cutting hole avoid sharp edge...

Страница 8: ... metal shear to create two openings Use a 2 1 4 drill to create two openings OR STEP 3 Use sheet metal screws provided to secure the UV air sanitize r STEP 2 Cut hole only in ductwork to prevent accidental cutting of wires or refrigerant pipes PREPARATION Place the included label on desired location and prepare for installation ...

Страница 9: ...mmoth UV Air Sanitizer is on Turn OFF AND UNPLUG power before servicing the fixture LED INDICATOR LIGHTS The LED s indicate that the UV lights are ON If the left or right light is NOT on the LED in the front will NOT be on The indicator light might not be working due to no bulb is inserted the bulb is defective or the ballast inside is defective To verify if you need to replace the ballast or the ...

Страница 10: ...es allow customers to drop off used bulbs for recycling If you cannot recycle and if it is acceptable with your local agency you may seal the bulb in a plastic bag and put in trash for collection MAINTENANCE UV lamps should be replaced on an annual basis or when the sanitizer prompts user of issue While there still may be visible blue light the output of UV light will have decreased significantly ...

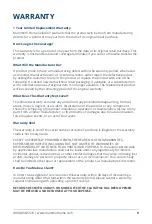
Страница 11: ...cident b alteration of the product or any component thereof c shipping d improper installation operation or maintenance e use of any parts from another manufacturer or f problems or damages due to natural disasters force majeure events or an act of God event Warranty Void The warranty is void if the serial number or date of purchase is illegible or the warranty claim is not timely made EXCEPT AS E...

Страница 12: ...ved No portion of this manual or any artwork contained herein may be reproduced in any shape or form without the express written consent of Mammoth Home SelectionTM For technical questions please call 800 858 5374 Visit our website www mammothome com R R TM ...

Отзывы: