3
MakerBot Replicator
MakerBot
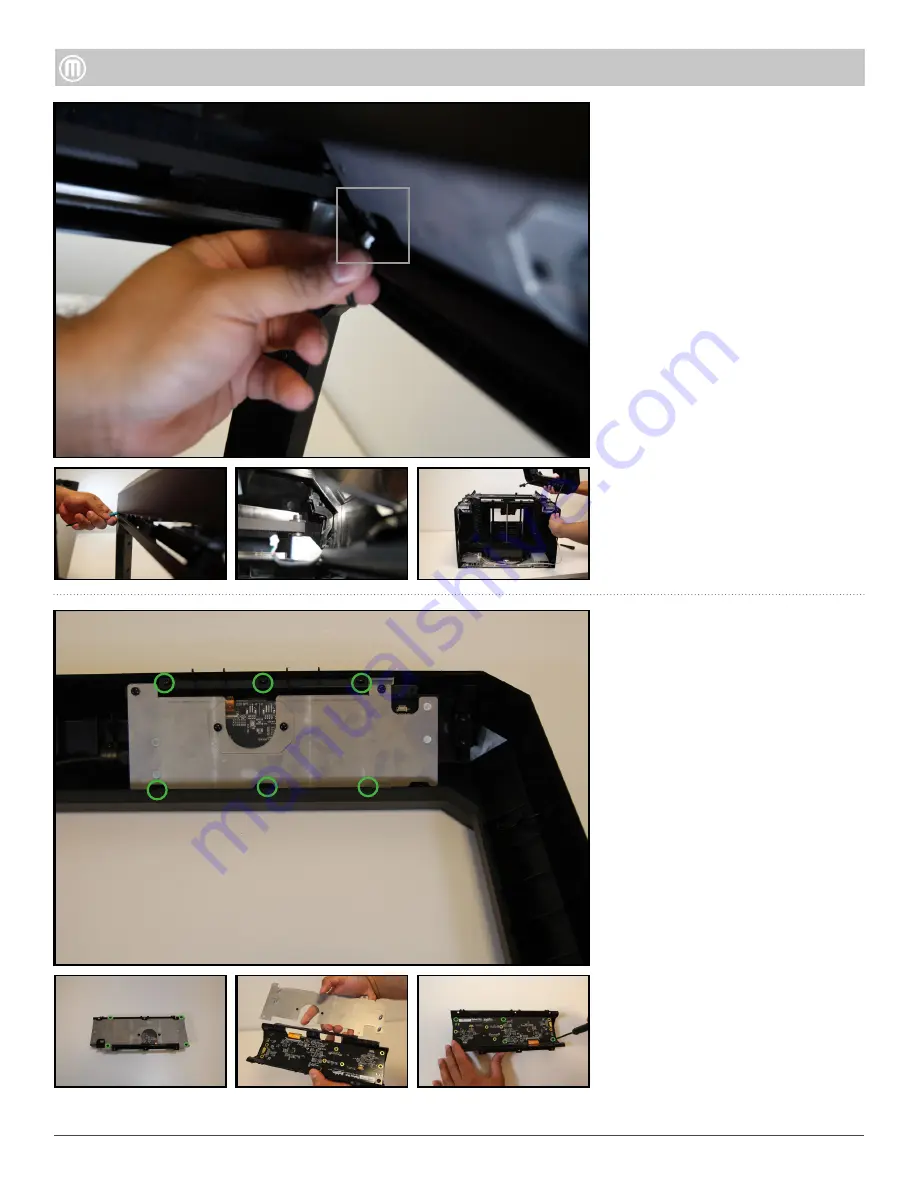
Unplug the HDMI Cable.
Remove the six (6) Torx button
heads attaching the UI to the Top
Cover and push the UI out of the
Top Cover.
Remove the four (4) Torx button
head screws holding the UI
Electrostatic Discharge Cover
(ESD) cover onto the UI Faceplate.
Pull apart the ESD to separate
Remove the four (4) Torx button
head screws that attach the
Hoboken PCB to the UI Faceplate.
Note: The following steps are only
if you need to disassemble the UI
Step 4 - Remove User Interface
Assembly (UI)
Disconnect the Camera Wire
Harness located behind the User
Interface Assembly (UI).
Gently lift the back of the Top
Cover first to expose the Snap
Brackets
Note: DO NOT lift top cover more
than 2 inches or you run risk of
breaking the screw boss, which are
not replaceable).
Using a medium length
screwdriver, from the front side of
the Replicator pry the Top cover
from the Font Panel snap brackets
located at each corner.
Unplug the motor wires and HDMI
cable, then lift and remove the Top
Cover and set aside.
Step 3 - Remove Top Cover
•
•


