background image

makerbot.com/docs/replicator 

5

STeP 3.

Take The STepSTRudeR

®

 Mk8 ouT of The Box

now you can carefully remove the 

Accessory Box. Be careful of the black 

plastic 

stepstruder mk8 mount. 

You should be able to see the build 

platform: it’s an aluminum plate 

covered in Kapton tape and attached 

to the rods by two black arms. This is 

where your print will form.

STeP 4.

RaiSe The Build plaTfoRM

You’ll need to raise the build platform 

to continue unpacking. You can either 

turn the threaded screw just behind 

The Replicator™ logo, or grasp the 

platform firmly on both sides and 

move it up with gentle pressure.

Move the platform up as far as you 

can; it should almost reach the black 

stepstruder mk8 mount.

Underneath the build platform you’ll 

see one or two boxes of 

MakerBot 

Filament. Remove the packing material and the filament.

You have now finished unpacking The Replicator! We’re really proud of it! We recommend that 

you keep the box it was shipped in for future transport and long-term storage.

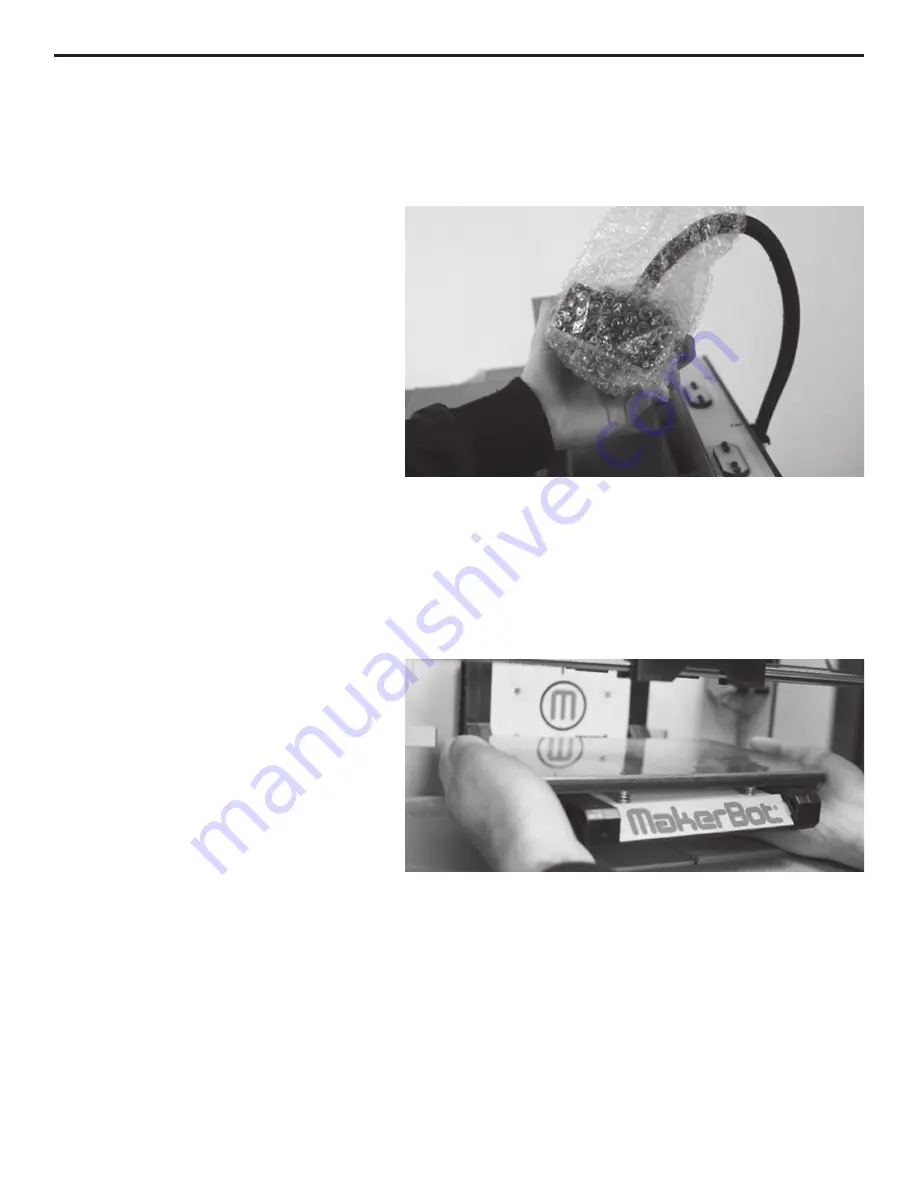
Step 3.

 Take care when handling the Stepstruder MK8.

Step 4.  Grasp the platform firmly on both sides and lift with gentle pressure.

settIng uP the RePlIcatoR™

Содержание Replicator

Страница 1: ...Setup Guide Read me BefoRe unPackIng...

Страница 2: ...tion Caution The Replicator generates high temperatures and includes moving parts that can cause injury Never reach inside The Replicator while it is in operation and allow time for The Replicator to...

Страница 3: ...docs replicator How to unpack The Replicator The Replicator is packaged very carefully at the MakerBot BotCave we hope you ll take your time and be just as careful unpacking it In this section the nam...

Страница 4: ...ckaging underneath you ll find the Power Supply and cable as well as the USB A to USB B cable and the Filament Guide Tube s Take these out and set them aside Step 2 Open The Accessory Box Follow the t...

Страница 5: ...threaded screw just behind The Replicator logo or grasp the platform firmly on both sides and move it up with gentle pressure Move the platform up as far as you can it should almost reach the black St...

Страница 6: ...the main features of The Replicator BACK 1 Power switch 2 Power input 3 USB B input 4 Reset button 5 Right and left spool holders FRONT 1 Single or Dual Stepstruder MK8 attached to mount 2 Build Platf...

Страница 7: ...truder MK8 into place Lower the build platform all the way by turning the threaded screw behind the platform or by grasping the black plastic arms at the sides of the platform and pressing down with s...

Страница 8: ...de panels Step 8 Slide the Spool Holder s into place Now grab the Spool Holder s If you have two spool holders put one on each side If you have one put it on the left side as you face the rear To inst...

Страница 9: ...ote this is a universal PSU which can accept 100 240 V AC at 50 60 hz It also has a standard IEC cable input to accept international cable types if you re outside the USA Next plug the cable into the...

Страница 10: ...up Take a moment to relax and prepare for calibration and printing Next Steps When you re ready to flip the switch and make your first prints head to makerbot com docs replicator fre Here s a preview...

Страница 11: ...licatorG Software your key to the world of MakerBotting ReplicatorG is software that allows you to prepare new prints for The Replicator You ll need to install ReplicatorG in order to print your own d...

Страница 12: ...2012 MakerBot Industries LLC 87 3rd Ave 1st floor Brooklyn NY 11217 For technical assistance please call 347 334 6801 or email support makerbot com...

Отзывы: