


EN 54-16 certified PA/VA System SERIES
5 6 , c h e m i n d e l a Fl a m b è re · 3 1 3 0 0 To u l o u s e · F R A N C E · T é l . 3 3 ( 0 ) 5 6 1 3 1 8 6 8 7
F a x 3 3 ( 0 ) 5 6 1 3 1 8 7 7 3 · c o m m e r c i a l @ m a j o r c o m . f r · w w w . m a j o r c o m . f r
User manual V1.1
5 6 , c h e m i n d e l a Fl a m b è re · 3 1 3 0 0 To u l o u s e · F R A N C E · T é l . 3 3 ( 0 ) 5 6 1 3 1 8 6 8 7
F a x 3 3 ( 0 ) 5 6 1 3 1 8 7 7 3 · c o m m e r c i a l @ m a j o r c o m . f r · w w w . m a j o r c o m . f r
Usermanual V1.1
33
32
SERIES EN 54-16 certified PA/VA System
Page
32
sur
51
ďͿ
TYPE OF MONITORING BUTTON
The type of monitoring buttons, allows to select what kind of elements are to be monitored. Press until
you find the desired item type:
Music source
Zone
Pre-recorded message player 1 or 2
Emergency microphone
ĐͿ
MUTE BUTTON
The mute button allows a radical decrease of the volume of the input to a minimum. When the mute is
disabled, the input will recover the volume it had before being silenced.
ĚͿ
VOLUME ADJUSTMENT BUTTONS
The window has two buttons to adjust volume " +" and "- «, each time you press one of them, the volume
of the monitor speaker will be increased or decreased by 1 dB.
To monitor, select the type of item using the " type of monitoring " button, and then click the item to be
monitored. Adjust the monitor's volume. To finish, press the " BACK" button.
NOTE: If the music source input 5 is being used by an ACSI element such as an EVP microphone, this will
also be monitored when one of the microphones are paging to any of the zones of the system.
NOTE: In case the type of item to monitor is a pre-recorded message, press the desired player to directly
access the messages window (see 3.5.7). From this window, it is possible to start or stop the playback of
the desired message. From the message player window, press the " BACK" button to return to the
monitor window.
ϯ͘ϱ͘ϳ
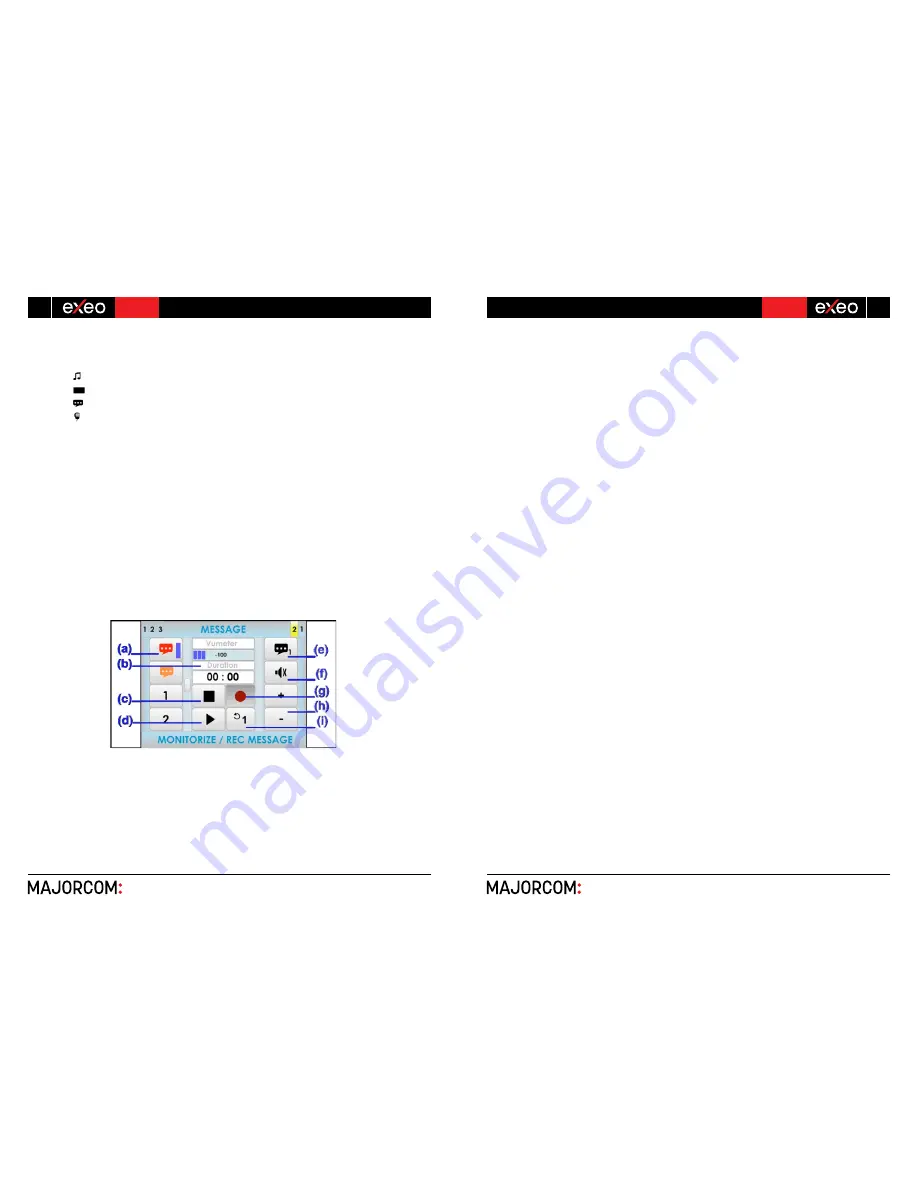
ADVANCED OPTIONS. MESSAGES.
ĂͿ
MESSAGE LIST
In the left column of the screen, you can find the list of pre-recorded messages. If the progress indicator
is present (see 2.2.6), use the scroll control to display the remaining messages available. To select one,
press its corresponding button in the list and a selection band will appear in the button.
ďͿ
MESSAGE DURATION INDICATOR
Displays the message duration in minutes and seconds when the message is selected. When the message
is playing, it will display a countdown of duration equal to the duration of the message.
Picture 37: Message Window
Page
32
sur
51
ďͿ
TYPE OF MONITORING BUTTON
The type of monitoring buttons, allows to select what kind of elements are to be monitored. Press until
you find the desired item type:
Music source
Zone
Pre-recorded message player 1 or 2
Emergency microphone
ĐͿ
MUTE BUTTON
The mute button allows a radical decrease of the volume of the input to a minimum. When the mute is
disabled, the input will recover the volume it had before being silenced.
ĚͿ
VOLUME ADJUSTMENT BUTTONS
The window has two buttons to adjust volume " +" and "- «, each time you press one of them, the volume
of the monitor speaker will be increased or decreased by 1 dB.
To monitor, select the type of item using the " type of monitoring " button, and then click the item to be
monitored. Adjust the monitor's volume. To finish, press the " BACK" button.
NOTE: If the music source input 5 is being used by an ACSI element such as an EVP microphone, this will
also be monitored when one of the microphones are paging to any of the zones of the system.
NOTE: In case the type of item to monitor is a pre-recorded message, press the desired player to directly
access the messages window (see 3.5.7). From this window, it is possible to start or stop the playback of
the desired message. From the message player window, press the " BACK" button to return to the
monitor window.
ϯ͘ϱ͘ϳ
ADVANCED OPTIONS. MESSAGES.
ĂͿ
MESSAGE LIST
In the left column of the screen, you can find the list of pre-recorded messages. If the progress indicator
is present (see 2.2.6), use the scroll control to display the remaining messages available. To select one,
press its corresponding button in the list and a selection band will appear in the button.
ďͿ
MESSAGE DURATION INDICATOR
Displays the message duration in minutes and seconds when the message is selected. When the message
is playing, it will display a countdown of duration equal to the duration of the message.
Picture 37: Message Window
Page
33
sur
51
ĐͿ
STOP BUTTON
The stop button allows to stop the playback completely. The duration indicator shows the length of the
selected message. Once the action has stopped, both the playback or recording should be started from
the beginning of the message. A selection band will appear when the message is stopped.
ĚͿ
PLAY/PAUSE BUTTON
This button starts the playback of the message. When the message is being played, it will pause the
playback of the message.
ĞͿ
MESSAGE PLAYER SELECTOR
Selects the message player to use. The system has 2 pre-recorded message players.
ĨͿ
MUTE BUTTON
The mute button allows a radical decrease of the volume of the input to a minimum. When the mute is
disabled, the input will recover the volume it had before being silenced.
ŐͿ
REC BUTTON
The rec button starts the recording over the selected pre-recorded message.
NOTE: If this button is in gray color, the system does not allow this function or it is not implemented.
ŚͿ
VOLUME ADJUSTMENT BUTTONS
The window has two buttons to adjust volume " +" and "- «, each time you press one of them, the volume
of the monitor speaker will be increased or decreased by 1 dB.
ŝͿ
LOOP BUTTON
Allows an automatic repetition of the message. It is possible to select either 1, 2 or 3 repetitions of the
message or loop mode for an indefinitely number of repetitions.
NOTE: if the message players require the use of the pre-recorded message player will clear this command.
USE OF THE PRE-RECORDE MESSAGE PLAYER
To play a message, first select it in the left side column list and then press the play button. To pause
or stop the playback, press the pause or stop buttons. If you would like to hear from the speaker monitor
the selected message being played, use the monitor controls placed in the right side of the screen.
ϯ͘ϱ͘ϴ
ADVANCED OPTIONS. LOAD PRESET
The system allows the use of presets that will instantly modify the parameters of audio regarding
volume, routing, etc. It is possible to create and save new presets in the equipment from the
configuration software. With the use of presets, habitual system's audio adjustments can be applied very
quickly.


