Operating Instructions
44
Creating a Tympanometry Protocol
To create a new protocol file, click the
Create New
button located on the right panel of the protocol
window. A new dialog will appear, select
Tympanometry Protocol
.
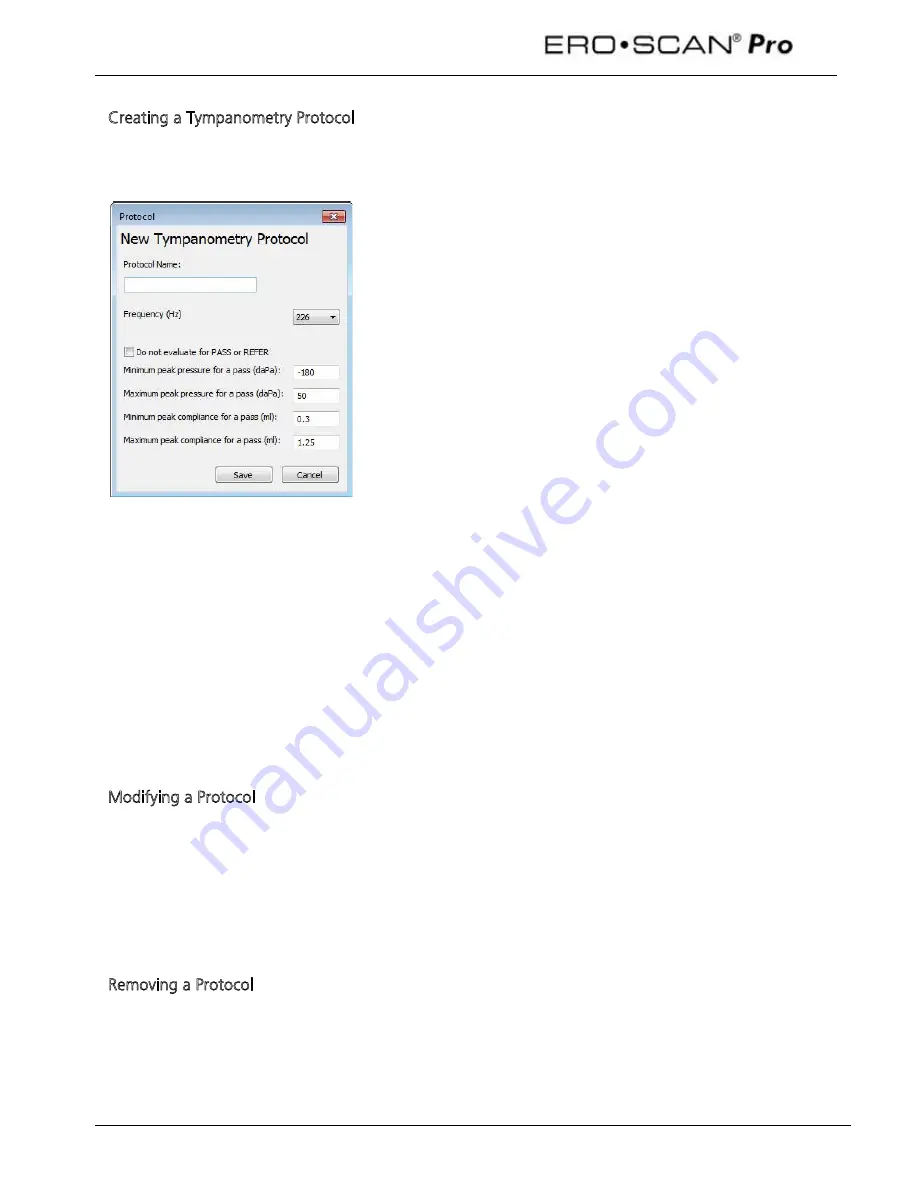
To the left is the Tympanometry protocol editing window.
Protocol Name: the text entered into the Protocol Name field is
what will appear in the instrument when the protocol is loaded.
This should be kept to approximately 14-16 characters in length so
that the full protocol name can be viewed on the instrument
display.
Frequency: sets the probe tone frequency for the tympanometry
measurement. The selections for probe tone frequency are 226
and 1000 Hz.
Evaluate Pass or Refer: A within limits box will be shown on the
tympanometry display and print out by default for the 226 Hz
probe tone measurement. The Pass or Refer outcome will is based
on the presence or absence of the tympanometric peak within the
limits box. If no limits box or Pass/Refer outcome is desired, check
the box
Do not evaluate Pass or Refer
.
Setting the within limits box:
Minimum peak pressure for a pass: selects the low pressure limit
for the box (-300 to 400)
Maximum peak pressure for a pass: selects the high pressure limit
for the box (-300 to 400)
Minimum peak compliance for a pass: selects the low peak
compliance limit for the box (0.0 to 2.0)
Maximum peak compliance for a pass: selects the high peak
compliance limit for the box (0.0 to 2.0)
Modifying a Protocol
To change the settings of an existing protocol, click the
Modify
button located on the right panel of the
protocol window (Figure 68). The protocol editing window for that protocol will open. Make the
desired changes and click
Save
.
Manufacturer default protocols cannot be modified by the user. They can, however, be copied and
used as the starting point for user defined custom protocols. See instructions below for copying a
protocol.
Removing a Protocol
To permanently delete a protocol from the directory, click the
Remove
button located on the right panel
of the protocol window (Figure 68).
Removing a protocol file from the directory does NOT remove it from the instrument. To remove a
protocol from the instrument, follow the instructions provided below in section 9.2.
Содержание Ero Scan Pro
Страница 74: ...1162 0802 Rev E 05 12...


