


– 16 –
EN
DV
D
FU
NCTI
ON
S
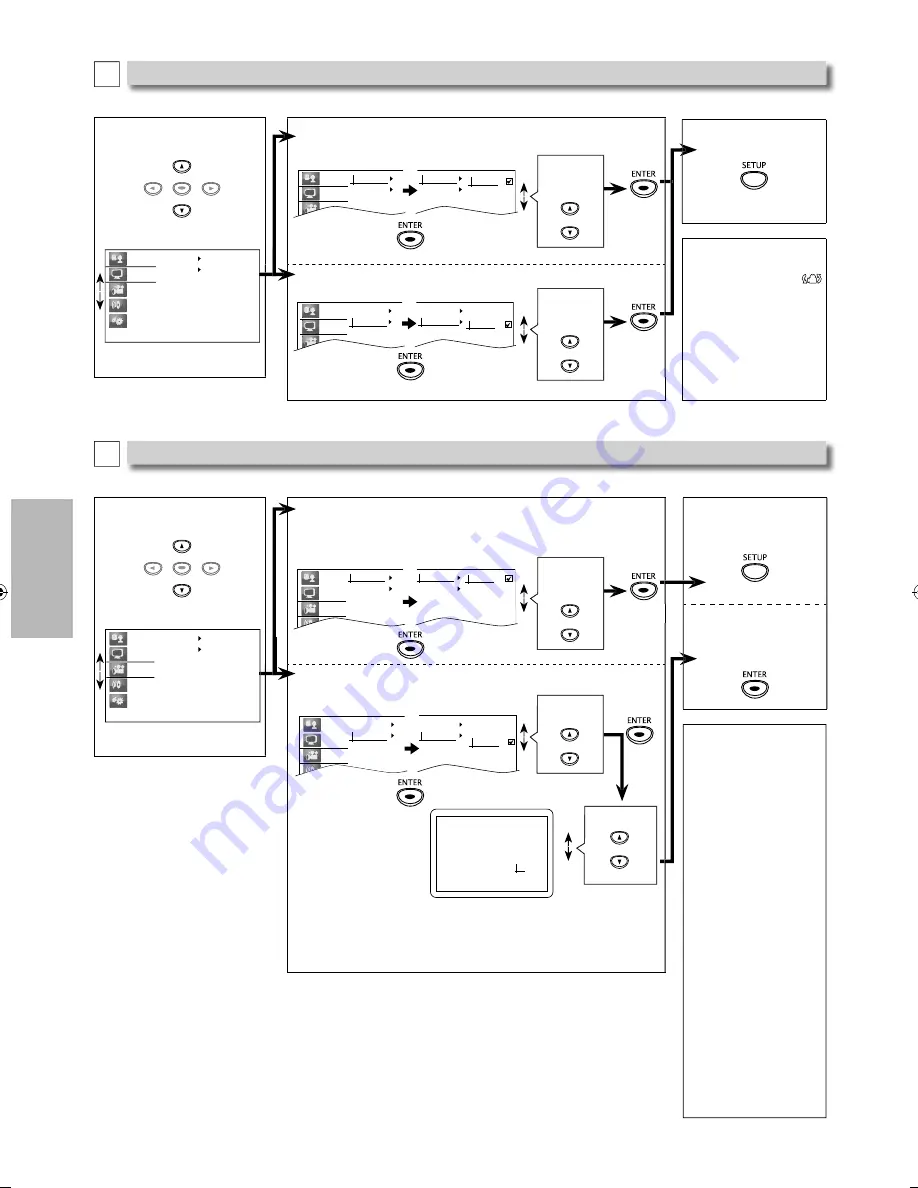
Display Setting
B
You can change the display functions. Follow steps 1 to 2 on page 15.
3
Select the desired item.
Language
Display
Video
Audio
Others
Angle Icon
Screen Saver
Display menu
ENTER
4
Angle Icon: (Default: On)
See note on the right.
Language
Display
Video
Angle Icon
Screen Saver
Angle Icon
Screen Saver
On
Off
Select the
desired
setting.
Select the
desired
setting.
Screen Saver: (Default: On)
See note on the right.
Language
Display
Video
Angle Icon
Screen Saver
Angle Icon
Screen Saver
On
Off
Video Setting
C
You can change the video functions. Follow steps 1 to 2 on page 15.
3
Select the desired item.
Language
Display
Video
Audio
Others
TV Aspect
Progressive
Video menu
ENTER
4
TV Aspect: (Default: 16:9 Wide)
Sets the aspect ratio of the playback
image to fit your TV.
Language
Display
Video
Audio
TV Aspect
Progressive
TV Aspect
Progressive
16:9 Wide
4:3 Letter Box
4:3 Pan & Scan
Select the
desired
setting.
TV Aspect
Progressive
On
Off
Language
Display
Video
Audio
TV Aspect
Progressive
Progressive: (Default: Off)
Changing ”Progressive” setting is not
available while HDMI cable is connected.
Before proceeding…
Make sure your TV supports the selected item.
Connect with component video cable.
NOTE: If a blank screen appears, wait for 15 seconds
for
auto-recovery.
Activate?
Progressive On
Select:
K
/
L
Set:ENTER
Yes
No
If there is no picture
or you do not press
any buttons for 15
seconds, “Progressive”
will switch to “Off”
and it will exit the
setup menu.
Select “Yes”.
Select
“On”.
5
To exit the menu
Note:
Angle Icon:
• Set to “On” to display
when multiple camera
angles are available
during DVD playback.
Screen Saver:
• Sets whether to
activate the screen
saver after 5 minutes of
no action on the unit.
Note:
TV Aspect:
• Select “16:9 Wide”
if a wide-screen TV is
connected to this unit.
• Select “4:3 Letter Box”,
so that black bars may
appear on the top
and bottom of the TV
screen.
• Select “4:3 Pan & Scan”
for a full height picture
with both sides adjusted.
Progressive:
• You can set
“Progressive” to “Off”
in “Video” menu or
press and hold
[PLAY
B
]
on the
front of the unit for
more than 5 seconds
during playback.
• When “Progressive”
is “On”, video signals
from the unit’s VIDEO
OUT and S-VIDEO OUT
jacks will be distorted
or not be output at all.
5
To exit
“TV Aspect” menu
To complete
“Progressive”
setting
E6MY3UD̲E6MY3UH̲MDV3300̲F7̲EN̲v1.indd 16
E6MY3UD̲E6MY3UH̲MDV3300̲F7̲EN̲v1.indd 16
2012/01/30 17:44:50
2012/01/30 17:44:50