background image

PRECAUTIONS

– 2 –

EN

PRECAUTIONS

WARNING:


TO PREVENT FIRE OR ELECTRICAL SHOCK, DO NOT EXPOSE THIS PRODUCT TO RAIN OR 
MOISTURE.

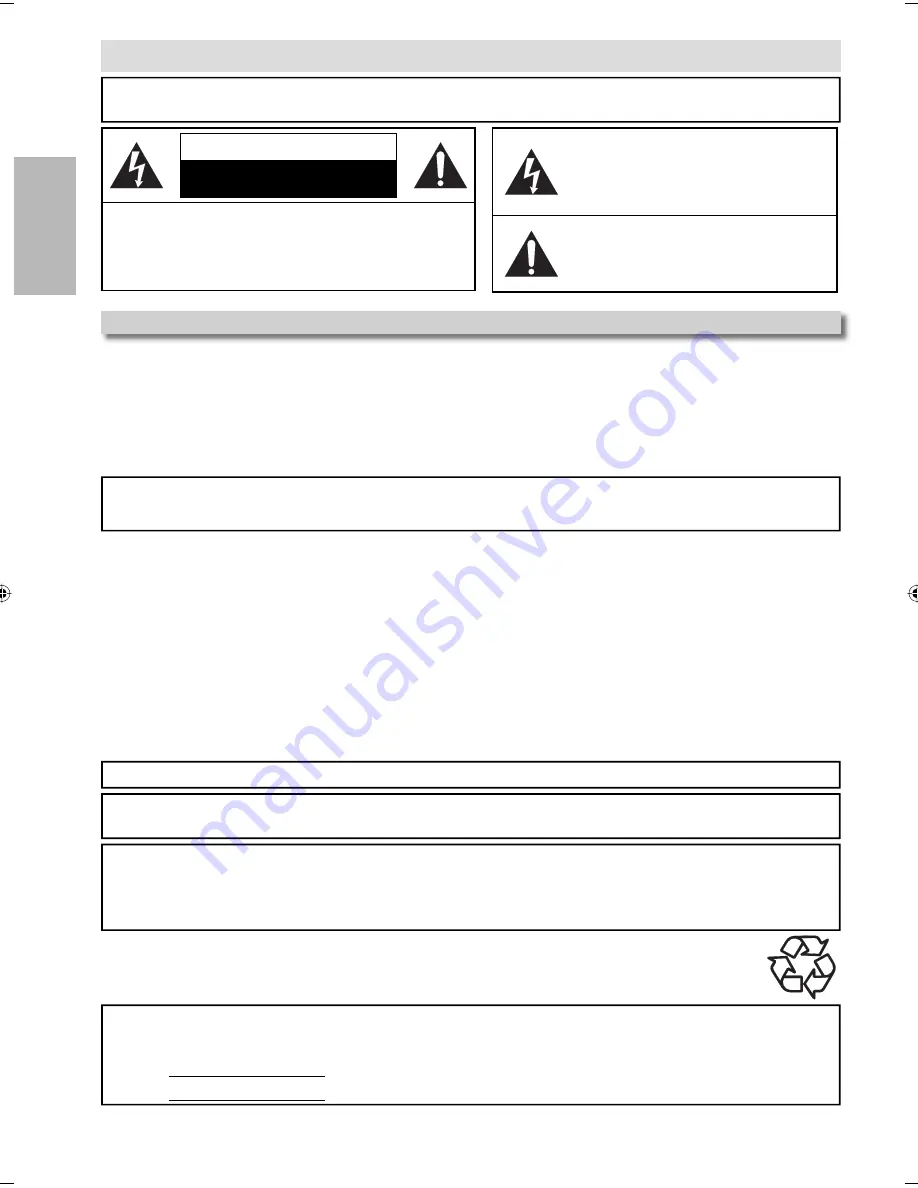
The lightning fl ash with arrowhead symbol, 
within an equilateral triangle, is intended to 
alert the user to the presence of uninsulated 
“dangerous voltage” within the product’s 
enclosure that may be of suffi

  cient magnitude 

to constitute a risk of electric shock to persons.

The exclamation point within an equilateral 
triangle is intended to alert the user to the 
presence of important operating and 
maintenance (servicing) instructions in the 
literature accompanying the appliance.

CAUTION

RISK OF ELECTRIC SHOCK

DO NOT OPEN

CAUTION:

TO REDUCE THE RISK OF ELECTRIC SHOCK, DO NOT 
REMOVE COVER (OR BACK). NO USER SERVICEABLE 
PARTS INSIDE. REFER SERVICING TO QUALIFIED SERVICE 
PERSONNEL.

The caution marking is located on the rear of the cabinet.

Laser Safety

This unit employs a laser. Only a qualified service person should remove the cover or attempt to service this device, due 
to possible eye injury.

CAUTION:    

  USE OF CONTROLS OR ADJUSTMENTS OR PERFORMANCE OF PROCEDURES OTHER THAN THOSE 

SPECIFIED HEREIN MAY RESULT IN HAZARDOUS RADIATION EXPOSURE.

CAUTION:    

  VISIBLE AND INVISIBLE LASER RADIATION WHEN OPEN AND INTERLOCK DEFEATED. DO NOT 

STARE INTO BEAM.

LOCATION:

  INSIDE, NEAR THE DECK MECHANISM.

RADIO-TV INTERFERENCE

This equipment has been tested and found to comply with the limits for a Class B digital device, pursuant to Part 15 of the FCC Rules. 
These limits are designed to provide reasonable protection against harmful interference in a residential installation. This equipment 
generates, uses, and can radiate radio frequency energy and, if not installed and used in accordance with the instructions, may cause 
harmful interference to radio communications. However, there is no guarantee that interference will not occur in a particular installation. 
If this equipment does cause harmful interference to radio or television reception, which can be determined by turning the equipment 
off and on, the user is encouraged to try to correct the interference by one or more of the following measures:
1)  Reorient or relocate the receiving antenna.
2)  Increase the separation between the equipment and receiver.
3)  Connect the equipment into an outlet on a circuit different from that to which the receiver is connected.
4)  Consult the dealer or an experienced radio/TV technician for help.

This Class B digital apparatus complies with Canadian ICES-003.
Cet appareil numérique de la classe B est conforme à la norme NMB-003 du Canada.

FCC WARNING -

 This equipment may generate or use radio frequency energy. Changes or modifications to this equip-

ment may cause harmful interference unless the modifications are expressly approved in the manual. The user could lose 
the authority to operate this equipment if an unauthorized change or modification is made.

CAUTION:

    TO PREVENT ELECTRIC SHOCK, MATCH WIDE BLADE OF PLUG TO WIDE SLOT, FULLY INSERT.

ATTENTION:

  POUR ÉVITER LES CHOCS ÉLECTRIQUES, INTRODUIRE LA LAME LA PLUS LARGE DE LA FICHE DANS LA 

BORNE CORRESPONDANTE DE LA PRISE ET POUSSER JUSQU’AU FOND.

A NOTE ABOUT RECYCLING

This product’s packaging materials are recyclable and can be reused. Please dispose of any materials in accordance with your local 
recycling regulations.
Batteries should never be thrown away or incinerated but disposed of in accordance with your local regulations concerning chemical 
wastes.

For Customer Use:
Read carefully the information located at the back of this unit and enter below the Model No. and the Serial No. Retain this information 
for future reference.

Model No.  ________________________

Serial No.  ________________________

Make your contribution to the environment!!!

• Used up batteries do not belong in the dust bin.
• You can dispose of them at a collection point for used up batteries or special wastes.

Contact your council for details.

E6E75UD_DP170MW8B_EN_v1.indd   2

E6E75UD_DP170MW8B_EN_v1.indd   2

2009/02/04   10:45:06

2009/02/04   10:45:06

Содержание DP170MW8B

Страница 1: ... Setting 17 Stereo Sound Mode 17 Virtual Surround 17 DVD Setting 18 LANGUAGE Setting 18 DISPLAY Setting 19 AUDIO Setting 20 PARENTAL Setting 21 OTHERS Setting 22 Reset to the Default Setting Except for PARENTAL Setting 23 INFORMATION Troubleshooting Guide 23 Specifications 24 Language Code List 24 LIMITED WARRANTY 24 Español 27 Quick Use Guide Back Cover If your TV has antenna in jack only it is s...

Страница 2: ...r in a particular installation If this equipment does cause harmful interference to radio or television reception which can be determined by turning the equipment off and on the user is encouraged to try to correct the interference by one or more of the following measures 1 Reorient or relocate the receiving antenna 2 Increase the separation between the equipment and receiver 3 Connect the equipme...

Страница 3: ...afety purpose of the polarized plug 12 Power Cord Protection Power supply cords should be routed so that they are not likely to be walked on or pinched by items placed upon or against them paying particular attention to cords at plugs convenience receptacles and the point where they exit from the appliance 13 Lightning For added protection for this video product during a lightning storm or when it...

Страница 4: ...ns regarding your TV set compatibility with this 525p DVD player please contact our customer service center Symbols Used in this Manual The following symbols appear in some headings in this manual Description refers to DVD video Description refers to audio CD Description refers to CD RW R with JPEG files Maintenance Servicing Please refer to relevant topics on the Troubleshooting Guide on page 23 ...

Страница 5: ...mpromised 6 You may play back the unfinalized DVD RW R recorded in the video format on our brand s DVD recorder However depending on the recording status of a disc the disc may not be played back at all or normally the picture or sound may not be smooth etc In this case you need to finalize the disc with the DVD recorder Refer to the manual accompanying the DVD recorder 7 Only discs recorded in th...

Страница 6: ...you want to enjoy that high quality picture You must select the connection COMPONENT VIDEO OUT above and progressive scanning mode To set the mode set PROGRESSIVE to ON in DISPLAY menu Refer to pages 18 20 for more details When PROGRESSIVE is ON video signals from the unit s VIDEO OUT and S VIDEO OUT jacks will be distorted or not be output at all If your TV is not compatible with progressive scan...

Страница 7: ...and authentication of the connected AV device This unit supports HDCP Please read the operating instructions of your display device or AV amplifier for more information HDMI High Definition Multimedia Interface Note When using an HDCP incompatible display device the image will not be viewed properly Among the devices that support HDMI some devices can control other devices via the HDMI connector h...

Страница 8: ...joy high quality Dolby Digital multi channel surround sound as heard in the movie theaters Playing back a DVD using incorrect settings may generate noise distortion and may also damage the speakers Audio This unit Connection Setting analog audio input jacks RCA audio cable digital audio input jack digital audio coaxial cable stereo system Dolby Digital decoder MD deck or DAT deck L R VIDEO OUT Y C...

Страница 9: ...ion 2 3 1 5 6 Note Please purchase the necessary cables at your local store Refer to pages 6 8 4 HDMI Setup Note Video and audio signals may distorted temporarily when changing to from the HDMI output mode Use a display with an HDMI compatible port You can check the HDMI connection status by pressing DISPLAY during playback with the HDMI output mode refer to page 14 The HDMI mode that is not suppo...

Страница 10: ...elect audio languages on a disc To select STEREO L ch or R ch CD CLEAR To clear the markers To clear the numbers entered incorrectly To cancel the point for A B repeat To clear the markers CD To remove status number in program input To clear the numbers entered incorrectly To cancel the point for A B repeat CD DISC MENU To call up the menu on a disc To call up the file list JPEG DISPLAY To display...

Страница 11: ...V H NEXT G on this unit Pressing and holding PREV H or NEXT G on this unit in the pause mode will also change forward or reverse playback speed To continue playback press PLAY B Note To cancel resume press STOP C one more time in the stop mode For JPEG playback will resume from the beginning of the track at which playback was stopped The resume playback information stays on even when the power is ...

Страница 12: ...again while CD RW R with JPEG files is already inserted folder name 4 folder name 1 folder name 3 folder name 2 folder name 1 DISC NAME FILE LIST OK PLAY file name 3 file name 2 file name 1 1 2 JPEG is a method of compressing files You can copy JPEG files on CD RW R from the computer and play back the files on this unit Note Depending on some sections it may take a while to be recognized Press TIT...

Страница 13: ...setting screen will not be displayed while in the stop mode or from the file list This feature may have no effect on some files e g Files with small picture size The default setting is NORMAL Transition Mode You can switch to the transition mode for JPEG files during playback 1 During playback press MODE repeatedly until appears 2 To switch CUT IN OUT or FADE IN OUT CUT IN OUT The entire image app...

Страница 14: ...epeat 11 16 0 00 00 0 03 30 1 3 0 00 00 1 23 45 T L1 bit rate the amount of audio and video data currently being read elapsed time of the current chapter remaining time of the current chapter elapsed time of the current title remaining time of the current title layer numbers appears only when playing back a 2 layered disc L0 Layer 0 is in playback L1 Layer 1 is in playback current playback status ...

Страница 15: ...arkers Selecting AC at step 2 in the section To set a marker or To return to the marker later will also erase all markers SEARCH SEARCH RETURN For the disc with less than 10 tracks press the track number directly For discs with more than 10 but less than 99 tracks to play back single digit track press 0 first then the track number e g for track 3 press 0 3 To play back a double digit track press t...

Страница 16: ...urrent file Press STOP C twice and PLAY B next so that playback restarts from the first track in the original order However your programmed playback can be restarted when you follow the above steps Your programs are still stored until either the disc tray is open or power is turned off To repeat the current track in the program press REPEAT repeatedly until TRACK appears during playback To repeat ...

Страница 17: ...language code the code will be displayed every time you change the subtitle language setting If you choose any other languages will be displayed instead Refer to page 24 Some discs will only allow you to change the subtitle from the disc menu Refer to the manual accompanying the discs for details Note For audio CD virtual surround will not be effective if the sound mode is set to something other t...

Страница 18: ...DIO ORIGINAL ENGLISH FRENCH SUBTITLE OFF ENGLISH FRENCH DISC MENU ENGLISH FRENCH SPANISH PLAYER MENU ENGLISH FRANÇAIS ESPAÑOL LANGUAGE menu page 18 A Step 5 page 19 B Step 5 page 20 C Step 5 A SETUP menu Confirm that QUICK is selected Note In QUICK menu PLAYER MENU TV ASPECT PROGRESSIVE HDMI MODE or DOLBY DIGITAL are available QUICK menu consists of the setting menu frequently used and they are ac...

Страница 19: ...s HDMI MODE 480p Video output from the HDMI OUT jack at 480p 720p Video output from the HDMI OUT jack at 720p 1080i Video output from the HDMI OUT jack at 1080i 1080p Video output from the HDMI OUT jack at 1080p When the HDMI DVI video can be output the setting change can be done If the TV is not compatible with newly selected HDMI output mode press and hold PLAY B on the front of the unit for mor...

Страница 20: ...annot be output the setting change cannot be done 6 To exit the menu SETUP OK OK OK Note In QUICK menu PLAYER MENU TV ASPECT PROGRESSIVE HDMI MODE or DOLBY DIGITAL are available QUICK menu consists of the setting menu frequently used and they are accompanied with QUICK You can make all settings in CUSTOM menu HDMI AUDIO Default ON This function is only available when you use an HDMI connection ON ...

Страница 21: ...assword press 4 7 3 7 at step 4 then enter your new password Password will be cleared and parental levels will be set to ALL 5 Select PARENTAL LEVEL PARENTAL Setting This function prevents unit from playing material inappropriate for children Parental Levels Parental level allows you to set the rating levels of your DVD software Playback will stop if the ratings exceed the levels you set Follow st...

Страница 22: ... ON Set to ON to display when multiple camera angles are available during DVD playback AUTO POWER OFF Default ON Set to ON to turn this unit off automatically after 30 minutes of no use ANGLE ICON ON AUTO POWER OFF ON ON OFF ANGLE ICON ON AUTO POWER OFF ON OFF ON OK OK ANGLE ICON ON AUTO POWER OFF ON SLIDE SHOW 5sec SLIDE SHOW 5sec 10sec SLIDE SHOW Default 5sec Set the display time of each JPEG fi...

Страница 23: ...ed picture Connect this unit directly to the TV There are some cases where pictures may be slightly distorted and those are not a sign of a malfunction Although pictures may stop for a moment this is not a malfunction Refer to page 11 Check if PROGRESSIVE is set correctly according to your TV Refer to pages 18 20 Disc cannot be played back Insert the disc Clean the disc Place the disc correctly wi...

Страница 24: ...E DURING THE WARRANTY PERIOD YOU ARE UNABLE TO OBTAIN SATISFACTION WITH THE REPAIR OF THIS PRODUCT PLEASE CONTACT FUNAI CORP ATTENTION FUNAI CORP RESERVES THE RIGHT TO MODIFY ANY DESIGN OF THIS PRODUCT WITHOUT PRIOR NOTICE WARRANTY STATEMENT REGARDING NON AUTHORIZED REPAIRS To obtain warranty service you must take the product or deliver the product freight prepaid in either its original packaging ...

Страница 25: ...INFORMATION EN 25 MEMO ...

Страница 26: ...INFORMATION 26 EN corte aquí MEMO ...

Страница 27: ...al virtual CD Para activar el modo carrusel de diapositivas JPEG OPEN CLOSE Para abrir o cerrar la bandeja del disco Para encender la unidad Para abrir o cerrar la bandeja del disco Para encender la unidad PAUSE Para hacer una pausa en la reproducción Para avanzar la reproducción un cuadro cada vez Para hacer una pausa en la reproducción PLAY Para empezar la reproducción del disco Para encender la...

Страница 28: ...rn the unit on To open or close the disc tray To turn the unit on PAUSE To pause disc playback To advance playback one frame at a time To pause disc playback PLAY To begin disc playback To turn the unit on To begin disc playback To turn the unit on PREV NEXT To skip chapters To skip tracks or files REPEAT To play back a chapter or title repeatedly To play back a track or disc repeatedly CD To play...

Отзывы: