10
11
Radio Operations
Select [Radio] on the main menu to enter
radio mode.
1
2
4
5
3
7
6
1
1
2
1
0
1
9
8
1. Return to home menu
2. Tune backward
Auto tune backward. (long press)
3. Current frequency
4. Tune forward
Auto tune forward. (long press)
5. Enter EQ menu
6. Enter favorite list
7. Search and store preset stations
automatically
8. To receive local / distant radio stations
9. Goto station by inputting frequency
10. Band switch
11. Stations list
12. Show more control buttons
13
14
15
16
17
13. Enter customized list
14. Show discovery stations
15. Show favorite stations
16. Mute radio
17. Hide the second line of control buttons
18. Show RDS options
Select One Radio Band
Touch the [ Band ] button to select one radio
band among FM and AM.
Manual Tuning
During manual tuning, the frequency will be
changed in steps.
Touch the [ ] or [ ] button on the
operation bar to tune in a lower/higher station.
Auto Tuning
Hold the [ ] or [ ] button on the
operation bar for more than 2 seconds to seek
a lower/higher station.
To stop searching, repeat the operation above
or press other buttons having radio functions.
Note:
When a station is received, searching stops
and the station is played.
Auto Store
be detected and stored in the memory.
To start automatic station search, touch the
[ ] button on the operation bar.
To stop auto store, repeat the operation above
or press other buttons having radio functions.
Note:
After auto store, the previous stored stations
will be overwritten.
Manual store
1. When one expected radio station has been
detected, touch [
] to show customized
station store list.
2. Touch to select an item on the list to store
the current station in the memory.
3. Touch top left of the screen to exit.
Radio Operations
Recall the Stored Stations
Method 1:
1. Touch [
] button on the screen to show
the preset stations.
2. Select a band
3. On the middle of the screen, drag the list
left/right to scroll, touch a station on the list
to listen to.
Method 2:
1. Touch [
] button on the screen to show
the favorite stations.
2. Select a band
3. On the middle of the screen, drag the list
left/right to scroll, touch a station on the list
to listen to.
4. Touch top left of the screen to exit.
Local Seeking
When LOCAL seeking is on, only radio
stations with strong radio signal will be be
received.
To open LOCAL function, touch [
] button
on the operation bar, then touch the [ ]
button to select “Loc” or “DX”.
Note
The number of radio stations that can be
received will decrease after the Loc seeking
mode is on.
Key Search
Touch [ ] button on the operation bar to
show key search menu.
Touch the keypad to input the frequency,
touch [ OK ] to goto the station directly.
To cancel an input number, touch [
].
RDS Basics
Radio Data System (RDS) enables traffic
reports to be received and provides many
facilities, including enabling the radio station
name to be displayed on the radio display.
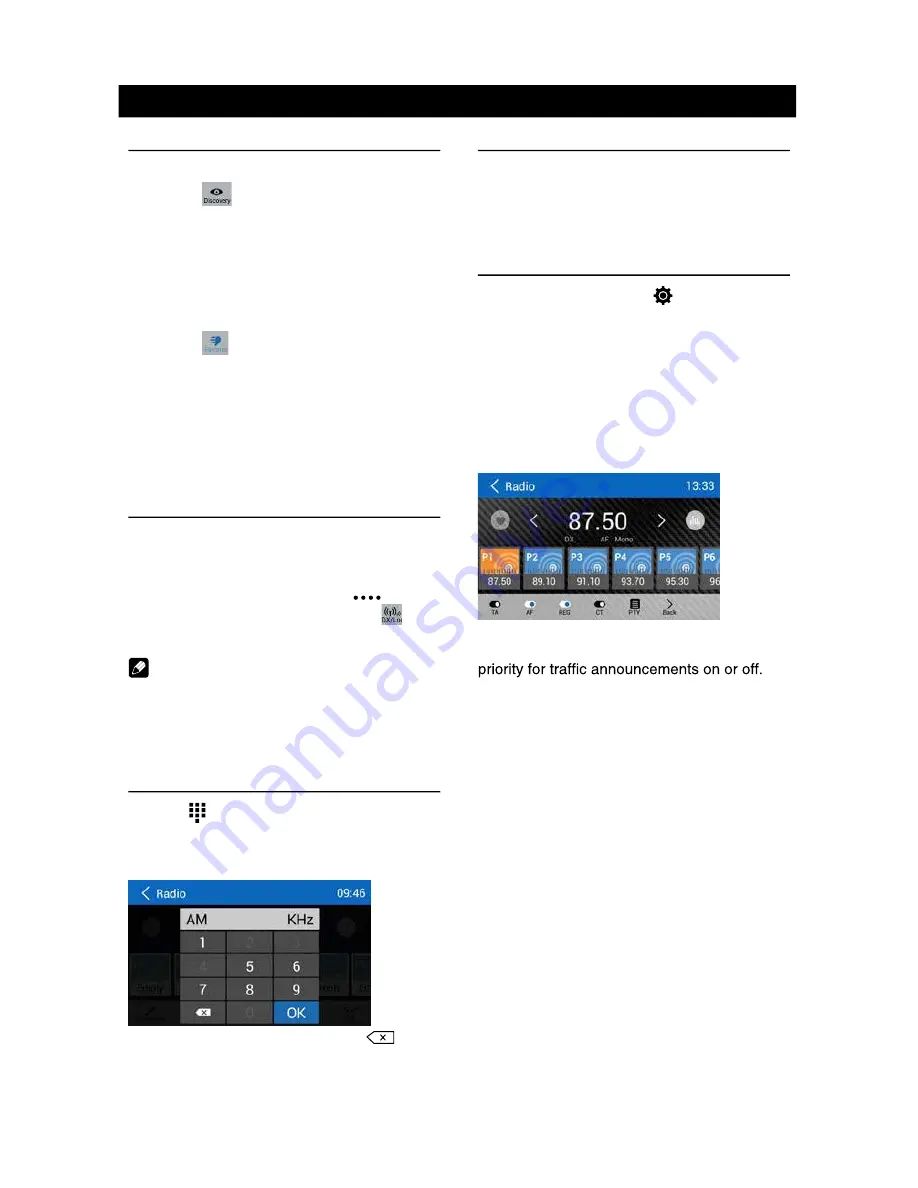
Adjust RDS Settings
1. In Radio menu, touch [ ].
The option menu is displayed.
2. Touch on the selected option to change the
setting.
∙
[TA]: To turn on or off “TA” function.
∙
[AF]: To turn on or off “AF” function.
∙
[REG]: To turn on or off “REG” function.
∙
[CT]: To turn on or off “Clock Time”
synchronization function.
∙
[PTY]: To show PTY list.
TA
Press the TA ON/OFF button to switch the
AF
The receiver can automatically switche to an
alternative frequency (AF) of the same station
if the reception becomes poor. Press the OFF/
ON touch-point to turn the automatic scanning
for alternative frequencies of an RDS broad-
cast station off and on.
CT (Clock Time)
Some stations broadcast the time and date
within the encoded RDS signal. The clock
time is automatically adjusted when ‘CT’ is set
to ‘ON’.
18
Содержание M10
Страница 2: ......
Страница 36: ...CLASS 1 LASER PRODUCT P N 127075007179 M10_UM_Rev A 8 12 16...


