background image

Содержание RM1

Страница 1: ......

Страница 2: ...ot be reproduced copied or translated without the sole permission of Maeving Published April 2022 For the latest version of this handbook please visit www maeving com Produced by Illston Authoring Lim...

Страница 3: ...ng throttle operation 15 Releasing the side stand 15 Choosing a driving mode 16 GENERAL INFORMATION Instrument panel layout 18 Warning lights 19 Traction battery indicator 19 Malfunction indicator 19...

Страница 4: ...12 volt battery is flat 34 SIDE STAND Side stand 35 STORAGE COMPARTMENT Storage compartment 36 ELECTRICAL ACCESSORY SOCKET Electrical accessory socket USB 37 SAFE OPERATION Daily safety checks 38 Batt...

Страница 5: ...the fuse box 64 Fuse identification 64 FRONT HEADLIGHT Headlight adjustment 65 CLEANING Preparing to wash your motorcycle 66 Seat care 67 Unpainted aluminium parts 67 STORAGE Storage 68 SPECIFICATION...

Страница 6: ...is correct at the time of writing It is designed to apply to all Maeving RM1 motorcycle variants therefore the descriptions and images may vary slightly to the model you have purchased Future updates...

Страница 7: ...when in use Wearing bright or reflective clothing and maintaining a good road position while riding can make you more visible to other road users and provide you with extra room to take evasive actio...

Страница 8: ...or advice For further information see Contacts on page 6 Do not remove or tamper with any warning labels fitted to any parts of the motorcycle The warning labels are fitted for your safety and to prev...

Страница 9: ...ft hand handlebar controls 11 Right hand handlebar controls 12 Throttle control 13 Front brake disc 14 Front brake caliper 15 Seat 16 12 volt battery access panel 17 Side stand 18 Reflector 19 USB C s...

Страница 10: ...Delivery date Name Licence plate Delivery date Serial number locations Please locate and enter the serial numbers for your motorcycle VIN number The Vehicle Identification Number VIN is stamped onto t...

Страница 11: ...erial number The battery serial number for each battery is printed on the sticker on the battery Primary battery Secondary battery Key serial number The key serial number is stamped onto the tag attac...

Страница 12: ...n page 23 Once the pre ride checks have been completed satisfactorily and you are ready to set off insert the key into the ignition barrel and turn the key clockwise to the ON position For further inf...

Страница 13: ...age compartment To install the primary battery open the primary battery storage compartment and carefully lift the battery and lower it into position Note Make sure the ignition key is in the OFF posi...

Страница 14: ...icator 2 The charge indicator displays the battery s current State of Charge SoC For further information see Charging the battery on page 32 Checking the brakes Make sure the brakes are functioning co...

Страница 15: ...esting position correctly For further information see Throttle control on page 44 Releasing the side stand A safety cut out sensor on the side stand prohibits drive from being engaged while the side s...

Страница 16: ...ives the best performance but consumes battery power more quickly and driving mode 2 is the most economical After selecting a driving mode release the brake and gradually turn the throttle towards you...

Страница 17: ...and it is designed to be recharged daily Therefore your motorcycle may yield different ranges from one charge to the next The range may be increased by following the guidance notes below Type of comm...

Страница 18: ...ttery indicator 2 Malfunction indicator 3 Neutral indicator 4 Direction indicator 5 Headlight high beam indicator 6 General warning indicator 7 Speedometer 8 Traction battery indicator 9 Battery charg...

Страница 19: ...light remains illuminated before starting your journey or illuminates whilst riding please stop riding the motorcycle as soon as it is safe to do so Once your motorcycle is safely stored please conta...

Страница 20: ...ction indicator light identifies activation of the indicators in conjunction with operation of the direction indicator switch The direction indicator arrow flashes until the manoeuvre is cancelled Ins...

Страница 21: ...velled until it is reset by the user When in Trip B press and hold the i button for 2 seconds to reset Clock The time can be displayed on the instrument panel display Using the i button left hand hand...

Страница 22: ...turn the motorcycle on Note The driving mode cannot be selected with the side stand down Caution Do not leave the ignition switch in the ON position for extended periods of time or unless you are inte...

Страница 23: ...her information see Serial number locations on page 10 The master key red can only be used to pair new keys to your motorcycle and cannot be used to ride the motorcycle Both keys have a transponder ch...

Страница 24: ...d The headlight and instrument panel remain switched on 2 Insert the first ignition key black into the ignition and turn to the ON position After a 3 second delay turn the key to the OFF position and...

Страница 25: ...g mode button D to select the required driving mode To select neutral press the Neutral N button Note If the side stand is in the down position the driving modes cannot be selected This is to prevent...

Страница 26: ...the direction indicator switch is pushed to the left or right and released the corresponding direction indicator flashes To turn the indicator off press the switch in the central position and release...

Страница 27: ...l then automatically switch to using both batteries together in parallel Checking the battery is charged With the motorcycle resting on the side stand insert the ignition key into the ignition barrel...

Страница 28: ...Storage on page 68 Warning The battery is not a serviceable component Attempting to dismantle the battery can lead to leakage explosion or fire In the case of a battery fault please contact the Maevi...

Страница 29: ...jury Caution Make sure to have a firm grip of the battery handle before removing the battery from the motorcycle Failure to do so may result in damage to the battery and or motorcycle 1 Open the prima...

Страница 30: ...osition before installing the primary or secondary battery 2 Carefully lift the primary battery and align it with the primary battery storage compartment before inserting Note The LED indicator on the...

Страница 31: ...partment Removing the secondary battery Warning Make sure to have a firm grip of the battery handle before attempting to remove or refit the battery to the motorcycle Failure to do so may result in pe...

Страница 32: ...ttery fully engages with the connector Charging the battery Your motorcycle is supplied with a combined battery charger 1 and a charging base unit 2 Find a suitable location to charge your battery Thi...

Страница 33: ...ged on page 27 Note The battery and charging base both have to be positioned correctly for charging to commence Note Additional battery chargers and charging base units can be purchased on the Maeving...

Страница 34: ...l not be possible to open the primary and secondary battery storage compartments using the battery storage compartment unlock button To open the battery storage compartments the 12 volt battery must b...

Страница 35: ...he motorcycle using the side stand always turn the handlebars fully to the left to provide maximum stability for the motorcycle Note The motorcycle has a side stand safety cut out feature which preven...

Страница 36: ...g all of your possessions safe The storage compartment can be accessed at any time when the motorcycle is stationary With the ignition switched to the ON position and the drive mode set to neutral pre...

Страница 37: ...the USB C socket remove the protective cap and connect your device using a suitable USB cable Stow the device and cable in the space available inside the storage compartment Caution Make sure that any...

Страница 38: ...ery low pressures as this could seriously affect the handling and stability of your motorcycle when in use and result in loss of control potentially causing serious injury Nuts bolts and fasteners Vis...

Страница 39: ...e return position without sticking For further information see Throttle control on page 44 Electrical equipment Check for correct functionality of the headlight tail light brake light and indicators M...

Страница 40: ...Note The L1 variant of the Maeving RM1 has two driving modes and the L3 variant has three driving modes The driving modes conveniently provide differing performance and speed characteristics for your...

Страница 41: ...motor and the power is not returned until the brake is released and the throttle is reapplied When pulling away on a hill apply the brakes to prevent the motorcycle from rolling backwards and apply th...

Страница 42: ...roperty damage to the motorcycle or personal injury To park the motorcycle Select neutral and turn the ignition switch to the OFF position Lock the steering to prevent theft Always park on firm level...

Страница 43: ...ect the stability of your motorcycle include Incorrectly balanced loads on both sides of the motorcycle Loads that are not securely attached to the motorcycle and that may move Overloaded suspension I...

Страница 44: ...r occurs first to be carried out by the Maeving Workshop Team or a Maeving Workshop Partner Thereafter scheduled service intervals of 3000 miles or annually should be undertaken by the Maeving Worksho...

Страница 45: ...without the brake lever coming into contact with the handlebar Make sure both brake fluid reservoirs contain sufficient brake fluid above the lower limit line For further information see Brake fluid l...

Страница 46: ...worn to or below the minimum service thickness of 1 5mm of friction material the brake pads should be replaced If the brake discs are worn to or below the minimum service thickness of 3 5mm the brake...

Страница 47: ...t on braking performance or lever travel There is nothing that requires adjustment on the braking system Brake fluid Brake fluid is hygroscopic which means the brake fluid will absorb moisture from th...

Страница 48: ...from making contact with any painted surface 2 Thoroughly clean around the top of the brake master cylinder reservoir cover 3 Remove the screws securing the cover 2 and remove the cover and diaphragm...

Страница 49: ...formation see Contacts on page 6 Steering and wheel bearings It is important that you regularly check the condition of your steering headstock bearings and wheel bearings to make sure your motorcycle...

Страница 50: ...t to the motorcycle and holding the handlebars push the motorcycle forwards and apply the front brake 2 Repeat the process rolling the motorcycle backwards and again apply the front brake 3 If any fre...

Страница 51: ...ation and allow the wheels to turn freely without excessive noise or play Suspension Warning Riding a motorcycle with defective or damaged suspension components is dangerous and may lead to loss of co...

Страница 52: ...e fork seals Rear suspension The motorcycle is fitted with twin rear suspension units with adjustable spring preload that are set at the factory for normal road riding conditions This provides a comfo...

Страница 53: ...refore a bedding in period of approximately 100 miles is recommended After a period of 24 hours of fitting or bedding in new tyres check the tyre pressures when the tyres are cold and adjust if necess...

Страница 54: ...table This can lead to loss of control and an accident Rear wheel removal To remove the rear wheel 1 Support the motorcycle on a suitable paddock stand s Note The motorcycle is shown not supported on...

Страница 55: ...e the rear mudguard and light assembly to one side using string or a retaining strap Caution Make sure the rear wheel motor wiring harness is not trapped or damaged while the rear wheel and motor asse...

Страница 56: ...eel motor wiring harness to the swinging arm Note Fit new retaining straps when reattaching the rear wheel motor wiring harness to the motorcycle 12 Carefully reposition the rear wheel motor wiring ha...

Страница 57: ...strap 15 Undo but do not remove both axle nuts on the rear wheel axle Note Left hand shown right hand similar Note When refitting tighten to 100 Nm 16 Remove both rear wheel securing plate bolts Note...

Страница 58: ...Carefully remove the rear wheel and motor assembly from the motorcycle Note The installation procedure is the reverse of the removal procedure Note Clean the mating faces of all components when insta...

Страница 59: ...tery access panel Remove the primary and secondary batteries For further information see Removing the primary battery on page 29 and Removing the secondary battery on page 31 The 12 volt battery can b...

Страница 60: ...electric vehicles Unqualified personnel can potentially cause serious personal injury or death To remove the 12 volt battery 1 Make sure the ignition key is in the OFF position 2 Remove the battery a...

Страница 61: ...s cannot be adjusted and the battery does not need any maintenance except if the motorcycle is being stored and unused for prolonged periods Battery discharge and storing the motorcycle To maximise th...

Страница 62: ...attery charger to rain or water and never immerse the charger or cables in water Caution Maeving do not recommend the use of a battery quick charger on the motorcycle as it could overcharge and perman...

Страница 63: ...ical problem and result in damage loss of control of the motorcycle and or an accident For further information see Fuse identification on page 64 There is a 15 amp main fuse connected to the 12 volt b...

Страница 64: ...12 volt battery For further information see 12 volt battery removal and installation on page 60 3 Remove the 5 bolts securing the battery carrier insert to the electronics housing reposition the 12 vo...

Страница 65: ...ne lens covers Doing so will impair the headlight beam and may result in loss of control and or an accident Caution Never cover the headlight lens with anything that may obstruct airflow to the lens a...

Страница 66: ...and chassis will be exposed to more abrasive road dirt debris and dust which may cause scratches to painted or polished areas if the same sponge or cleaning cloths are used Caution The use of high pr...

Страница 67: ...terial To remove minor marks clean the seat material with a damp cloth and leave it to dry naturally Caution Do not immerse the seat in water and never use household cleaning products such as bleach d...

Страница 68: ...ge in the primary and or secondary batteries should also be maintained on a regular basis and it is recommended to store them at 50 State of Charge SoC Storing these batteries at less than 10 or more...

Страница 69: ...spoke aluminium casing Battery voltage nominal 50 4 V Charging capacity 42 Ah Energy 2026 Wh Charger 600 W Charging time Approx 4h 10min for 0 100 and approx 2h 55min for 0 80 Input Universal 110 240...

Страница 70: ...iper Linked brakes Bias 40 front 60 rear Brake fluid DOT4 Dimensions Seat height at vehicle kerb weight 785 mm Length includes number plate fitted 2145 mm Height excludes mirrors 1067 mm Width include...

Страница 71: ...rvice depends on the age of your motorcycle the distance it has travelled and whether the motorcycle has been used in arduous conditions The actions for each service interval are listed on a maintenan...

Страница 72: ...istance Serviced by Service registered online Yes No Stamp Notes 12 months or 3 000 miles from previous service Date Distance Serviced by Service registered online Yes No Stamp Notes 12 months or 3 00...

Страница 73: ...rviced by Service registered online Yes No Stamp Notes 12 months or 3 000 miles from previous service Date Distance Serviced by Service registered online Yes No Stamp Notes 12 months or 3 000 miles fr...

Страница 74: ...te Distance Serviced by Service registered online Yes No Stamp Notes 12 months or 3 000 miles from previous service Date Distance Serviced by Service registered online Yes No Stamp Notes 12 months or...

Страница 75: ...rviced by Service registered online Yes No Stamp Notes 12 months or 3 000 miles from previous service Date Distance Serviced by Service registered online Yes No Stamp Notes 12 months or 3 000 miles fr...

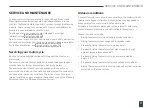
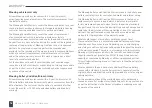
Страница 76: ...Maeving RM1 Owner s Handbook 76 SERVICE AND MAINTENANCE General repair notes...

Страница 77: ...bsite at www maeving com If you have any questions please email support maeving com or call 44 0 2477180149 Charge on Maeving warranty This warranty applies to all original owners and any subsequent o...

Страница 78: ...nth or 13 000 mile extended battery and drivetrain warranty The Maeving Battery and Drivetrain Warranty covers the battery dual battery control unit motor controller hub motor and internal wiring The...

Страница 79: ...and limited service life In the course of a regular scheduled service or maintenance procedure consumable items which are subject to replacement or adjustment are not included in the Maeving warranty...

Страница 80: ...he results of any modifications made to the motorcycle to conform with legal or local requirements of a market for which it was not manufactured for unless authorised by Maeving Limited Misuse of the...

Страница 81: ...rges loss or damage to personal property loss of time or inconvenience How do I obtain service under this warranty Maeving offers mobile servicing and repairs done by our in house engineers and techni...

Страница 82: ...about your motorcycle please visit www maeving com Refunds and returns If you are not satisfied with your purchase upon delivery you have the option to send it back within 14 days and receive a full...

Страница 83: ......

Страница 84: ......

Отзывы: