10
RG/2MCS - RG/2MBZ
DN 65 - 80 - 100
© 2011 MADAS s.r.l.
Capitolo - Chapter
Chapìtre - Capitulo
22.2
RIDUTTORI DI PRESSIONE PER GAS CON OTTURATORE COMPENSATO AD AZIONE DIRETTA TIPO RG/2MCS - RG/2MBZ
DIRECT OPERATED GAS PRESSURE REGULATOR WITH COMPENSATED OBTURATOR TYPE RG/2MCS - RG/2MBZ
REDUCTEUR DE PRESSION DU GAZ AVEC OBTURATEUR COMPENSE A ACTION DIRECTE TYPE RG/2MCS - RG/2MBZ
REDUCTOR DE PRESIÓN PARA GAS CON OBTURADOR COMPENSADO DE ACCIÓN DIRECTA TIPO RG/2MCS - RG/2MBZ
Manuale Tecnico 2011
Capitolo 22.2 (Rev. 0)
2011 Technical Manual
Chapter 22.2 (Rev. 0)
Manuel Technique 2011
Chapitre 22.2 (Rev. 0)
Manual Técnico 2011
Capítulo 22.2 (Rev. 0)
Valvola a sfera
Ball valve
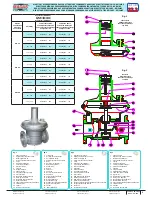
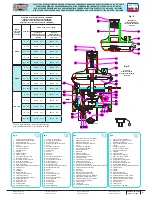
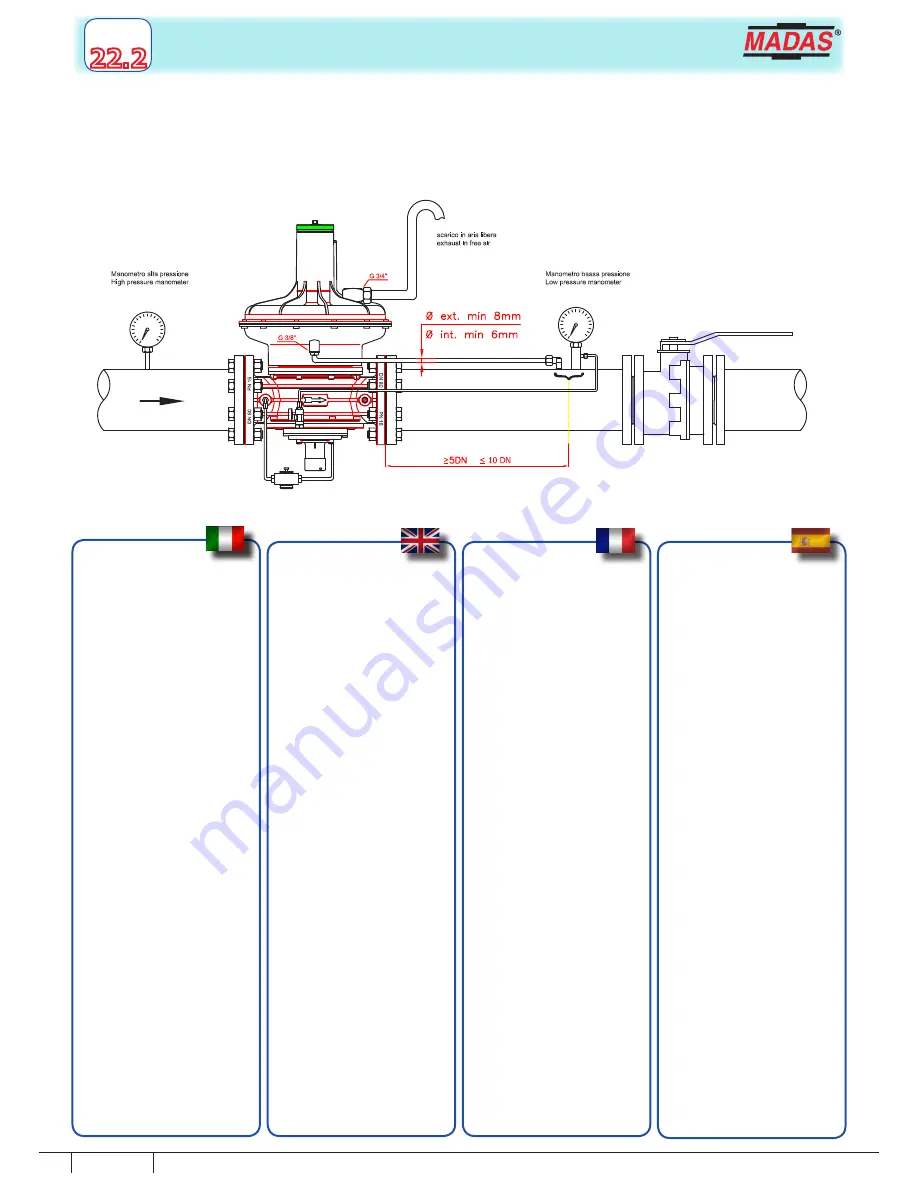
ESEMPIO DI INSTALLAZIONE (RG/2MBZ)
INSTALLATION EXAMPLE (RG/2MBZ)
EXEMPLE D’INSTALLATION (RG/2MBZ)
EJEMPLO DE INSTALACIÓN (RG/2MBZ)
rete
pipe
réseau
red
utenza
user
utilisateur
usuario
Manomètre baja pression
Manómetro basse presión
evacuation à l’air libre
escape en aire libre
Manomètre de haute pression
Manómetro alta presión
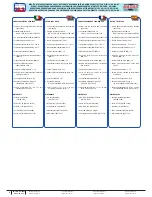
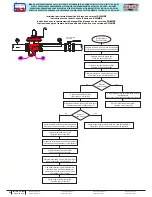
RIARMO MANUALE (solo RG/2MBZ):
Per riarmo del dispositivo di blocco occorre
seguire le indicazioni riportate nello schema
di pag. 13.
A operazione di riarmo terminata si deve tirare
lentamente verso il basso il perno di riarmo
(
25
) (per evitare che sia a contatto con il
perno di riarmo interno).
TARATURA P2
Prima di avviare l’impianto, assicurarsi che la
molla in dotazione al regolatore sia adeguata
alla pressione di regolazione voluta.
Nelle versioni con sfioro si deve agire
direttamente sulla vite di regolazione (
2
),
nelle versioni senza sfioro è necessario svitare
il tappo (
1
). A fine operazione riavvitare il
tappo (
1
) nella posizione originale.
(versioni RG/2MCS)
• Aprire lentamente la valvola di intercettazione
a monte.
• Posizionare la vite di regolazione (
2
) al
minimo di taratura (completamente
svitata).
• Avviare l’impianto e controllando la
pressione di regolazione avvitare la vite di
regolazione (
2
) fino al valore di pressione
desiderata.
(versioni RG/2MBZ)
• Svitare il tappo (
23
).
• Svitare e rimuovere la parte finale del
perno (
25
).
• Con apposita chiave (
29
) avvitare al massimo
la vite di regolazione (
24
) e posizionare al
minimo la vite di regolazione (
26
).
MANUAL RESET (only RG/2MBZ):
In order to reset the shut off device, you
need to follow the instructions mentioned in
the schedule you may find on page 13.
When the reset operation must be completed
slowly pull down the reset pin (
25
) (to avoid
any contact with the internal reset pin).
CALIBRATION P2
Before starting the system, pay attention that
the standard regulation spring is suitable with
the needed regulation pressure.
On versions with relief valve, you must act
directly on the adjustment regulation screw
(
2
), on versions without relief valve you have
to unscrew the cap (
1
).When the regulator is
set, rescrew the cap (
1
) in the original position.
(RG/2MCS versions)
• Open slowly open the upstream closing
valve.
• Calibrate the regulator (
2
) at the minimum
(completely unscrewed).
• Start the system and checking the regulation
pressure, screw the regulator (
2
) up to
the needed pressure value.
(versions RG/2MBZ)
• Unscrew the cap (
23
).
• Unscrew and remove the final part of the
pin (
25
).
• By the special key (
29
) screw completely the
regulation screw (
24
) and put at minimum
the regulation screw (
26
).
REARMEMENT MANUEL
(seulement RG/2MBZ):
Pour réenclencher le dispositif de blocage,
il faut suivre les indications fournies dans
le schéma p.13.A la fin de l'opération de
réenclenchement, il faut tirer lentement vers
en bas le bras de réenclenchement (
25
) (pour
éviter qu'il soit en contact avec le bras de
réenclenchement interne).
TARAGE P2
Avant de démarrer le système, assurez-vous
que le ressort du régulateur est adapte à la
pression de réglage de fonctionnement.
Pour les versions avec soupape d'effleurement
vous devez tourner la vis de régulation (2),
dans les versions sans vanne de décharge il
est necessaire dèvisser le bouchon (1) dans la
position d'origine.
(versions RG/2MCS)
• Ouvrez lentement la valve d’interception
amont.
• Tarez la vis de tarage (
2
) au minimum
(totalement dévissée).
• Démarrez le système et vissez la vis de
tarage, en contrôlant la pression de
réglage, jusqu’à la pression voulue (
2
).
(versions RG/2MBZ)
• Dévisser le bouchon (
23
).
• Dévisser et retirer l'extrémité du pivot (
25
).
• Par la clé appropriée (
29
) visser
complètement la vis de réglage (
24
) et
positionner la vis de réglage (
26
) au
minimum.
REARME MANUAL (solo RG/2MBZ):
Para rearmar el dispositivo de bloqueo se deben
seguir las indicaciones que se encuentran en el
esquema de la pág. 13.Cuando se concluye la
operación de rearmado, el perno de rearmado
(
25
) se debe tirar lentamente hacia abajo (para
evitar que entre en contacto con el perno de
rearmado interno).
CALIBRADO P2
Antes del arranque del sistema, asegurarse
de que el muelle en dotación al regulador sea
adecuado a la presión de regulación requerida.
En las versiones con válvula de alivio, se debe
accionar directamente sobre el tornillo de
regulación (
2
); en las versiones sin válvula de
alivio es necesario desenroscar el tapón (
1
).
Una vez finalizada la operación será preciso
volver a roscar el tapón (
1
) dejándolo en su
posición original.
(versiones RG/2MCS)
• Abrir
lentamente
la
válvula
de
interceptación precedente.
• Posicionar el tornillo de regulación
(
2
) hasta el calibrado mínimo
(completamente desenroscado)
• Poner en marcha el sistema y, controlando
la presión de regulación, enroscar el
tornillo de regulación (
2
) hasta el valor
de presión deseado.
(versiones RG/2MBZ)
• Desenroscar el tapón (
23
).
• Desatornille y quite la parte final del perno
(
25
).
• Utilizando la llave especial (
29
) enroscar
completamente los tornillos de regulación
(
24
) y poner al mínimo el tornillo de
regulación (
26
).


