28
X.200
Digital X Bus
•
Channel linking allow you to control a pair of
channels at the same time. All channel param-
eters can be linked, or just selected parameters.
For instance, in many cases only the faders
need to be linked; all other parameters should
remain independent for the individual track.
•
Any channel can be linked to any other channel.
•
Linking allows a stereo channel to be input on
two channels and controlled as a pair of con-
secutive faders.
•
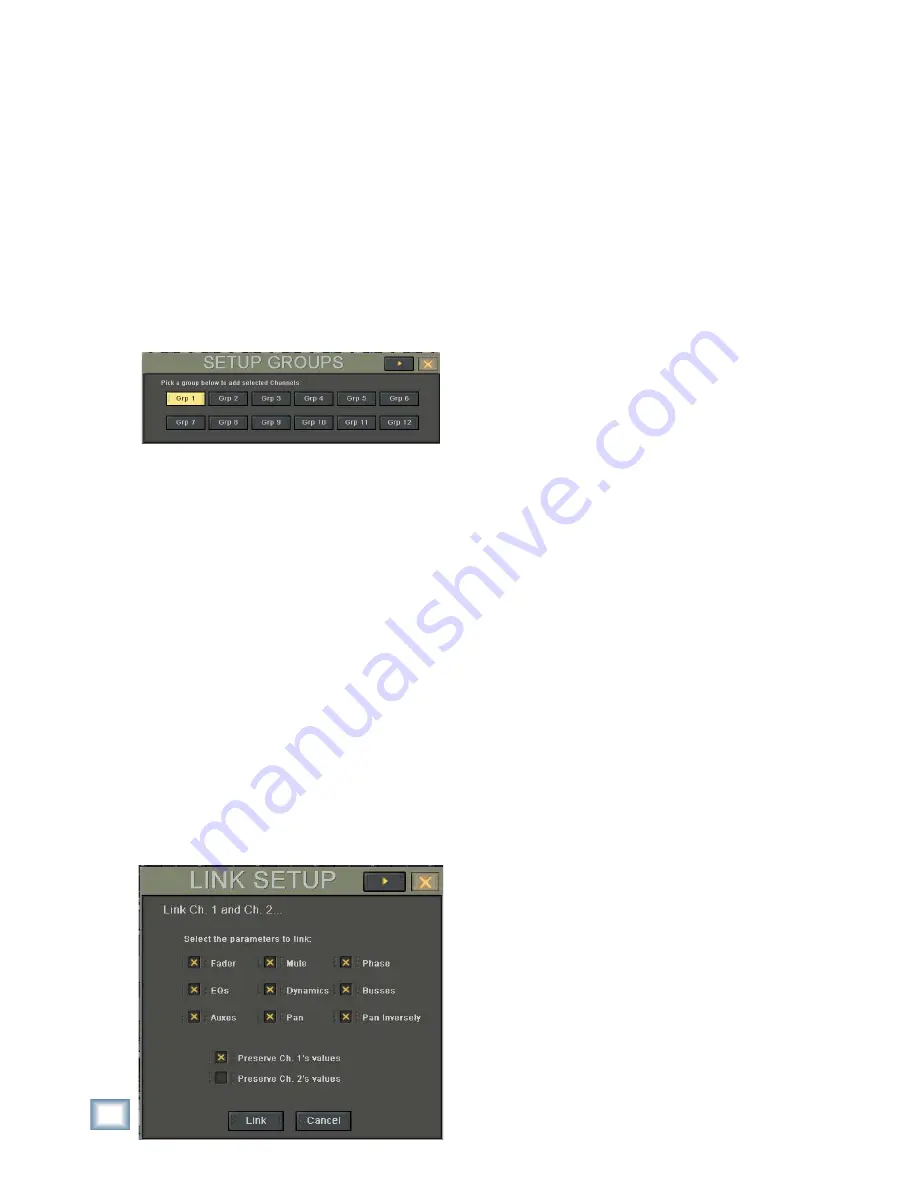
To link a pair of channels, select the left channel
of an adjacent pair and choose Link Channels…
from the Channel menu, or press Ctrl+L on the
keyboard. The Link Setup window appears.
•
To link a pair of non-adjacent channels, select
the fi rst channel, then SHIFT+SELECT the
second one, then select Link Channels from the
Channel menu.
•
Select the parameters that you want linked
between the channels. All checked parameters
are adjusted together for both linked channels.
•
Select how you want the channels linked. In
this case, we are linking channel 1 and 2.
Check
“Preserve Ch. 1’s values” to copy channel
1’s parameters over to channel 2.
Check
“Preserve Ch. 2’s values” to copy channel
2’s parameters over to channel 1.
•
Click the Link button to link the channels you
have selected, or click Cancel to cancel the link-
ing process.
•
To link a pair of channels from the control sur-
face, press and hold the SELECT buttons of the
two adjacent channels you wish to link. This
opens the Link Setup window.
•
Select Pan Inverse to have the pans linked
inversely. This means that rotating the pan
control on one channel causes the pan control
on the linked channel to rotate in the opposite
direction.
UnLink Channels (Ctrl+U)
•
Removes a link between channels.
•
Select a linked channel and then select Unlink
Channels in the Channels menu.
Faders to Unity (Ctrl+])
•
Sets the selected channel faders to unity.
•
Affects faders only (including Master L/R faders).
Does not affect any other channel parameters.
•
Click Save to update the channel preset with
the current selected channel’s settings. All the
channel parameters (EQ, Dynamics, and DSP
Insert patch points) are saved as well.
•
Highlight the desired preset and click Load to
copy the preset settings to the selected channel.
•
Click the Preview box to observe the channel
preset settings on the selected channel before
clicking Load.
•
Click Change Folder to organize channels into
logical groups: band name, instrument type,
singers, drums, guitars, etc.
Setup Groups (Ctrl+G)
•
Provides a convenient way to group faders for
control by a group master fader in the GROUPS
fader bank.
•
Simply select the group to which you want to as-
sign channels, and then select those channels on
the console.
•
This does not override any previous group set-
tings outside the selected channels; however, a
channel can only be assigned to one group. The
most current group selection does override a
previous channel group assignment.
•
This feature provides a way to add faders to an
already existing group.
Un-Group
•
Provides an easy way to remove channels from
a previously established group.
•
Select some or all of the grouped channels to re-
move the selected channel(s) from group status.
Link Channels… (Ctrl+L)
Содержание X.200
Страница 1: ...OWNER S MANUAL X 200 Manual Rev 1 0 4 March 7 2005...
Страница 61: ...61 Owner s Manual Owner s Manual...
Страница 82: ...82 X 200 Digital X Bus...
Страница 93: ...93 Owner s Manual Owner s Manual...
Страница 94: ...94 X 200 Digital X Bus Index...
Страница 95: ...95 Owner s Manual Owner s Manual...


