SP260 2x6 Spe
ak
er Pr
oc
es
sor
14
SP260 2x6 Speaker Processor
Utilities
As mentioned earlier, there are three main utility
menus to choose from:
• System Utilities
• Preset Utilities
• Security Utilities
Within each utility menu, an array of sub-menus are
available. We will go through each utility, each sub-
menu, how to get there, how to edit and change settings
and what each wheel and button does in each situation.
When navigating menus, the current setting
for any parameter will be indicated with an
asterisk [*] making it easy to get back where
you started.
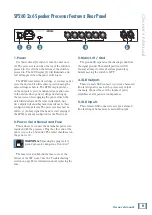
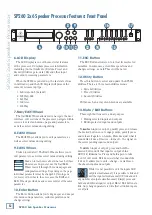
Press the Utility Button [12] to open the Utility
Menu.
Use the Nav/Edit1 Wheel [7] to navigate between the
three utility menus: System Utilities, Preset Utilities
and Security Utilities.
Press the ESC button [11] to return to the main
screen. We’re here to learn about Utilities, so no need to
ESC out of here at this point!
Press the Enter Button [10] to enter and edit the
selected Utilities menu. This is how we reach the
sub-menus of the Utilities.
System Utilities
Turn the Nav/Edit1 Wheel until System Utilities is
presented and press the Enter Button [10] to reach the
System Utilities sub-menus as listed below:
• System Setup
• Delay Units
• Ramps on changes
• Software Version
We will go through each of these sub-menus, one-by-
one (and in order), but know that...
(1) The Nav/Edit1 Wheel [7] is used to navigate
between the four System Utilities.
(2) The ESC button [11] is used to return to the
System Utilities menu.
(3) The Enter Button [10] is used to enter and edit
the chosen System Utility.
Without further ado, press the Enter Button [10] to
enter System Setup.
System Setup
System Setup is where the processor is configured
for your particular loudspeaker system. It configures
channel names, input routing to outputs and provides
starting points for crossover setups.
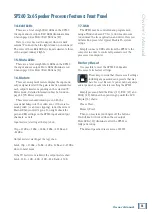
The five options are listed below. Here, turn the
Edit2 [8] or Edit3 [9] Wheel to scroll between the
different System Setup choices.
• 2Sub [default]
Two full-range loudspeaker pairs and
a pair of [mono by default] subwoofers
• Sub
Two bi-ampable full-range loudspeakers
and a pair of [mono by default] subwoofers
• 2x3Way
Two tri-ampable full-range loudspeakers
• 3xStereo
Three full-range loudspeaker pairs
• 1x6Way
Mono 6-way setup
Once you have decided on a system, press the Enter
Button [10] twice: once to select and again to confirm.
The outputs will automatically mute once updated
and the processor returns to the System Setup splash
screen.
You may configure the SP260 for other
scenarios by adjusting the available
parameters. If you are creating a custom
setup, choose the setup that most closely resembles
your system, then tweak from there.
Press the ESC button [11] to return to the System
Utility menu without making any changes.
Delay Units
This is where to choose units used when adjusting
the input and output delay values. You will be presented
with three options here:
• Unit : Time(ms)
• Unit : Distance(m) [default]
• Unit : Distance(feet)
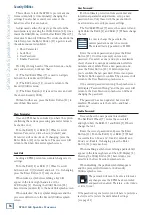
Turn the Edit2 [8] or Edit3 [9] Wheel to
scroll between these three choices. Press the
Enter Button [10] once a unit of delay has been
decided. The processor will return to the Delay
Units splash screen. Or press the ESC button [11] to
return to the System Utility menu without making any
changes.

