24
ONYX 1200F
ONYX 1200F
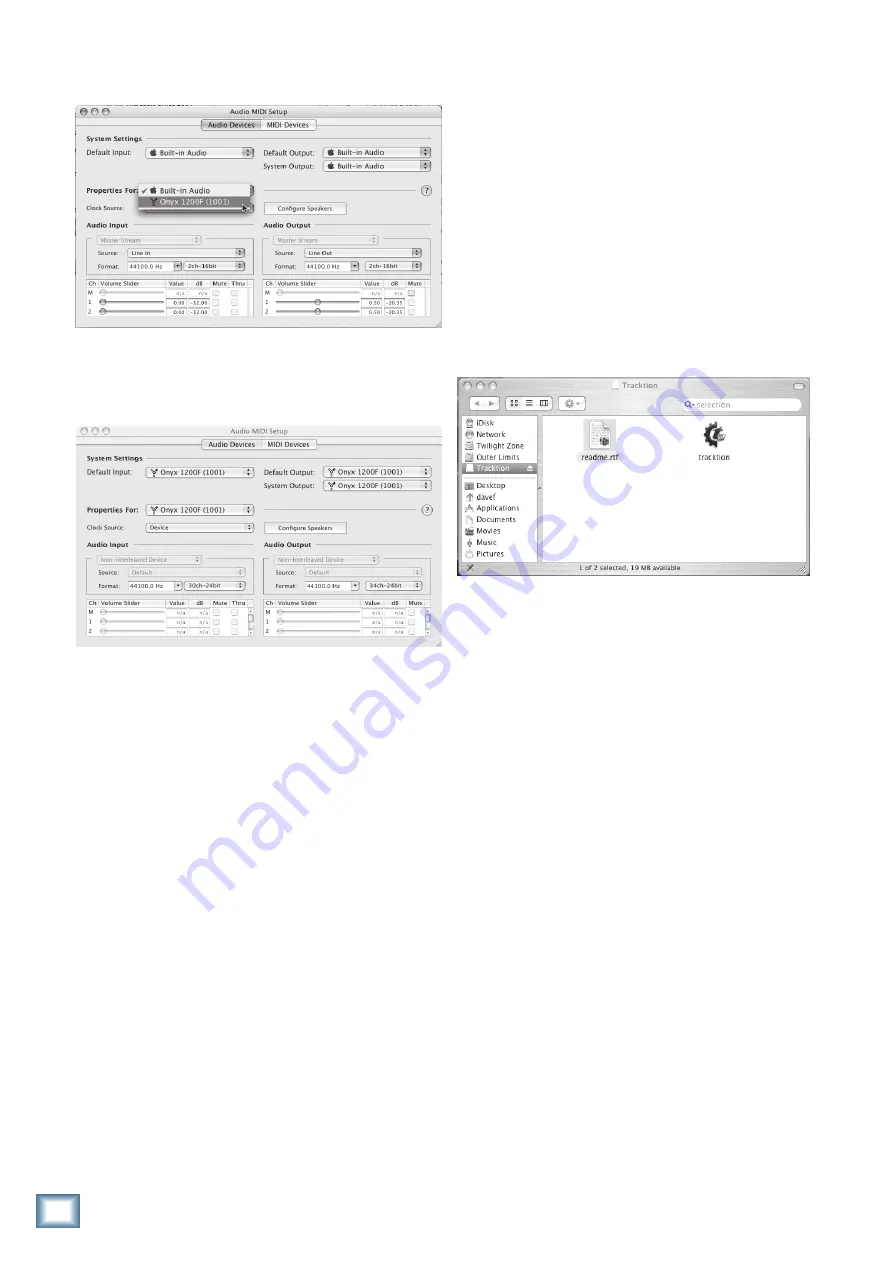
3. Click the Audio Devices tab, and select Onyx 1200F
in the “Properties For” drop-down box.
4. Here you can see the settings for the Onyx 1200F.
You can also choose to use the Onyx 1200F as your
default input or output, as well as designate it to be
used for system sound output.
5. You’re ready to go with any Mac OS X Core Audio
host application (i.e., Tracktion, Logic, Cubase,
Nuendo, Live, Digital Performer, etc.).
The Onyx 1200F should now appear as a 30x34 audio
interface available for any DAW application that you
have installed on your computer.
Note:
It is still necessary to select the Onyx 1200F as
the audio device in the DAW software application’s
“Settings” window.
Installing Tracktion
Your Onyx 1200F also came with the full version of
Tracktion, our easy-to-use multitrack recording and
sequencing software for the PC and Mac.
Note:
After installing Tracktion, be sure to check our
website periodically for software updates
(www.mackie.com).
To install Tracktion on a PC running Windows XP:
1. Insert the CD-R or DVD-R into the CD or DVD drive.
2. Browse to the CD or DVD directory and open the
“Tracktion” folder. You can copy the folder called
“Tracktion Documentation” to your hard drive if you
like, to make it easier to access.
3. Double-click the file “TracktionSetup.exe”.
4. Follow the instructions in the Tracktion Installer to
complete the installation.
To install Tracktion on a Mac running OS X
(version 10.3.9 or later):
1. Insert the CD-R or DVD-R into the CD or DVD drive.
2. Double-click the CD or DVD icon on the desktop and
double-click the file named “TracktionSetup.dmg”.
3. A Tracktion window opens. Drag the Tracktion icon
from the Tracktion window into the Applications folder.
4. Double-click the Tracktion file in the Applications
folder to open Tracktion.
Authorizing Tracktion
There is an authorization code on the sleeve of the
Tracktion CD-R or DVD-R that came with your Onyx
1200F. You can authorize the software from within
Tracktion or by going to http://my.mackie.com.
Using the Onyx 1200F Console
The Onyx 1200F Console does two things:
1) It lets you adjust master settings for the 1200F like
sample rate, etc., and 2) It lets you use the DSP Mixer
to create independent zero latency mixes for each of the
eight analog outputs, eight digital A outputs, eight digital
B outputs, two S/PDIF/AES outputs, and four stereo
headphone outputs.
There are six tabs along the top of the Onyx 1200F
Console and four buttons along the bottom. The buttons
on the bottom select the group of outputs affected by the
matrix mixer (analog outputs, digital outputs A, digital
outputs B, or headphones).
The first four tabs on the top change depending on
which group of outputs is selected, but each tab repre-
sents a pair of outputs. The SPDIF/AES and Settings tabs
remain the same regardless of which output group is
selected.


