Draining Your Spa
Note:
Always turn the circuit breaker off when
you drain your spa. Do not turn the spa heater back on
until you have full flow coming from the jets for sev-
eral minutes.
High concentrations of impurities caused by water
evaporation, body oils, perfumes, and other contami-
nants may accumulate in the spa and cannot be filtered
out. Consequently, it is advisable to drain your spa and
refill it with fresh water every six to eight weeks or
more often, depending on the amount of use.
All spas are equipped with both external and inter-
nal drains. The external drain is used for draining the
spa. The internal drain(s) are used to remove water
from internal hoses when Winterizing your spa (See
pg. 25) or if the water is severely contaminated.
Note:
Use a standard garden hose to direct the water to
an appropriate disposal area.
The
external
drain valve is located behind the
niche door at the base of the front side of the panel.
Open the niche door and pull the drain out approxi-
mately one foot. Remove the cap, attach a garden
hose, and turn the valve handle 90° counter-clockwise.
When flow stops, close the valve, remove garden hose,
replace the cap, and push the hose back into the niche.
The
internal
drain hose(s) are located behind the
front access panel. Remove the access panel screws
and the access panel. Locate the drain hose(s). For
each hose drain valve, remove the cap, attach the gar-
den hose, and turn the valve handles, located on the
drain valve body, 90° counter-clockwise. Water will
begin to flow. When all water has been evacuated,
turn the valve handle clockwise until it stops. Remove
garden hose and replace the cap. Repeat for each
internal drain hose.
Note:
Do
NOT
attempt to use the pump to drain the
spa.
Note:
Close and replace caps on all drains
prior
to
refilling the spa.
Note:
When refilling the spa, you may need to bleed
air from the system. Refer to Priming Your Spa, pg. 10,
for instructions.
Filter Maintenance
Note:
It is not necessary to drain the spa in order to
clean the filter.
The removable filter cartridge is located in the fil-
ter canister behind the skimmer. The filter should be
inspected/cleaned monthly during normal use, and
more often when spa use is heavy.
Your filtration system may also include First Filter,
an additional filter that is placed on top of the skimmer
basket and pressed into place. This filter aids the col-
lection of microscopic organic matter, debris, hair,
soap residue and body oils. To clean this filter,
remove, rinse or soak in cartridge cleaner as directed,
and reinstall. When First Filter is no longer white after
cleaning, replace with a new filter. These can be pur-
chased from your dealer.
Keep the filter cartridge clean!
Clean the filter
cartridge at least once every 90 days. A clogged filter
decreases performance and degrades water quality.
To clean the filter cartridge:
1. Turn the pump off.
2. Remove skimmer lid on top of spa.
3. Remove strainer basket.
4. Remove filter cartridge from the filter canister by
grasping the top and lifting upwards.
5. Soak filter in a commercial filter cleaner/ degreas-
er, available from your Coleman Spa® dealer, per
manufacturer’s instructions. Hose out filter car-
tridge or replace with new cartridge, if needed.
6. Place filter cartridge back into filter canister. When
the spa is empty, the weir door may block the fil-
ter canister. You must hold it out of the way when
reinstalling the cartridge. When the spa is full, the
door will float so you will have easy access for
installing the filter cartridge.
7. Replace strainer basket and skimmer lid.
8. Turn the pump ON.
Replacing the filter cartridge annually is recom-
mended to maintain optimum performance. Filter
maintenance depends on usage.
16
Содержание California Cooperage 2006
Страница 1: ...Owner s Manual...
Страница 28: ...California Cooperage System Wiring Model 165 23...
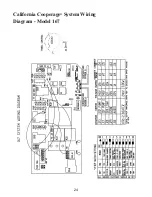
Страница 29: ...24 California Cooperage System Wiring Diagram Model 167...


