R7I4DECT-1-PA8A
5-2-55, Minamitsumori, Nishinari-ku, Osaka 557-0063 JAPAN
Phone: +81(6)6659-8201 Fax: +81(6)6659-8510 E-mail: [email protected]
EM-7779-F Rev.1 P. 4 / 11
PC CONFIGURATOR
The following parameter items can be configured with the PC configurator software (model: R7CFG).
Refer to the users manual of the software for detailed operations.
■
CHANNEL INDIVIDUAL SETTING
PARAMETER
SETTING RANGE
DEFAULT
Unused channels
Invalid (checked),
Valid (unchecked)
Valid
Maximum accumulated pulse count
1 to 4294967295
4294967295
Overflow reset value
0 or 1
0
Preset pulse count
0 to max. accumulated pulse count
0
■
CHANNEL BATCH SETTING
PARAMETER
SETTING RANGE
DEFAULT
Edge direction for counting pulses
Falling edge (DI-ON),
Rising edge (DI-OFF)
Falling edge (DI-ON)
Edge direction for resetting pulse
count by reset terminal
Falling edge (DI-ON),
Rising edge (DI-OFF)
Falling edge (DI-ON)
Enabling or disabling pulse count
reset by reset terminal
Enable or Disable
Disable
Enabling or disabling pulse count
reset / preset by master
Enable or Disable
Disable
MOUNTING INSTRUCTIONS
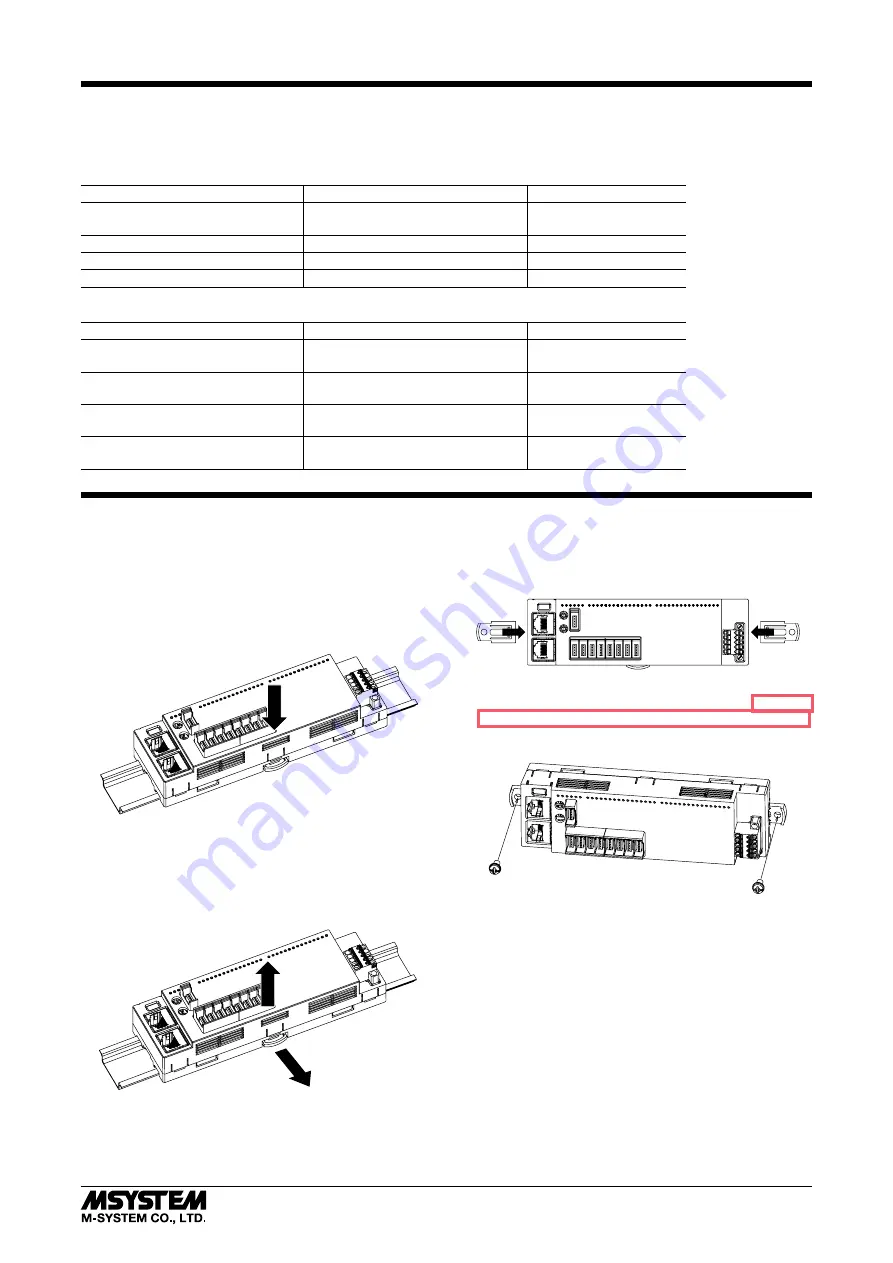
■
DIN RAIL MOUNTING (PARALLEL)
• Mounting the unit
1) Hook the upper hook at the rear side of the base onto the
DIN rail.
2) Push the lower part of the unit in the direction of the ar-
row until the base is firmly fixed to the DIN rail.
1
2
• Removing the unit
1) Push down the slider using a minus screwdriver.
2) Pull out the lower part of the unit.
3) Remove the upper part of the unit from the DIN rail.
1
2
3
■
WALL MOUNTING
1) Insert the two DIN rail mounter sliders until they click
once, as shown below.
1
1
2) Mount the unit with M4 screws referring to the “MOUNT-
ING REQUIREMENTS unit: mm (inch)” on page 6.
(Torque: 1.4 N∙m)


