


FinishLynx P
LATINUM
Package Quick Start Guide - For Vision Cameras
5
Step 8:
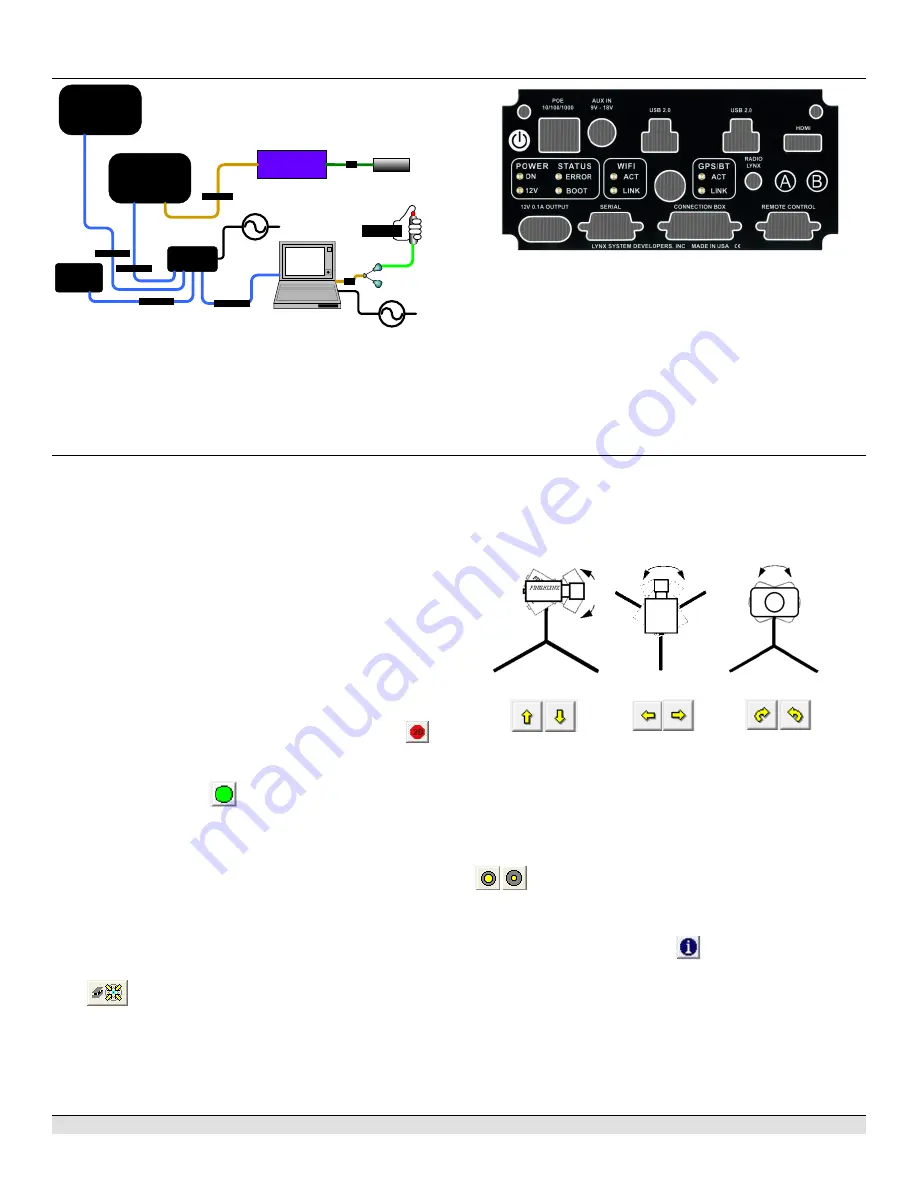
Connect the Cables to your Cameras
AC
EtherLynx Vision
Primary Camera
Connection Box
Sensor
DB 15 Cable
XLR
Capture
Button
Cat 5 Ethernet
IdentiLynx
Camera
Cat 5 Ethernet
AC
PoE
Switch
USB
Button Splitter
EtherLynx Vision
Reverse Camera
Cat 5 Ethernet
Cat 5 Ethernet
Primary
camera
(Marked TIMING ENABLED on camera ID
plate on base of camera)
1. Connect an Ethernet cable to the network connection on
your computer and the other end to a port on the Power
over Ethernet switch
2. Connect an Ethernet cable between the back of the Primary
camera labeled
POE 10/100/1000
and a port on the Power
over Ethernet switch.
3. Turn on the camera by pressing and holding the white
power button on the back.
Step 9:
Align the Primary Camera
NOTE
: The EtherLynx Vision camera can be aligned using either
1-D mode or 2-D EasyAlign mode. We recommend using
EasyAlign. If you are using an older model EtherLynx camera,
however, it must be aligned using classic 1-D mode.
NOTE: If running a wireless Ethernet card on your
computer, we recommend that you disable it before starting
FinishLynx and while the camera is booting.
Start FinishLynx
. Wait while the green status bar in the lower
right corner of the screen completes its cycle. After this is
complete, repeat Step 8 parts 3-5 to connect, power, and boot
the reverse angle camera. Allow the green status bar to
complete its cycle.
Align Camera in EasyAlign 2-D Video Mode
1.
Activate EasyAlign
by clicking on the 2-D Align Icon
in
the top left-hand corner of the FinishLynx
Hardware
Control
screen.
2. The icon turns green
and the 2-D video viewer appears
within the software. The 2-D viewer makes it easy to see
how your camera is aligned on the finish.
The goal is to
align the green vertical line on the painted white finish
line and near its front edge.
3.
Adjust Remote Lens/Positioner Controls
–
Adjust the
remote lens/position controls on the right of the FinishLynx
hardware control screen.
Center Remote Camera Positioner
Click
to center the camera automatically using the remote
positioner.
Remote Camera Tilt, Pan & Swivel
Use the remote
Tilt, Pan
, and
Swivel
buttons to adjust the
orientation of the camera on the finish.
You want to ensure the green vertical line is perfectly aligned on
the white finish line, and that all lanes are visible in the viewer.
Tilt
Pan
Swivel
Have your assistant run through the finish line and watch where
they appear on the computer monitor. The
goal is for the
runner’s torso to be fully visible in both the inside and outside
lanes. Once the camera's position is correct, you can optimize
the remote lens settings.
Remote Iris (adjusts amount of light in lens)
Enable the Auto-Iris feature to allow the software to remotely and
automatically adjust the camera iris as the lighting changes:
a. Access the Camera Settings
.
b. Under the
Parameters
tab, set
Gain Method
: to
AGC
.
c.
Check
Auto-Iris
. Click
Ok
. The iris will now open or close to
maintain the AGC Parameters.


