background image

User Manual of Digital Video Recorder 


68 

5.9


Files Protection


Purpose: 

You can lock the recorded files or set the HDD property to Read-only to protect the record files from being 

overwritten. 


Protect file by locking the record files 

Steps: 

1.


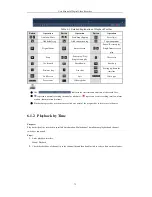
Enter Playback setting interface. 

Menu> Export 


Figure 5. 23


Export 


2.


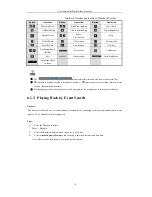
Select the channels you want to investigate by checking the checkbox to 

3.


Configure the record type, file type, start time and end time. 

4.


Click 

Search

 to show the results. 


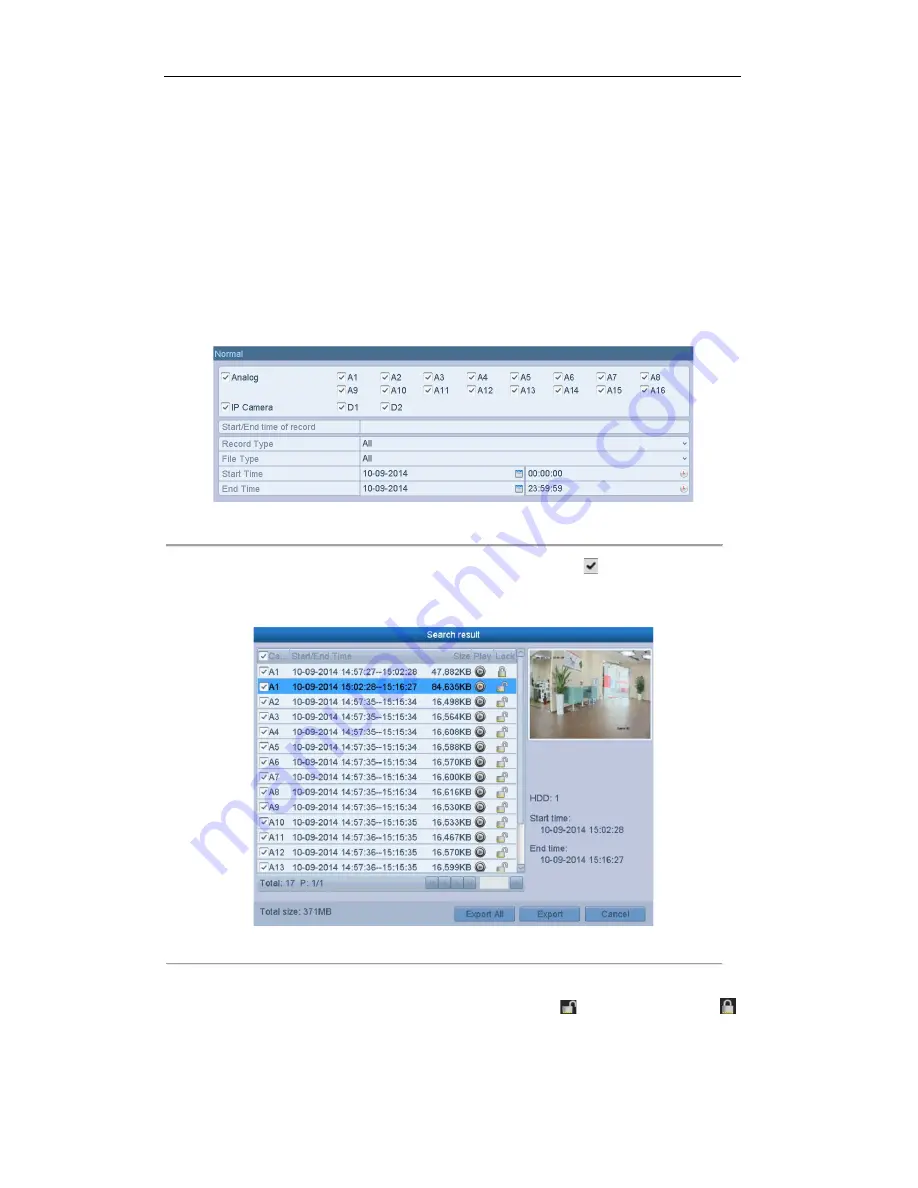
Figure 5. 24


Export- Search Result 


5.


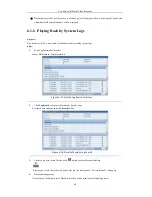
Protect the record files. 

1)


Find the record files you want to protect, and then click the 

  icon  which will turn  to 

indicating that the file is locked. 


Содержание TVR series

Страница 1: ...Digital Video Recorder User Manual ...

Страница 2: ...er REGARDING TO THE PRODUCT WITH INTERNET ACCESS THE USE OF PRODUCT SHALL BE WHOLLY AT YOUR OWN RISKS OUR COMPANY SHALL NOT TAKE ANY RESPONSIBILITES FOR ABNORMAL OPERATION PRIVACY LEAKAGE OR OTHER DAMAGES RESULTING FROM CYBER ATTACK HACKER ATTACK VIRUS INSPECTION OR OTHER INTERNET SECURITY RISKS HOWEVER OUR COMPANY WILL PROVIDE TIMELY TECHNICAL SUPPORT IF REQUIRED SURVEILLANCE LAWS VARY BY JURISDI...

Страница 3: ...erference that may cause undesired operation EU Conformity Statement This product and if applicable the supplied accessories too are marked with CE and comply therefore with the applicable harmonized European standards listed under the EMC Directive 2004 108 EC the RoHS Directive 2011 65 EU 2012 19 EU WEEE directive Products marked with this symbol cannot be disposed of as unsorted municipal waste...

Страница 4: ... safety regulations of the nation and region Please refer to technical specifications for detailed information Input voltage should meet both the SELV Safety Extra Low Voltage and the Limited Power Source with 100 240 VAC or 12 VDC according to the IEC60950 1 standard Please refer to technical specifications for detailed information Do not connect several devices to one power adapter as adapter ov...

Страница 5: ...is properly secured to a rack or shelf Major shocks or jolts to the unit as a result of dropping it may cause damage to the sensitive electronics within the unit Use the device in conjunction with an UPS if possible Power down the unit before connecting and disconnecting accessories and peripherals A factory recommended HDD should be used for this device Improper use or replacement of the battery ...

Страница 6: ...ck setting menu is provided for live view The selected live view channel can be shielded Motion detection video tampering detection video exception alarm video loss alarm and VCA alarm functions Privacy mask Several PTZ protocols supported PTZ preset patrol and pattern Zooming in out by clicking the mouse and PTZ tracing by dragging mouse HDD Management 1 SATA hard disk can be connected Each disk ...

Страница 7: ...ce center sending email and alarm output VCA detection alarm line crossing detection and intrusion detection is supported Support coaxial alarm Automatic restore when system is abnormal Other Local Functions Manual and automatic video quality diagnostics Users can operate by mouse and remote control Three level user management admin user can create many operating account and define their operating...

Страница 8: ... FTP server RS 485 transparent channel transmission Alarm and exception information can be sent to the remote host Remotely start stop recording Remotely start stop alarm output Remote PTZ control Remote JPEG capture Two way audio and voice broadcasting Embedded WEB server Development Scalability SDK for Windows and Linux system Source code of application software for demo Development support and ...

Страница 9: ...Monitor 35 3 2 4 Main Aux Output Switching 36 3 2 5 Quick Setting Toolbar in Live View Mode 36 3 3 Channel zero Encoding 38 3 4 Adjusting Live View Settings 39 3 5 Manual Video Quality Diagnostics 41 3 6 User Logout 42 Chapter 4 PTZ Controls 43 4 1 Configuring PTZ Settings 44 4 2 Setting PTZ Presets Patrols Patterns 45 4 2 1 Customizing Presets 45 4 2 2 Calling Presets 45 4 2 3 Customizing Patrols...

Страница 10: ...ti channel 84 Chapter 7 Backup 85 7 1 Backing up Record Files 86 7 1 1 Backing up by Normal Video Search 86 7 1 2 Backing up by Event Search 87 7 1 3 Backing up Video Clips 90 7 2 Managing Backup Devices 92 Chapter 8 Alarm Settings 95 8 1 Setting Motion Detection 96 8 2 Setting Sensor Alarms 98 8 3 Detecting Video Loss 98 8 4 Detecting Video Tampering 101 8 5 Detecting VCAAlarm 103 8 6 Setting All...

Страница 11: ...uring HDD Error Alarms 138 Chapter 11 Camera Settings 139 11 1 Configuring OSD Settings 140 11 2 Configuring Privacy Mask 141 11 3 Configuring Video Parameters 143 Chapter 12 DVR Management and Maintenance 144 12 1 Viewing System Information 145 12 2 Searching and Exporting Log Files 145 12 3 Importing Exporting IP Camera Info 147 12 4 Importing Exporting Configuration Files 148 12 5 Upgrading Sys...

Страница 12: ...User Manual of Digital Video Recorder 12 Chapter 1 Introduction ...

Страница 13: ...hen none of the above condition is met ALARM the light is red when there is an alarm occurring HDD the indicator flickers red when HDD is reading writing Tx Rx TX RX indicator flickers green when network connection is functioning normally 2 USB Interfaces Universal Serial Bus USB ports for additional devices such as USB mouse and USB Hard Disk Drive HDD 3 Composite Keys 1 MENU Enter numeral 1 Acce...

Страница 14: ...tton to switch the main and auxiliary output 4 SHIFT Switch between the numeric or letter input and functions of the composite keys Input letter or numbers when the light is out Realize functions when the light is red 5 Control Buttons Directional buttons In menu mode the direction buttons are used to navigate between different fields and items and select setting parameters In playback mode the Up...

Страница 15: ...larm indicator turns red when a sensor alarm is detected HDD HDD indicator blinks in red when data is being read from or written to HDD Tx Rx TX RX indictor blinks in green when network connection is functioning properly 5 DVD ROM Slot for DVD ROM 6 DIRECTION The DIRECTION buttons are used to navigate between different fields and items in menus In Playback mode the Up and Down button is used to sp...

Страница 16: ...direct access to manual record interface manually enable disable record 8TUV PTZ Enter numeral 8 Enter letters TUV Access PTZ control interface 9WXYZ PREV Enter numeral 9 Enter letters WXYZ Multi camera display in live view In Playback mode or Menu Playback Tag playback interface this button can be used to delete the selected tag 0 A Enter numeral 0 Switch between input methods upper and lowercase...

Страница 17: ... be installed before operation Figure 1 3 Remote Control The keys on the remote control closely resemble the ones found on the front panel Refer to Table 1 3 they include Table 1 3 Description of the IR Remote Control Buttons No Name Description 1 POWER Power on off the device 2 DEV Enables Disables Remote Control 3 Alphanumeric Buttons Same as Alphanumeric buttons on front panel ...

Страница 18: ...X button on front panel Troubleshooting Remote Control Make sure you have install batteries properly in the remote control And you have to aim the remote control at the IR receiver in the front panel If there is no response after you press any button on the remote follow the procedure below to troubleshoot Steps 1 Go into Menu Settings General More Settings by operating the front control panel or ...

Страница 19: ...st from your provider The operation of the mouse Table 1 4 Description of the Mouse Control Name Action Description Left Click Single Click Live view Select channel and show the quick set menu Menu Select and enter Double Click Live view Switch between single screen and multi screen Click and Drag PTZ control Wheeling Privacy mask and motion detection Select target area Digital zoom in Drag and se...

Страница 20: ... Description Figure 1 4 Soft Keyboard Description of the buttons on the soft keyboard Table 1 5 Description of the Soft Keyboard Icons Icons Description Icons Description English Capital English Numbers Symbols Lowercase Uppercase Backspace Space Enter Exit ...

Страница 21: ...l Figure 1 5 Rear Panel of 4 8 16ch 720p Series without alarm Figure 1 6 Rear Panel of 4 8 16ch 720p Series with alarm Table 1 6 Description of Front Panel No Item Description 1 VIDEO IN BNC interface for TVI and analog video input 2 AUDIO IN RCA connector ...

Страница 22: ...tput 3 AUDIO IN RCA connector 4 USB Port Universal Serial Bus USB port for additional devices 5 HDMI HDMI video output connector 6 VGA DB15 connector for VGA output Display local video output and menu 7 AUDIO OUT RCA connector 8 Network Interface Connector for network 9 RS 485 Interface Connector for RS 485 devices T and T pins connect to R and R pins of PTZ receiver respectively D D pin connects ...

Страница 23: ...User Manual of Digital Video Recorder 23 Chapter 2 Getting Started ...

Страница 24: ... is HIGHLY recommended that an Uninterruptible Power Supply UPS be used in conjunction with the device 2 Turn on the power switch on the rear panel and the Power indicator LED should turn on indicating that the unit begins to start up 3 After startup the Power indicator LED remains on Shutting down the DVR Steps There are two proper ways to shut down the DVR To shut down the DVR OPTION 1 Standard ...

Страница 25: ...o Recorder 25 Rebooting the DVR While in the Shutdown menu Figure 2 1 you can also reboot the DVR Steps 1 Enter the Shutdown menu by clicking Menu Shutdown Click the Logout button to log out or the Reboot button to reboot the DVR ...

Страница 26: ... some important settings of the device If you don t want to use the Start Wizard at that moment click Exit You can also choose to use the Start Wizard next time by leaving the Start wizard when device starts checkbox checked 2 Click Next to enter the date and time settings window Figure 2 4 Date and Time Settings 3 After the time settings click Next button which will take you back to the General N...

Страница 27: ...5 Set the parameters of port No Cloud P2P Auto UPnP or DDNS if required 6 Click Next button after configuring the advanced network parameters which will take you to the HDD Management window shown in Figure 2 6 Figure 2 6 HDD Management 7 To initialize the HDD click the Init button Initialization will remove all the data saved in the HDD 8 Click Next button to enter the Record Settings window as s...

Страница 28: ...User Manual of Digital Video Recorder 28 Figure 2 7 Record Settings 9 Click Copy to copy the recording setting to other cameras 10 Click OK to save the settings and exit the wizard ...

Страница 29: ... 9 Note For the 4 ch device 1 ch IP camera can be connected and for other models up to 2 ch IP cameras can be connected OPTION 1 Steps 1 Right click the mouse when you in the live view mode to show the right click menu Right click Menu 2 Select Add IP Camera in the pop up menu to enter the IP Camera Management interface Figure 2 8 Adding IP Camera Interface 3 The online cameras with same network s...

Страница 30: ...ormation of camera Delete the IP camera Advanced settings of the camera Update the IP camera 4 To add other IP cameras 1 Click the Custom Adding button to pop up the Add IP Camera Custom interface Figure 2 9 Custom Adding IP Camera Interface 2 You can edit the IP address protocol management port and other information of the IP camera to be added 3 Click Add to add the camera OPTION 2 Steps 1 Enter...

Страница 31: ...eters of the camera Add the detected IP camera The camera is connected you can click the icon to get the live view of the camera The camera is disconnected you can click the icon to get the exception information of camera Delete the IP camera Advanced settings of the camera Update the IP camera 3 For the encoders with multiple channels only check the checkbox of Channel No in the pop up window and...

Страница 32: ...User Manual of Digital Video Recorder 32 Chapter 3 Live View ...

Страница 33: ... mode Live View Icons In the live view mode there are icons at the right top of the screen for each channel showing the status of the record and alarm in the channel so that you can know whether the channel is recorded or whether there are alarms occur as soon as possible Table 3 1 Description of Live View Icons Icons Description Alarm video loss tampering motion detection or sensor alarm Record m...

Страница 34: ...is HDMI VGA CVBS This means if the HDMI is used it will be the main output If the HDMI is not used the VGA output will be the main output See the table below Table 3 2 Priorities of Interfaces HDMI VGA CVBS Main output Auxiliary output 1 HDMI VGA 2 HDMI CVBS 3 VGA CVBS 4 CVBS means the interface is in use means the interface is out of use or the connection is invalid And the HDMI VGA and CVBScan b...

Страница 35: ...PTZ Control A shortcut to enter the PTZ control interface of the selected camera Aux Monitor Switch to the auxiliary output mode and the operation for the main output is disabled If you enter Aux monitor mode and the Aux monitor is not connected the mouse operation is disabled you need to switch back to the Main output with the F1 button on front panel or VOIP MON button on IR remote control and t...

Страница 36: ...n CVBS from the right click menu on the CVBS output monitor 4 On the pop up message box click Yes to restart the device to enable the CVBS output as the main output You can select the Menu Output Mode under Menu Configuration More Settings to Auto or HDMI VGA and then restart the device to switch the main output back to HDMI VGA output 3 2 5 Quick Setting Toolbar in Live View Mode On the screen of...

Страница 37: ...cording to the real situation Standard for general lighting conditions default Indoor the image is relatively smoother Dim Light the image is smoother than the other two modes Outdoor the image is relatively clearer and sharper The degree of contrast and saturation is high Figure 3 3 Image Settings You can adjust the image parameters including brightness contrast saturation hue sharpness and denoi...

Страница 38: ...ithout affecting the image quality channel zero encoding is supported as an option for you Steps 1 Enter the Live View Settings interface Menu Configuration Live View 2 Select the Channel Zero Encoding tab 3 Check the checkbox after Enable Channel Zero Encoding 4 Configure the Frame Rate Max Bitrate Mode and Max Bitrate 5 Click the Apply button to activate the settings After you set the Channel Ze...

Страница 39: ...lay mode to be used for Live View Dwell Time The time in seconds to dwell between switching of channels when enabling auto switch in Live View Enable Audio Output Enables disables audio output for the selected camera in the live view mode Volume Adjust the volume of the audio output Event Output Designates the output to show event video if available you can select a different video output interfac...

Страница 40: ...display Setting an X means the window will not display any camera 3 You can also click to start live view of all channels in order and click to stop live view of all channels Click or to go to the previous or next page 4 Click the Apply button ...

Страница 41: ...iagnostics Figure 3 6 Video Quality Diagnostics 2 Check the checkboxes to select the channels for diagnostics 3 Check the check box to enable video quality diagnostics Click Handling and the message box for arming pops up For getting an accurate feedback it is recommended to set the testing schedule in the daytime Figure 3 7 Diagnostics Result Connect the camera to the device for the video quality...

Страница 42: ...ode and if you want to do some operation you need to enter user name and password to log in again Steps 1 Enter the Shutdown menu Menu Shutdown Figure 3 8 Shutdown 2 Click Logout Note After you have logged out the system menu operation on the screen is invalid It is required a user name and password to login the system ...

Страница 43: ...User Manual of Digital Video Recorder 43 Chapter 4 PTZ Controls ...

Страница 44: ...3 Click the RS 485 Settings button to set the RS 485 parameters 4 Enter the parameters of the PTZ camera All the parameters should be exactly the same as the PTZ camera parameters For the Coaxitron camera dome connected you can select the PTZ protocol to HDCAM C Coaxitron or PELCO C Coaxitron Make sure the protocol selected here is supported by the connected camera dome When the Coaxitron protocol...

Страница 45: ...e the directional button to wheel the camera to the location where you want to set preset and the zoom and focus operations can be recorded in the preset as well 3 Enter the preset No 1 255 in the preset text field and click the Set button to link the location to the preset Repeat the steps 2 3 to save more presets You can click the Clear button to clear the location information of the preset or c...

Страница 46: ...o show the general settings of the PTZ control Figure 4 3 PTZ Panel General 4 Click to enter the preset No in the corresponding text field 5 Click the Call Preset button to call it 4 2 3 Customizing Patrols Purpose Patrols can be set to move the PTZ to different key points and have it stay there for a set duration before moving on to the next key point The key points are corresponding to the prese...

Страница 47: ...point to the patrol or you can click the OK button to save the key point to the patrol You can delete all the key points by clicking the Clear button for the selected patrol or click the Clear All button to delete all the key pints for all patrols 4 2 4 Calling Patrols Purpose Calling a patrol makes the PTZ to move according the predefined patrol path Steps 1 Click the button PTZ in the lower righ...

Страница 48: ...nding buttons in the control panel to move the PTZ camera and click the Stop button to stop it The movement of the PTZ is recorded as the pattern 4 2 6 Calling Patterns Purpose Follow the procedure to move the PTZ camera according to the predefined patterns Steps 1 Click the button PTZ in the lower right corner of the PTZ setting interface Or press the PTZ button on the front panel or click the PT...

Страница 49: ...al direction in the predefined range This function is supported by some certain models Steps 1 Enter the PTZ Control interface Menu Camera PTZ Figure 4 9 PTZ Settings 2 Use the directional button to wheel the camera to the location where you want to set the limit and click the Left Limit or Right Limit button to link the location to the corresponding limit The speed dome starts linear scan from th...

Страница 50: ... PTZ Panel One touch 3 Click Linear Scan button to start the linear scan and click the Linear Scan button again to stop it You can click the Restore button to clear the defined left limit and right limit data and the dome needs to reboot to make settings take effect 4 2 9 One touch Park Purpose For some certain model of the speed dome it can be configured to start a predefined park action scan pre...

Страница 51: ...e predefined preset 1 to preset 32 in order after the park time The undefined preset will be skipped Park Patrol 1 The dome starts move according to the predefined patrol 1 path after the park time Park Preset 1 The dome moves to the predefined preset 1 location after the park time The park time can only be set through the speed dome configuration interface by default the value is 5s 4 Click the b...

Страница 52: ...e In PTZ control mode the PTZ panel will be displayed when a mouse is connected with the device If no mouse is connected the icon appears in the lower left corner of the window indicating that this camera is in PTZ control mode Figure 4 12 PTZ Panel Table 4 1 Description of the PTZ panel icons Icon Description Icon Description Icon Description Direction button and the auto cycle button Zoom Focus ...

Страница 53: ...User Manual of Digital Video Recorder 53 Chapter 5 Recording Settings ...

Страница 54: ...General Figure 5 1 HDD General 2 Click Advance to check the storage mode of the HDD 1 Whether the HDD mode is Quota please set the maximum record capacity 2 If the HDD mode is Group you should set the HDD group Figure 5 2 HDD Advanced Steps 1 Enter the Record settings interface to configure the encoding parameters Menu Record Parameters Figure 5 3 Record Parameters 2 Set the parameters for recordi...

Страница 55: ...o be kept in the HDD if the deadline is reached the file will be deleted You can set the expired time to 0 and then the file will not be deleted The actual keeping time for the file should be determined by the capacity of the HDD Redundant Record The redundant record is to decide whether you want the camera to save the record files in the redundant HDD You must configure the redundant HDD in HDD s...

Страница 56: ...ers for sub stream 1 Select the Substream tab Figure 5 5 Sub stream Encoding 2 Select a camera in the camera dropdown list 3 Configure the parameters 4 Click Apply to save the settings 5 Optional If the parameters can also be used to other cameras click Copy to copy the settings to other channels ...

Страница 57: ...o the configured schedule Steps 1 Enter the Record Schedule interface Menu Record Schedule Figure 5 6 Record Schedule 2 Choose the camera you want to configure in the Camera dropdown list 3 Check the checkbox of Enable Schedule 4 Configure the record schedule Edit the schedule 1 Click Edit 2 In the message box you can choose the day to which you want to set schedule 3 To schedule an all day record...

Страница 58: ... with each other Repeat the above steps 1 4 to schedule recording for other days in the week If the schedule can also be set to other days click Copy Figure 5 9 Copy Schedule to Other Days The Holiday option is available when you enable holiday schedule in Holiday settings See Chapter 5 7 Configuring Holiday Record 5 Click OK to save setting and back to upper level menu Draw the schedule 1 Click o...

Страница 59: ...ons 2 Click and drag the mouse on the schedule 3 Click on the other area except for the schedule table to finish and exit the drawing You can repeat step 4 to set schedule for other channels If the settings can also be used to other channels click Copy and then choose the channel to which you want to copy 5 Click Apply in the Record Schedule interface to save the settings ...

Страница 60: ... audio warning notifying the surveillance center sending email and so on Steps 1 Enter the Motion Detection interface Menu Camera Motion Figure 5 12 Motion Detection 2 Configure Motion Detection 1 Choose camera you want to configure 2 Check the checkbox after Enable Motion Detection 3 Drag and draw the area for motion detection by mouse If you want to set the motion detection for all the area shot...

Страница 61: ...ure alarm triggered recording Steps 1 Enter the Alarm setting interface Menu Configuration Alarm 2 Click the Alarm Input tab 1 Select Alarm Input number and configure alarm parameters 2 Choose N O normally open or N C normally closed for alarm type 3 Check the checkbox of Setting 4 Click the button 5 Choose the alarm triggered recording channel 6 Check the checkbox to select channel 7 Click Apply ...

Страница 62: ...e Manual settings interface Menu Manual Figure 5 15 Manual Record 2 Enable manual record Click the status icon before camera number to change it to Or click the status icon of Analog to enable manual record of all channels 3 Disable manual record Click the status icon to change it to Or click the status icon of Analog to disable manual record of all channels After rebooting all the manual records ...

Страница 63: ...y Steps 1 Enter the Record setting interface Menu Record 2 Choose Holiday on the left bar Figure 5 16 Holiday Settings 3 Enable Edit Holiday schedule 1 Click to enter the Edit interface Figure 5 17 Edit Holiday Settings 2 Check the checkbox of Enable 3 Select Mode from the dropdown list There are three different modes for the date format to configure holiday schedule By Month By Week and By Month ...

Страница 64: ...down list or you can draw the schedule on the timeline of Holiday Figure 5 18 Edit Schedule Holiday Up to 8 periods can be configured for each day And the time periods cannot be overlapped each other In the time table of the channel both holiday schedule and normal day schedule are displayed Repeat the above step 4 to set Holiday schedule for other channel If the holiday schedule can also be used ...

Страница 65: ... HDD advanced settings to Group before you set the HDD property to Redundant There should be at least another HDD which is in Read Write status Steps 1 Enter HDD Information interface Menu HDD Figure 5 19 HDD General 2 Select the HDD and click to enter the Local HDD Settings interface 1 Set the HDD property to Redundant Figure 5 20 HDD General Editing 2 Click Apply to save the settings 3 Click OK ...

Страница 66: ...ncoding Parameters 2 Select Camera you want to configure 3 Check the checkbox of Redundant Record 4 Click Apply to save settings If the encoding parameters can also be used to other channels click Copy and choose the channel you want to apply the settings ...

Страница 67: ...DD group 1 Choose a group number for the HDD group 2 Click Apply to save your settings 3 Click OK to back to the upper level menu Repeat the above steps to configure more HDD groups 5 Choose the Channels which you want to save the record files in the HDD group 1 Select Advanced on the left bar Figure 5 22 HDD Advanced 2 Choose Group number in the dropdown list of Record on HDD Group 3 Check the ch...

Страница 68: ...les Steps 1 Enter Playback setting interface Menu Export Figure 5 23 Export 2 Select the channels you want to investigate by checking the checkbox to 3 Configure the record type file type start time and end time 4 Click Search to show the results Figure 5 24 Export Search Result 5 Protect the record files 1 Find the record files you want to protect and then click the icon which will turn to indica...

Страница 69: ...DD Figure 5 25 HDD General 2 Click to edit the HDD you want to protect Figure 5 26 HDD General Editing 3 Set the HDD to Read only 4 Click OK to save settings and back to the upper level menu You cannot save any files in a Read only HDD If you want to save files in the HDD change the property to R W If there is only one HDD and is set to Read only the DVR cannot record any files Only live view mode...

Страница 70: ...User Manual of Digital Video Recorder 70 Chapter 6 Playback ...

Страница 71: ...layback interface Mouse right click a channel in live view mode and select Playback from the menu as shown in Front Panel press PLAY button to play back recording files of the channel under single screen live view mode Under multi screen live view mode the recorded files of the top left channel will be played back For the models with front panel pressing numerical buttons will switch playback to t...

Страница 72: ...e Full Screen Exit Video type Process bar Video type bar The indicates the start time and end time of the record files represents normal recording manual or schedule represents event recording motion alarm motion alarm motion alarm Playback progress bar use the mouse to click any point of the progress bar to locate special frames 6 1 2 Playback by Time Purpose Play back video files recorded in spe...

Страница 73: ...displayed as Otherwise it is displayed as In the Playback interface The toolbar in the bottom part of Playback interface can be used to control playing process as shown in Figure 6 3 Figure 6 3 Playback Interface Click the channel s if you want to switch playback to another channel or execute simultaneous playback of multiple channels Figure 6 4 Toolbar of Playback ...

Страница 74: ...d end time of the record files represents normal recording manual or schedule represents event recording motion alarm motion alarm motion alarm Playback progress bar use the mouse to click any point of the progress bar to locate special frames 6 1 3 Playing Back by Event Search Purpose Play back record files on one or several channels searched out by restricting event type motion detection alarm i...

Страница 75: ...play back the file You can click the Back button to back to the search interface Note Pre play and post play can be configured 6 Optional If multiple channels are triggered recording by the alarm input clicking the button will pop up a synchoronouse playback channel selection window Select channel s you want to play and click the OK button 7 Playback management The toolbar in the bottom part of Pl...

Страница 76: ...dd customized tag Tag management Digital Zoom Pause Reverse play Single frame reverse play Stop Pause play Play Single frame play 30s reverse 30s forward Speed down Speed up Previous day Next day Scaling up down the time line Full Screen Exit Video type Process bar Video type bar Notes represents normal recording manual or schedule represents event recording motion alarm motion alarm motion alarm ...

Страница 77: ...e point Before playing back by tag 1 Enter Playback interface Menu Playback 2 Search and play back the record file s Refer to Chapter 6 1 Playing Back by Channel for the detailed information about searching and playback of the record files Figure 6 9 Interface of Playback by Time Click button to add default tag Click button to add customized tag and input tag name Max 64 tags can be added to a sin...

Страница 78: ... Search to enter Search Result interface You can enter keyword in the textbox to search the tag on your command Figure 6 11 Video Search by Tag 3 Click button to play back the file You can click the Back button to back to the search interface Pre play and post play can be configured You can click or button to select the previous or next tag Please refer to Table 6 1 for the description of buttons ...

Страница 79: ...ps 1 Enter Playback interface Menu Playback 2 Select the Smart in the drop down list on the top left side 3 Select a date in the calendar and select a camera in the camera list 4 Click the button to play Figure 6 12 Smart Playback Interface Table 6 4 Detailed Explanation of Smart Playback Toolbar Button Operation Button Operation Button Operation Smart search Stop Pause play Play Process bar Scali...

Страница 80: ...og Information interface Menu Maintenance Log Information Figure 6 13 System Log Search Interface 2 Click Log Search tab to enter Playback by System Logs Set search time and type and click Search button Figure 6 14 Result of System Log Search 3 Choose a log with record file and click button to enter Playback interface If there is no record file at the time point of the log the message box No resul...

Страница 81: ...ook up and play back files in the external devices Steps 1 Enter Tag Search interface Menu Playback 2 Select the External File in the drop down list on the top left side The files are listed in the right side list You can click the button to refresh the file list 3 Select and click the button to play back it Figure 6 16 Interface of External File Playback ...

Страница 82: ... 6 2 2 Smart Search Purpose In order to locate motion detection event easily and accurately in the playback progress bar you are allowed to analyze a certain area scene dynamically and to get all of the related motion detection events that occurred in this area Steps 1 Go to Playback interface and play the video Figure 6 17 Interface of Playback by Time 2 Click the button to go to analysis area se...

Страница 83: ...arch Playback represents normal recording manual or schedule represents event recording motion alarm motion alarm motion alarm Playback progress bar use the mouse to click any point of the progress bar to locate special frames 6 2 3 Digital Zoom Steps 1 Click the button on the playback control bar to enter Digital Zoom interface 2 Use the mouse to draw a red rectangle and the image within it will ...

Страница 84: ...hannel Purpose You can play back record files of multi channel reversely Up to 16 ch simultaneous reverse playback is supported Steps 1 Enter Playback interface Menu Playback 2 Check more than one checkboxes to select multiple channels and click to select a date on the calendar Figure 6 22 4 ch Synchronous Playback Interface 3 Click to play back the record files reversely ...

Страница 85: ...User Manual of Digital Video Recorder 85 Chapter 7 Backup ...

Страница 86: ...s USB HDDs and USB writer Backup using USB flash drives USB HDDs and USB writer Steps 1 Enter Export interface Menu Export Normal Figure 7 1 Normal Export Interface 2 Set search condition and click Search button to enter the search result interface Figure 7 2 Result of Normal Video Search for Backup 3 Select record files you want to back up Click button to play the record file if you want to check...

Страница 87: ...e Format button Figure 7 3 Export by Normal Video Search using USB Flash Drive Stay in the Exporting interface until all record files are exported with pop up message box Export finished 5 Check backup result Choose the record file in Export interface and click button to check it The Player player exe will be exported automatically during record file export 7 1 2 Backing up by Event Search Purpose...

Страница 88: ... Backup 3 Select record files to export 1 Select an alarm input in the list and click Quick Export button to enter Export interface 2 Clicking Details button will take you to the interface with detailed information of all channels triggered by the event 3 Click Details button to view detailed information of the record file e g start time end time file size etc The size of the currently selected fi...

Страница 89: ... also format USB flash drive or USB HDDs via the device Figure 7 6 Export by Event Using USB Flash Drive Stay in the Exporting interface until all record files are exported with pop up message Export finished 5 Check backup result The Player player exe will be exported automatically during record file export Figure 7 7 Checkup of Event Export Result Using USB Flash Drive ...

Страница 90: ...e of Playback 2 During playback use buttons and in the playback toolbar to start and stop clipping record file s 3 Click the icon to enter the Clips Export interface Up to 30 items of video clips can be selected for backup at one time 4 Click the button Export to export the selected video clips to the backup device If the inserted USB device is not recognized Click the Refresh button Reconnect dev...

Страница 91: ...r a prompt will pop up when you quit the Playback interface if there are clips not saved Figure 7 10 Attention to Video Clip Saving 6 Click Yes to save video clips and enter Export interface or click No to quit without saving video clips 7 Check backup result The player exe will be exported automatically during record file export Figure 7 11 Checkup of Video Clips Export Result Using USB Flash Dri...

Страница 92: ... button to enter Search Result interface At least one channel shall be selected Figure 7 12 Normal Video Search for Backup 2 Select record files you want to back up Click Export button to enter Export interface At least one recording file shall be selected Figure 7 13 Result of Normal Video Search for Backup 3 Backup device management Management of USB flash drives and USB HDDs ...

Страница 93: ...d press button if you want to delete it Select a record file in the backup device and press button to play it Click Format button to format the backup device If the inserted USB device is not recognized Click the Refresh button Reconnect device Check for compatibility from vendor Management of USB writers Figure 7 15 USB Writer Management Click Erase button if you want to erase the files from a re...

Страница 94: ...f Digital Video Recorder 94 There must be a re writable CD DVD when you make this operation If the inserted USB writer is not recognized Click the Refresh button Reconnect device Check for compatibility from vendor ...

Страница 95: ...User Manual of Digital Video Recorder 95 Chapter 8 Alarm Settings ...

Страница 96: ... Detection Setup Interface 2 Set detection area and sensitivity Check checkbox to enable motion detection use the mouse to draw detection area s and drag the sensitivity bar to set sensitivity Click to set alarm response actions Figure 8 2 Set Detection Area and Sensitivity 3 Click Trigger Channel tab and select one or more channels which will start to record or become full screen monitoring when ...

Страница 97: ...ime periods shall not be repeated or overlapped Figure 8 4 Set Arming Schedule of Motion Detection 5 Click Linkage Action tab to set up alarm response actions of motion alarm please refer to Chapter 8 8 Setting Alarm Response Actions Repeat the above steps to set up arming schedule of other days of a week Click the OK button to complete the motion detection settings of the channel 6 If you want to...

Страница 98: ... not be repeated or overlapped 5 Select Linkage Action tab to set up alarm response actions of the alarm input please refer to Chapter 8 7 Setting Alarm Response Actions Repeat the above steps to set up arming schedule of other days of a week You can also use Copy button to copy an arming schedule to other days 6 If necessary select PTZ Linking tab and set PTZ linkage of the alarm input Set PTZ li...

Страница 99: ...time periods can be set within each day Or you can click the Copy button to copy the time period settings to other day s Time periods shall not be repeated or overlapped Figure 8 6 Set Arming Schedule of Video Loss Repeat the above steps to set arming schedule of other days of a week You can also use Copy button to copy an arming schedule to other days 4 Select Linkage Action tab to set up alarm r...

Страница 100: ...User Manual of Digital Video Recorder 100 Repeat the above steps to finish settings of other channels or click the Copy button copy the above settings to them ...

Страница 101: ... Tampering Detection Figure 8 7 Video Tempering Interface 2 Check the checkbox of Enable Video Tampering 3 Drag the sensitivity bar and choose a proper sensitivity level 4 Click to set handling method of video tampering Set arming schedule and alarm response actions of the channel 1 Click Arming Schedule tab to set the arming schedule of response action 2 Choose one day of a week and up to eight t...

Страница 102: ...arm Response Actions Repeat the above steps to set arming schedule of other days of a week You can also use Copy button to copy an arming schedule to other days 4 Click the OK button to complete the video tampering settings of the channel Repeat the above steps to finish settings of other channels or click the Copy button copy the above settings to them 5 Click the Apply button to save and activat...

Страница 103: ... monitoring audible warning etc Intrusion Detection This function can be used for detecting whether there are people vehicles and objects intruding into the pre defined region longer than the set duration And you can set the duration for the alarm response actions such as full screen monitoring audible warning 4 Check the Enable checkbox to enable the selected VCA detection 5 Click the to configur...

Страница 104: ...ons are selectable 2 Select the sensitivity of the intrusion detection to 1 100 3 Set the percentage to 1 100 Percentage defines the ratio of the region the target object enters that can trigger the alarm For example when you set the percentage as 50 when the target enters half of the region the alarm will be triggered 4 Set the time threshold to 0 10 sec When the duration of the object in the def...

Страница 105: ...heck the corresponding checkbox of the diagnostic type and adjust the threshold of it by clicking and dragging the bar The higher the threshold you set the harder the exception will be detected 4 Click to set handling method of video tampering Set arming schedule and alarm response actions of the channel 1 Click Arming Schedule tab to set the arming schedule of response action 2 Choose one day of ...

Страница 106: ...an arming schedule to other days 4 Click the OK button to complete the video tampering settings of the channel 5 Click the Apply button to save and activate settings 6 Optional you can copy the same settings to other cameras by clicking the Copy button ...

Страница 107: ...than the recording resolution Record Exception No space for saving recorded files Steps 1 Enter Exceptions interface and handle various exceptions Menu Configuration Exceptions Figure 8 10 Exception Settings Interface 2 Check the checkbox of Enable Event Hint to display the Event Exception icon when an exceptional event occurs And click the icon to select the detailed event hint for display Click ...

Страница 108: ...User Manual of Digital Video Recorder 108 3 Set the alarm linkage actions 4 Click Apply to save the settings ...

Страница 109: ... Warning Trigger an audible beep when an alarm is detected Notify Surveillance Center Sends an exception or alarm signal to remote alarm host when an event occurs The alarm host refers to the PC installed with Remote Client The alarm signal will be transmitted automatically at detection mode when remote alarm host is configured Please refer to Chapter 9 2 6 for details of alarm host configuration ...

Страница 110: ...l Video Recorder 110 Click Trigger Clear button if you want to trigger or clear an alarm output Click Trigger All button if you want to trigger all alarm outputs Click Clear All button if you want to clear all alarm output ...

Страница 111: ...User Manual of Digital Video Recorder 111 Chapter 9 Network Settings ...

Страница 112: ...Settings Interface 2 Select the General tab 3 In the General Settings interface you can configure the following settings NIC Type IPv4 Address IPv4 Gateway MTU and DNS Server If the DHCP server is available you can check the checkbox of DHCP to automatically obtain an IP address and other network settings from that server The valid value of MTU is from 500 to 1500 4 After having configured the gen...

Страница 113: ...he verification code of the device The verification code consists of 6 capital letters and is located at the bottom of the DVR You can also use the scanning tool of your phone to quickly get the code by scanning the QR code below 7 Click the Apply button to save and exit the interface After configuration you can access and manage the DVR by your mobile phone on which the Cloud P2P application is i...

Страница 114: ...9 4 PeanutHull Settings Interface NO IP Enter the account information in the corresponding fields Refer to the DynDNS settings 1 Enter Server Address for NO IP 2 In the DVR Domain Name text field enter the domain obtained from the NO IP website www no ip com 3 Enter the User Name and Password registered in the NO IP website Figure 9 5 NO IP Settings Interface HiDDNS 1 The Server Address of the DDN...

Страница 115: ...box to enable this feature 4 Enter User Name and Password for PPPoE access The User Name and Password should be assigned by your ISP 5 Click the Apply button to save the settings 6 After successful settings the system asks you to reboot the device to enable the new settings and the PPPoE dial up is automatically connected after reboot You can go to Menu Maintenance System Info Network interface to...

Страница 116: ... used to establish a NTP server used for time synchronization 9 2 4 Configuring SNMP Purpose You can use SNMP protocol to get device status and parameters related information Steps 1 Enter the Network Settings interface Menu Configuration Network 2 Select the SNMP tab to enter the SNMP Settings interface Figure 9 8 SNMP Settings Interface 3 Check the Enable SNMP checkbox to enable this feature 4 C...

Страница 117: ...t Route of the device should be in the same network segment as that of the LAN IP address of the router Steps 1 Enter the Network Settings interface Menu Configuration Network 2 Select the NAT tab to enter the UPnP settings interface Figure 9 10 UPnP Settings Interface 3 Check checkbox to enable UPnP 4 Select the Mapping Type as Manual or Auto in the drop down list OPTION 1 Auto If you select Auto...

Страница 118: ...ultiple devices are configured for the UPnP settings under the same router the value of the port No for each device should be unique Figure 9 12 External Port Settings Dialog Box 2 Click Apply button to save the settings 3 You can click Refresh button to get the latest status of the port mapping Figure 9 13 UPnP Settings Finished Manual 9 2 6 Configuring More Settings Steps 1 Enter the Network Set...

Страница 119: ...ording to different requirements Server Port and HTTP Port Enter the Server Port and HTTP Port in the text fields The default Server Port is 8000 and the HTTP Port is 80 and you can change them according to different requirements The Server Port should be set to the range of 2000 65535 and it is used for remote client software access The HTTP port is used for remote IE access 4 Click the Apply but...

Страница 120: ... The name of sender Sender s Address The Email address of sender Select Receivers Select the receiver Up to 3 receivers can be configured Receiver The name of the receiver of the Email Receiver s Address The Email address of the receiver Enable Attached Pictures Check the checkbox of Enable Attached Picture if you want to send email with attached alarm images The interval is the time between two c...

Страница 121: ...ain real time information of DVR such as linking status MTU sending receiving rate etc Steps 1 Enter the Network Traffic interface Menu Maintenance Net Detect Figure 9 17 Network Traffic Interface 2 You can view the sending rate and receiving rate information on the interface The traffic data is refreshed every 1 second ...

Страница 122: ...e text field of Destination Address 5 Click the Test button to start testing network delay and packet loss 9 4 2 Exporting Network Packet Purpose By connecting the DVR to network the captured network data packet can be exported to USB flash disk SATA and other local backup devices Steps 1 Enter the Network Traffic interface Menu Maintenance Net Detect 2 Click the Network Detection tab to enter the...

Страница 123: ...Digital Video Recorder 123 Figure 9 19 Export Network Packet 4 Click the Export button to start exporting 5 After the exporting is complete click OK to finish the packet export Up to 1M data can be exported each time ...

Страница 124: ... Status on the right bottom of the page Figure 9 20 Checking Network Status If the network is normal the following message box pops out Figure 9 21 Network Status Checking Result If the message box pops out with other information instead of this one you can click Network button to show the quick setting interface of the network parameters Figure 9 22 Network Parameters Configuration ...

Страница 125: ...on of the device Steps 1 Enter the Network Statistics interface Menu Maintenance Net Detect 2 Click the Network Stat tab to enter the Network Statistics menu Figure 9 23 Network Stat Interface 3 View the bandwidth of Remote Live View bandwidth of Remote Playback and bandwidth of Net Total Idle 4 Click Refresh button to get the latest bandwidth statistics ...

Страница 126: ...User Manual of Digital Video Recorder 126 Chapter 10 HDD Management ...

Страница 127: ...lized 3 Click the Init button Figure 10 2 Confirm Initialization 4 Select the OK button to start initialization Figure 10 3 Start Initialization 5 After the HDD has been initialized the status of the HDD will change from Uninitialized to Normal Figure 10 4 HDD Status Changes to Normal Initializing the HDD will erase all data on it The HDDs which are free of working for a long time can be enabled t...

Страница 128: ...Advanced Figure 10 5 Enable HDD Sleeping Check the checkbox of Enable HDD Sleeping by default and the HDDs which are free of working for a long time will be set to sleep Uncheck the checkbox of Enable HDD Sleeping and the HDDs will be set to work for all time ...

Страница 129: ...Add the allocated NetHDD 4 Select the type to NAS or IP SAN 5 Configure the NAS or IP SAN settings Add NAS disk 1 Enter the NetHDD IP address in the text field 2 Click Search to search the available NAS disks 3 Select the NAS disk from the list shown below Or you can just manually enter the directory in the text field of NetHDD Directory 4 Click OK to add the configured NAS disk Up to 8 NAS disks ...

Страница 130: ...st of eSATA Export use the eSATA for backup Refer to Backup using eSATA HDDs in Chapter 7 1 1 Backing up by Normal Video Search for operating instructions Record use the eSATA for record Refer to the following steps for operating instructions 3 When the eSATA type is selected to Record enter the HDD Information interface Menu HDD General 4 Edit the property of the selected eSATA or initialize it i...

Страница 131: ...Click the Yes button to reboot the device to activate the changes 5 After reboot of device enter the HDD Information interface Menu HDD General 6 Select HDD from the list and click the icon to enter the Local HDD Settings interface as shown in Figure 10 15 Figure 10 10 Local HDD Settings Interface 7 Select the Group number for the current HDD The default group No for each HDD is 1 ...

Страница 132: ... recorded files from being overwritten when the HDD becomes full in overwrite recording mode When the HDD property is set to redundancy the video can be recorded both onto the redundancy HDD and the R W HDD simultaneously so as to ensure high security and reliability of video data Steps 1 Enter the HDD Information interface Menu HDD General 2 Select HDD from the list and click the icon to enter th...

Страница 133: ...User Manual of Digital Video Recorder 133 At least 2 hard disks must be added on your DVR when you want to set a HDD to Redundancy and there is one HDD with R W property ...

Страница 134: ... the storage capacity in the text field of Max Record Capacity GB 5 You can copy the quota settings of the current camera to other cameras if required Click the Copy button to enter the Copy Camera interface as shown in Figure 10 19 Figure 10 14 Copy Settings to Other Camera s 6 Select the camera s to be configured with the same quota settings You can also click the checkbox of Analog to select al...

Страница 135: ... displayed on the list as shown in Figure 10 20 Figure 10 15 View HDD Status 1 If the status of HDD is Normal or Sleeping it works normally If the status is Uninitialized or Abnormal please initialize the HDD before use And if the HDD initialization is failed please replace it with a new one Checking HDD Status in System Information Interface Steps 1 Enter the System Information interface Menu Mai...

Страница 136: ...the hopes of anticipating failures Steps 1 Enter the HDD Detect interface Menu HDD HDD Detect 2 Click the S M A R T Settings tab to enter the interface 3 Select the HDD to view its S M A R T information list as shown in Figure 10 22 If you want to use the HDD even when the S M A R T checking is failed you can check the checkbox before the Continue to use this disk when self evaluation is failed it...

Страница 137: ...ct Figure 10 18 Bad Sector Detection 2 Click the Bad Sector Detection tab to enter the interface 3 Select a HDD and click the Detect button to start detecting Figure 10 19 Bad Sector Detecting 4 You can click the Pause button to pause the detection and click the Resume button to resume the detection 5 If there is error information about the HDD you can click the Error Info button to view the infor...

Страница 138: ... or Abnormal Steps 1 Enter the Exception interface Menu Configuration Exceptions 2 Select the Exception Type to HDD Error from the dropdown list 3 Check the checkbox s below to select the linkage action s for HDD error The linkage actions can be selected to Audible Warning Notify Surveillance Center and Send Email 4 Click the Apply button to save the settings ...

Страница 139: ...User Manual of Digital Video Recorder 139 Chapter 11 Camera Settings ...

Страница 140: ...Mode and the OSD font Figure 11 1 OSD Configuration Interface 6 You can use the mouse to click and drag the text frame on the preview window to adjust the OSD position 7 Copy Camera Settings 1 If you want to copy the OSD settings of the current camera to other cameras click the Copy button to enter the Copy Camera interface as shown in Figure 11 2 Figure 11 2 Copy Settings to Other Cameras 2 Selec...

Страница 141: ... Mask Settings Interface 4 Use the mouse to draw a zone on the window The zones will be marked with different frame colors Up to 4 privacy mask zones can be configured and the size of each area can be adjusted 5 The configured privacy mask zones on the window can be cleared by clicking the corresponding Clear Zone1 4 icons on the right side of the window or click Clear All to clear all zones Figur...

Страница 142: ...User Manual of Digital Video Recorder 142 7 Click the Apply button to save the settings ...

Страница 143: ...st The time periods cannot be overlapped with each other 4 Select the mode from the drop down list of Mode there are four modes selectable Standard Indoor Dim Light and Outdoor 5 Adjust the image parameters according to actual needs The parameters include Brightness Contrast Saturation Hue Sharpness and Denoising You can also click Restore to set the parameters to the default settings 6 You can cl...

Страница 144: ...User Manual of Digital Video Recorder 144 Chapter 12 DVR Management and Maintenance ...

Страница 145: ...og Files Purpose The operation alarm exception and information of the DVR can be stored in log files which can be viewed and exported at any time Steps 1 Enter the Log Search interface Menu Maintenance Log Information Figure 12 2 Log Information Interface 2 Set the log search conditions to refine your search including the Start Time End Time Major Type and Minor Type 3 Click the Search button to s...

Страница 146: ...of each log or double click it to view its detailed information as shown in Figure 12 4 And you can also click the button to view the related video files if available Figure 12 4 Log Details 6 If you want to export the log files click the Export button to enter the Export menu as shown in Figure 12 5 ...

Страница 147: ...ose The information of added IP camera can be generated into an excel file and exported to the local device for backup including the IP address manage port password of admin etc And the exported file can be edited on your PC like adding or deleting the content and copy the setting to other devices by importing the excel file to it Steps 1 Enter the camera management interface Menu Camera IP Camera...

Страница 148: ...parameters Steps 1 Enter the Import Export Configuration File interface Menu Maintenance Import Export Figure 12 6 Import Export Config File 2 Click the Export button to export configuration files to the selected local backup device 3 To import a configuration file select the file from the selected backup device and click the Import button After the import process is completed you must reboot the ...

Страница 149: ... the backup device 5 Click the Upgrade button to start upgrading 6 After the upgrading is complete reboot the DVR to activate the new firmware 12 5 2Upgrading by FTP Before you start Configure PC running FTP server and DVR to the same Local Area Network Run the 3rd party TFTP software on the PC and copy the firmware into the root directory of TFTP Steps 1 Enter the Upgrade interface Menu Maintenan...

Страница 150: ... all parameters except the network including IP address subnet mask gateway MTU NIC working mode default route server port etc and user account parameters to the factory default settings Factory Defaults Restore all parameters to the factory default settings Restore to Inactive Restore the device to the inactive status 3 Click the OK button to restore the default settings The device will reboot au...

Страница 151: ...User Manual of Digital Video Recorder 151 Chapter 13 Others ...

Страница 152: ...t parameters must be the same as the device s when connecting with the PC serial port Transparent Channel Connect a serial device directly to the device The serial device will be controlled remotely by the PC through the network RS 232 serial port is not available for 4ch 8ch 16ch 720p series Steps 1 Enter the RS 232 Settings interface Menu Configuration RS 232 2 Configure RS 232 parameters includ...

Страница 153: ...e The default language used is English Resolution Select the output resolution which must be the same with the resolution of the VGA HDMI display Time Zone Select the time zone Date Format Select the date format System Date Select the system date System Time Select the system time Mouse Pointer Speed Set the speed of mouse pointer 4 levels are configurable Enable Wizard Enable disable the Wizard w...

Страница 154: ...nter the General Settings interface Menu Configuration General 2 Choose DST Settings tab Figure 13 2 DST Settings Interface You can check the checkbox before the Auto DST Adjustment item Or you can manually check the Enable DST checkbox and then you choose the date of the DST period ...

Страница 155: ...er of DVR The Device No can be set in the range of 1 255 and the default No is 255 Auto Logout Set timeout time for menu inactivity E g when the timeout time is set to 5 Minutes then the system will exit from the current operation menu to live view screen after 5 minutes of menu inactivity Menu Output Mode You can choose the menu display on different video output Encode Mode You can select the enc...

Страница 156: ...er Figure 13 4 User Management Interface 2 Click the Add button to enter the Add User interface Figure 13 5 Add User Menu 3 Enter the information for new user including User Name Password Confirm Level and User s MAC Address Password Set the password for the user account STRONG PASSWORD RECOMMENDED We highly recommend you create a strong password of your own choosing using a minimum of 8 character...

Страница 157: ... interface The added new user will be displayed on the list as shown in Figure 13 6 Figure 13 6 Added User Listed in User Management Interface 5 You can assign permissions for the added user a Select the user from the list and then click the button to enter the Permission settings interface as shown in Figure 13 7 Figure 13 7 User Permission Settings Interface b Set the operating permission of Loc...

Страница 158: ...are clearing I O alarm output Remote Shutdown Reboot Remotely shutting down or rebooting the device Camera Configuration Remote Live View Remotely viewing live video of the selected camera s Local Manual Operation Locally starting stopping manual recording picture capturing and alarm output of the selected camera s Remote Manual Operation Remotely starting stopping manual recording picture capturi...

Страница 159: ...ssword is recommended Admin You are only allowed to edit te password and MAC address Check the checkbox of Change Password if you want to change the password and the input the correct old password and the new password in the text field of Password and Confirm STRONG PASSWORD RECOMMENDED We highly recommend you create a strong password of your own choosing using a minimum of 8 characters including ...

Страница 160: ...User Manual of Digital Video Recorder 160 Appendix ...

Страница 161: ...ransceiver modem over Ethernet and in plain Metro Ethernet networks DDNS Dynamic DNS is a method protocol or network service that provides the capability for a networked device such as a router or computer system using the Internet Protocol Suite to notify a domain name server to change in real time ad hoc the active DNS configuration of its configured hostnames addresses or other information stor...

Страница 162: ... 3 If it is solved finish the process If not please contact the engineer from our company to do the further process There is a beep sound after a new bought device starts up Possible Reasons a No HDD is installed in the device b The installed HDD has not been initialized c The installed HDD is not compatible with the device or is broken down Steps 1 Verify at least one HDD is installed in the devi...

Страница 163: ...parameters are correct Select Menu Record Parameters Record and set the Stream Type as Audio Video 3 Check if the fault is solved by the above steps If it is solved finish the process If not please contact the engineer from our company to do the further process The image gets stuck when DVR is playing back by single or multi channel cameras Possible Reasons a The frame rate is not the real time fr...

Страница 164: ...General and verify the Device Time is correct 2 Verify the search condition is correct Select Playback and verify the channel and time are correct 3 Verify the HDD status is normal Select Menu HDD General to view the HDD status and verify the HDD is detected and can be read and written normally 4 Check if the fault is solved by the above steps If it is solved finish the process If not please conta...

Отзывы: