QS Timeclock Installation and Operation Guide 14
®
Timeclock Operation
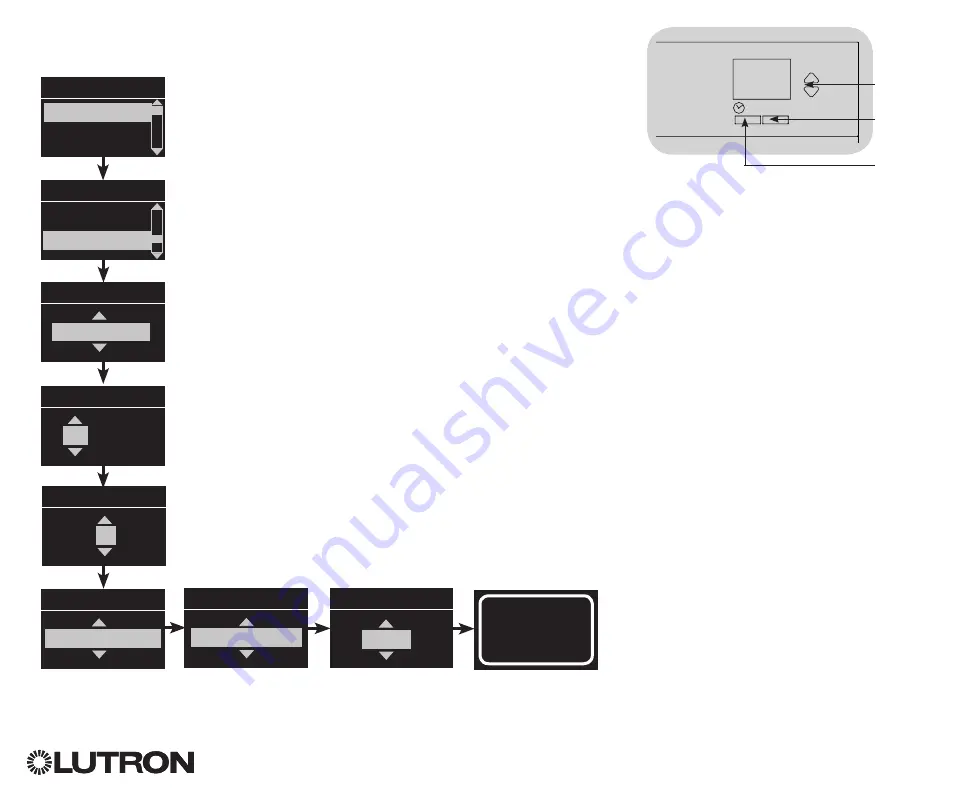
Setting Time and Date
1. Enter programming mode.
2. Use the Master buttons to highlight “Timeclock” and press the
OK button to accept.
3. Use the Master buttons to highlight “Time & date” and press
the OK button to accept.
4. Use the Master buttons to highlight either “12 Hr” or “24 Hr”
format for time display and press the OK button to accept.
5. Use the Master buttons to highlight the current hour and press
the OK button to accept. Repeat for the current minutes.
6. Use the Master buttons to highlight the current year and press
the OK button to accept. Repeat for the current month and
date.
7. The info screen will confirm that your time and date have
been saved.
8. Exit programming mode.
Main menu
Timeclock
Scene setup
Timeclock
End afterhours
Time & date
Set time
: 00 AM
08
Timeclock
Set date
: 00
2009
Set date
Set format
12 Hr
March
Set date
17
Set time
08 : AM
30
Saved
OK
1
2
3
4
5
6
Master
buttons
OK
button
Timeclock
(back) button


