


34
Using the Main Menu
5
(Optional): Use the bottom
Copy
and
Copy
To
drop-down to copy the recording
schedule to a specific channel or all
channels. Click
Copy
to copy the schedule.
6
Click
Apply
to save your settings.
Enabling Audio Recording
Audio-capable cameras are required
(not included) for audio recording.
To enable audio recording:
1
Click the
MainStream
tab.
2
Beside the corresponding channel, select
or deselect the checkbox under
Audio
to
enable or disable audio recording.
3
Click
Apply
to save your settings.
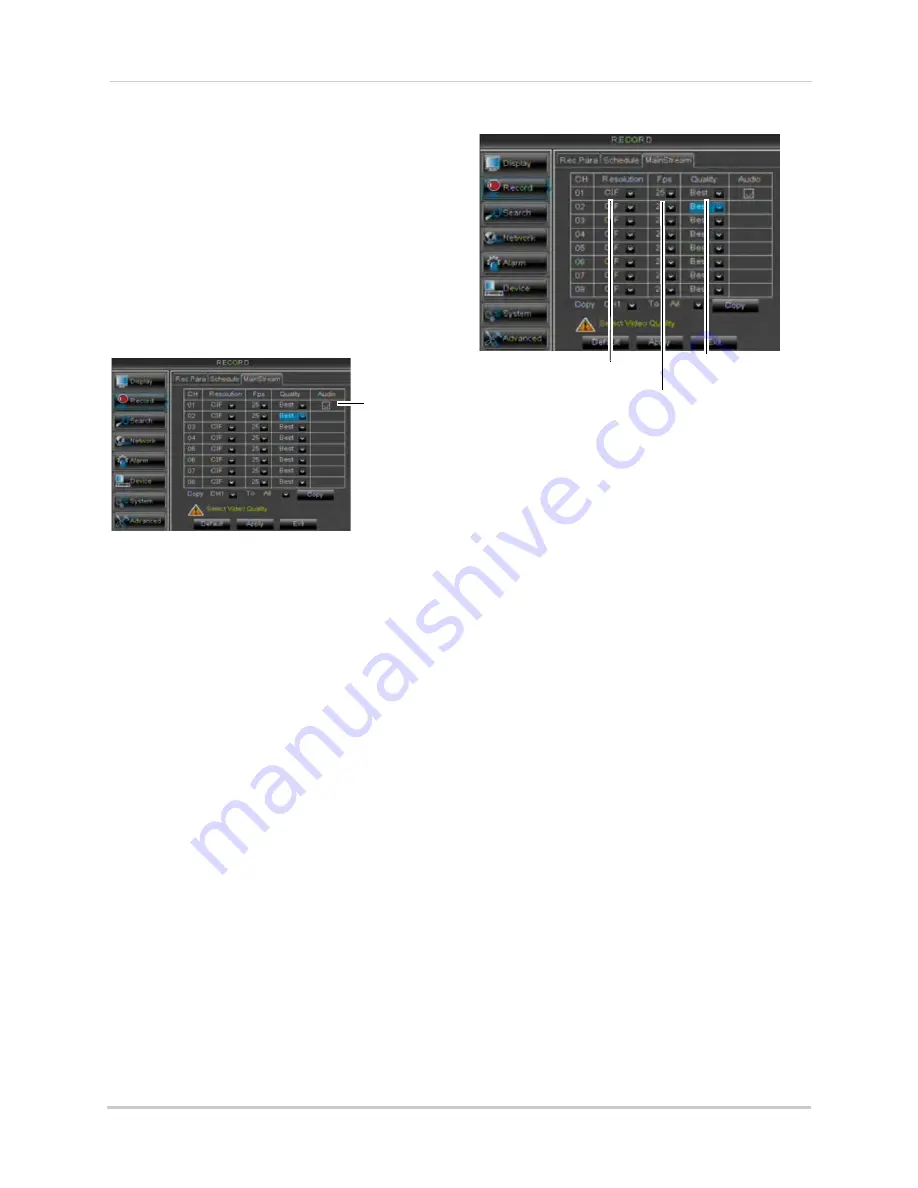
Configuring Recording Quality,
Resolution, and Video Frame Rate
You can configure the recording quality,
recording resolution and video frame
rate for each channel.
To change the recording quality,
recording resolution, and video frame
rate:
1
Click the
MainStream
tab.
2
Under the
Quality
drop-down menu, select
from
Good, Better
, or
Best
to adjust the
quality of recordings on each channel.
3
Under the Resolution drop-down menu,
select the Recording Resolution for each
channel:
C1F
(320x240),
HD1
(720x240), or
D1
(720x480).
NOTE:
16-channel models support C1F
only.
4
Under the
FPS
drop-down menu, select
the number of frames per second you want
the DVR to record on each channel.
5
(Optional) Use the
Copy
and
Copy To
drop-down menus to copy recording
settings to one or all channels. Click
Copy
to copy recording settings.
6
Click
Apply
to save your settings.
NOTE:
Increasing the resolution or quality
settings will decrease the amount of
Frames per Second (FPS) the DVR
can record. If you receive an error
message when saving your changes,
reduce the Resolution, Quality, or
FPS and try again.
Audio
checkbox
Frames per Second
Recording
Resolution
Recording quality