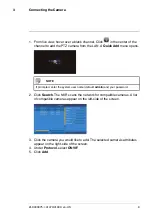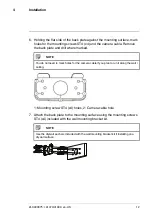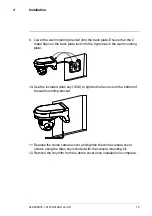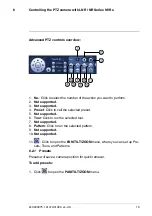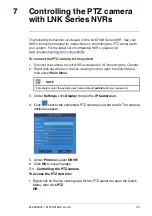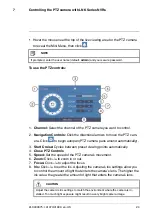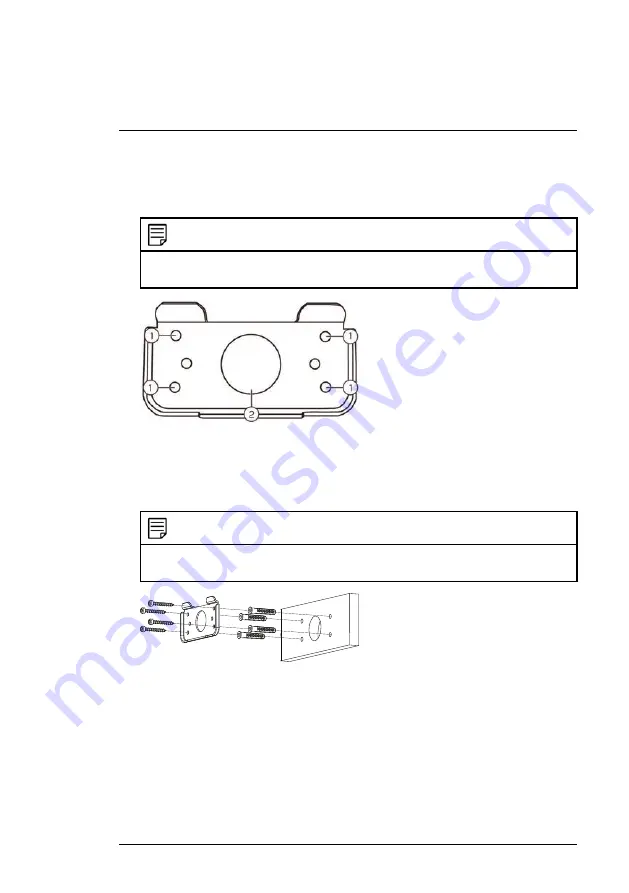
6. Holding the flat side of the back plate against the mounting surface, mark
holes for the mounting screws ST4 (x4) and the camera cable. Remove
the back plate and drill where marked.
NOTE
You do not need to mark holes for the camera cable if you plan to run it along the wall /
ceiling.
1: Mounting screw ST4 (x4) holes, 2: Camera cable hole
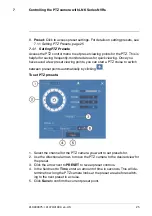
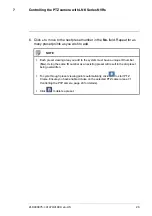
7. Attach the back plate to the mounting surface using the mounting screws
ST4 (x4) included with the wall mounting bracket kit.
NOTE
Use the drywall anchors included with the wall mounting bracket kit if installing on a
drywall surface.
#LX400075; r.41474/41994; en-US
12
Содержание LNZ32P4 SERIES
Страница 1: ...Instruction Manual LNZ32P4 SERIES 4x IP PTZ DOME CAMERA ...
Страница 31: ...Technical Specifications 8 8 1 Dimensions Camera Alone Camera and Wall Mount LX400075 r 41474 41994 en US 28 ...
Страница 39: ...Manuel d utilisation LNZ32P4 SÉRIE IP CAMÉRA À DÔME PTZ 4 x ...
Страница 82: ...Manual de instrucciones LNZ32P4 CÁMARA PTZ IP TIPO DOMO 4x SERIE ...
Страница 117: ...Especificaciones técnicas 8 8 1 Dimensiones Cámara sola Cámara y montaje de pared LX400075 r 2 0 42056 42056 es MX 33 ...

