manualshive.com logo in svg
background image

Setting priority levels of ports allows the user to determine which ports will
always transfer their data first.  The Priority Configuration Menu screen
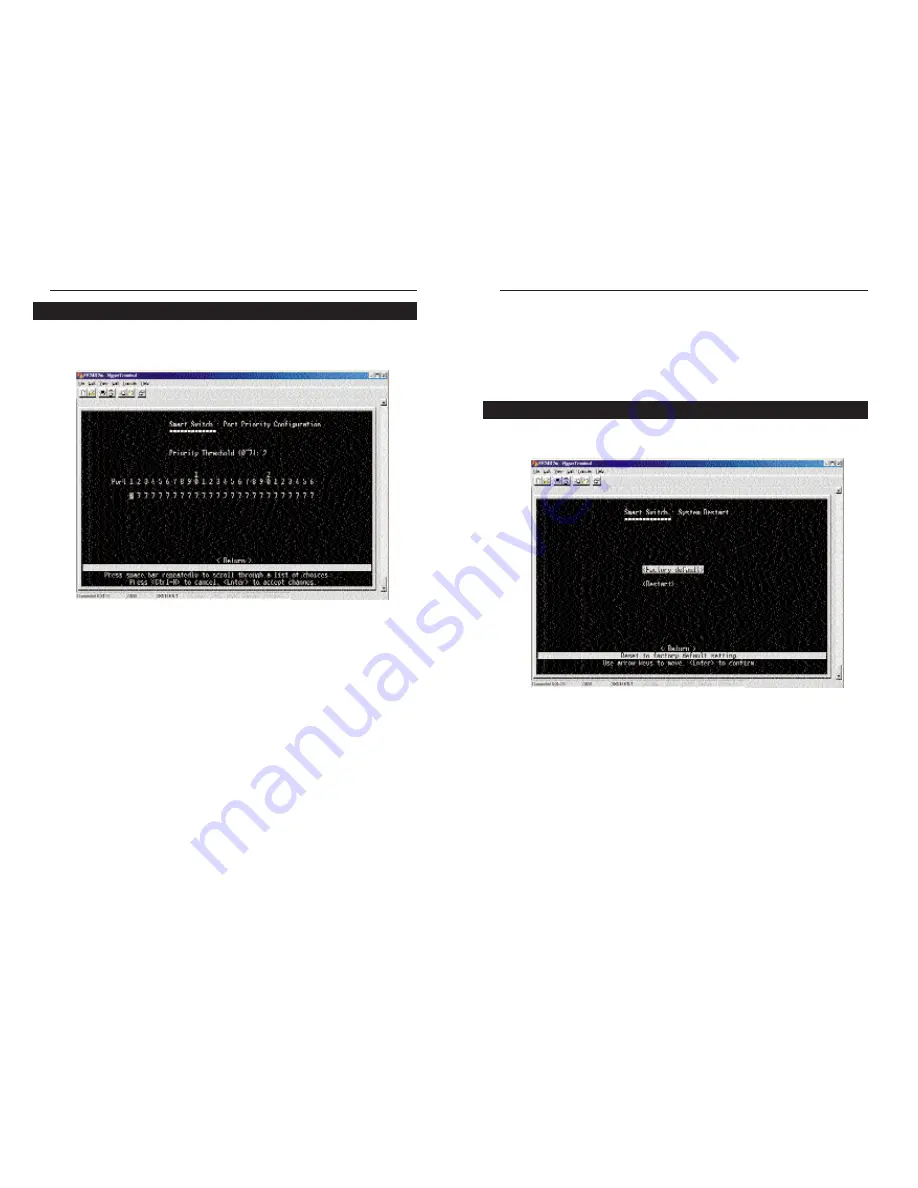
(shown here), allows you to view or change the following values:

• Priority Threshold (0~7) - The Priority Threshold is the dividing line, set

by the user, between high and low priority ports on the Switch.  For
instance, if the user sets the Priority Threshold value at 4, then any ports
that have a value set to 4 or higher will receive the highest priority when
the Switch is transferring data.  Ports that have a value set to 3 or below
must wait until the high priority ports are done to transmit.  This option
allows the user to make sure that computers or devices connected to cer-
tain ports always have the highest priority.  To change this value, highlight
the value next to Priority Threshold using the arrow keys and use the
Space Bar key to scroll through the options (0~7).  Once you have made
your choice, press the Enter key.  You will receive a message in the white
status bar near the bottom of the screen that indicates whether or not the
change was accepted.  The default setting for this value is 3.

• Port Priority (per port) (0~7) - The Port Priority value allows the user to

set the priority of each port, depending on the user’s need.  Each port can
be assigned a level of priority, based on the Priority Threshold (see above).
Each of the 26 ports are listed.  Using the arrow keys, highlight the port
you wish to set the priority value for and press the Space Bar key.  This
will toggle between the options (0~7).  Once you have made your choice,

The Priority Configuration Menu

press the Enter key.  You will receive a message in the white status bar
near the bottom of the screen that indicates whether or not the change was
accepted.  

Once you have made all the changes you wish to make, highlight Return
and hit the Enter key to return to the Main Menu.

The Restart Menu screen (shown here), allows you to view or change the fol-
lowing values:

• Factory Default - The Factory Default option resets all of the Switch’s

settings from all the menus.  Before selecting this option, you should
record all values from the other screens for reference.  To reset the Switch,
highlight Factory Default using the arrow keys and press the Enter key.
You will receive a message in the white status bar near the bottom of the
screen that states “Are you sure you wish to perform this operation? (y/n)”.
Press the key to confirm the reset, or to cancel.  

• Restart -  To restart the Switch, highlight Restart using the arrow keys

and press the Enter key.  You will receive a message in the white status
bar near the bottom of the screen that states “Are you sure you wish to per-
form this operation? (y/n)
”.  Press the key to confirm the resart, or to
cancel.  The Switch will restart and return to the Main Menu.

The Restart Menu

22

Instant Gigabit

®

Series

EtherFast

®

Dual Gigabit with 24-Port 10/100 Switch

23

Содержание EF24G2 - EtherFast Dual Gigabit

Страница 1: ...EtherFast Dual Gigabit with 24 Port 10 100 Switch Use this guide to install Linksys EtherFast Dual Gigabit with 24 Port 10 100 Switch EF24G2 User Guide Instant Gigabit Series...

Страница 2: ...sys makes no warranty or representation expressed implied or statutory with respect to its products or the contents or use of this documentation and all accompa nying software and specifically disclai...

Страница 3: ...Gigabit ports and connect your workstations to any of the available 10 100 ports and you ve maximized your network In addition the Switch has easy hassle free setup with no configuration required Sav...

Страница 4: ...ting in full duplex mode and flicker amber when collisions are being encountered GIGABIT PER PORT G1 G2 1000Link Green The LED will illuminate when the Gigabit Port is successfully connected to a netw...

Страница 5: ...gh 5 Instant Gigabit Series The EtherFast Dual Gigabit with 24 Port 10 100 Switch is equipped with twenty four 10 100 RJ 45 ports These RJ 45 ports support network speeds of either 10Mbps or 100Mbps a...

Страница 6: ...ed in any standard 19 inch rack Use the following instructions to rack mount the Switch Before you begin disconnect all cables from the Switch 1 Place the Switch right side up with the front panel fac...

Страница 7: ...ing click the arrow and choose the COM port that the Switch will be connected to In the example below COM1 is the port selected Click the OK button 8 EtherFast Dual Gigabit with 24 Port 10 100 Switch...

Страница 8: ...ows you configure speed duplex and flow control admin status and auto negotiation Port Trunking Configuration allows you trunk ports together for faster backplane speeds in data transmission Port Mirr...

Страница 9: ...twork in order to deliver data to that MAC address signifi cantly preserving network bandwidth After the specified amount of time passes the Switch will dump the inactive MAC address meaning that when...

Страница 10: ...screen that indicates whether or not the change was accepted The default setting for this value is Enabled Speed Duplex Current This value is automatically determined by the Switch and cannot be chang...

Страница 11: ...omatically determined for these two ports by the Switch and cannot be changed by the user Speed Duplex This value is automatically determined for these two ports by the Switch and cannot be changed by...

Страница 12: ...Port mirroring allows the user to assign two different ports to carry the same data stream This is a diag nostic tool that permits the user to verify that all data is being transmitted and received p...

Страница 13: ...ort causing your Switch to malfunc tion The VLAN Configuration Menu Link Status and Admin Status Same as the other 24 ports See the beginning of this section Auto Negotiate This value is automatically...

Страница 14: ...shold see above Each of the 26 ports are listed Using the arrow keys highlight the port you wish to set the priority value for and press the Space Bar key This will toggle between the options 0 7 Once...

Страница 15: ...s wires junctions and connectors in terms of the data rates that they can sustain CAT 5 cable has a maximum throughput of 100 Mbps and is usually utilized for 100BaseTX networks CAT 5e The additional...

Страница 16: ...number Mbps MegaBits Per Second One million bits per second unit of measure ment for data transmission Network A system that transmits any combination of voice video and or data between users NIC Netw...

Страница 17: ...0 C to 70 C 40 F to 158 F Operating Humidity 20 to 95 Non Condensing Storage Humidity 20 to 95 Non Condensing Environmental Warranty Information BE SURE TO HAVE YOUR PROOF OF PURCHASE AND A BARCODE FR...

Страница 18: ...nksys Customer Support at one of the phone numbers or Internet addresses below Sales Information 800 546 5797 LINKSYS Tech Support and RMA Issues 800 326 7114 949 261 1288 Fax 949 261 8868 Email suppo...

Страница 19: ...Copyright 2001 Linksys All Rights Reserved Printed in the USA http www linksys com...

Отзывы: