5. Software Control - Lightware Device Controller
RAP-B511 series
– User's Manual
36
Step 3.
All the saved Events are analyzed and the
conditions
are listed (it takes some seconds to finish).
The
Show advanced
expressions
option allows showing the exact path and set the value of the given
property.
Step 4.
Select the desired
Condition
and press the
Apply
button to store the settings.
5.6.4.
Special Tools and Accessories
The Name of the Event
The name of a port can be changed by typing the new name and clicking the
Set
button. The following
characters are allowed when naming:
Letters (A-Z) and (a-z), numbers (0-9), special characters: hyphen ( - ), underscore ( _ ), and space ( ).
Enable or Disable an Event
The set Event can be enabled or disabled in the Event list, or directly in the Event editor window by setting
the
tick mark
beside the name.
Testing the Condition
When the desired Condition is arranged, the setting can be tested. The Event list and the Event editor contains
a small panel that shows if the set condition is detected and how many times. The
Counter
can be reset by
the button in Event editor. If the Condition is true, the
detected
mark turns green for two seconds and the
Counter
is increased.
Testing the Action
The method is the same as testing the Condition, but in this case, the Action can be triggered manually by
pressing the
Test
button.
TIPS AND TRICKS: The Test button is also placed on the Action panel in the Event list. Thus, you can check
the Actions without opening the Event editor.
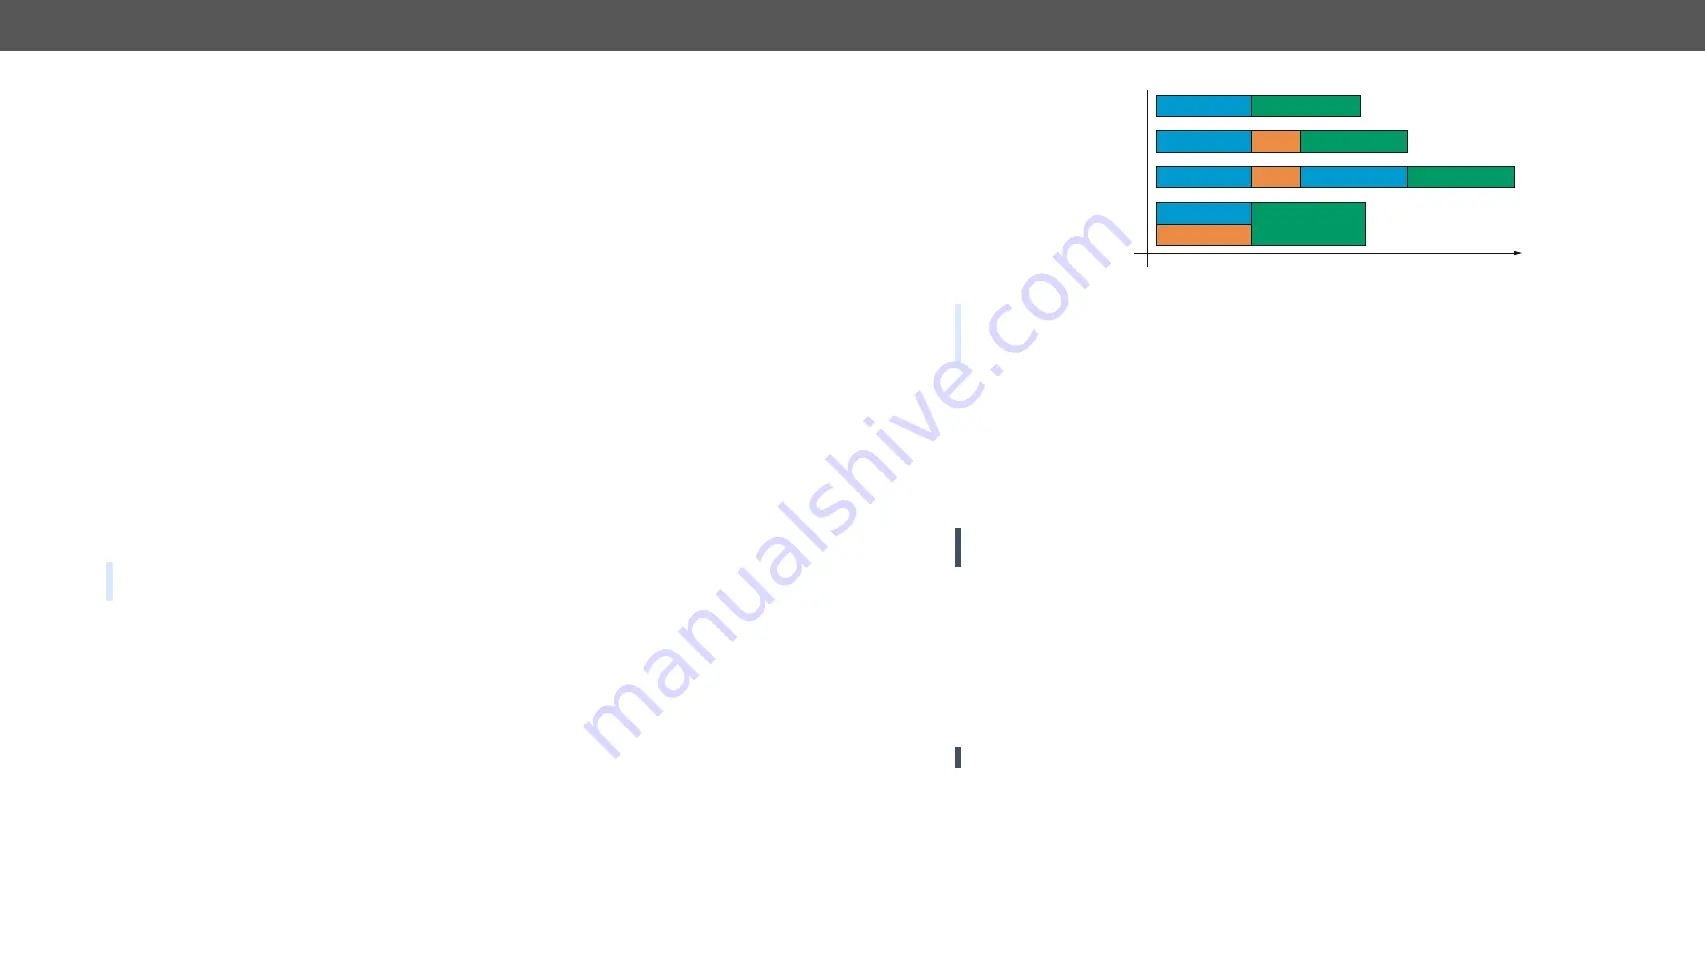
Delay the Action
In most cases the Action is performed immediately after the Condition is detected. But sometimes a delay
is necessary between the Condition and the Action. Therefore, the new Event manager contains the Delay
panel which allows that feature with below settings:
▪
No delay
: when the Condition is detected, the Action is launched.
▪
Simple delay
: when the Condition is detected, the Action is launched after the set time interval.
▪
Still exists
: when the Condition is detected, the Action is launched after the set time interval only if the
Condition still exists.
▪
Continuously exists
: when the Condition is detected, the Action is launched after the set time interval
only if the Condition has been existing continuously.
The available delay settings of an Event
TIPS AND TRICKS:
Show advanced expressions
option is a useful tool when you look for the path or value
of a property but just the expression is displayed. The option is available in the Event list window or when
Link tool is used.
5.6.5. Clear One or More Event(s)
Clear an Event
Press the
Clear
button in the Event list or in the header section in the Event editor.
Clear all Events
When all the Events must be cleared press the
Load factory defaults
button above the Event list. You will be
prompted to confirm the process.
WARNING! Clicking on
Load factory defaults
button means, the configuration of the buttons are also
deleted, because the conditions and the actions of the buttons are saved as an events.
5.6.6.
Export and Import Events
The feature allows saving all the Events. The backup file can be uploaded to another RAP-B511 series device.
Export all the Events
Step 1.
Press the
Export
button above the Event list.
Step 2.
The Save as dialog box will appear. Set the desired folder and file name, then press the
Save
button.
The generated file is a simple text file which contains LW3 protocol commands. The file can be viewed by a
simple text editor, e.g. Notepad.
ATTENTION!
Editing the file is recommended only for expert users.
Import all the Events
Step 1.
Press the
Import
button above the Event list.
Step 2.
The Open dialog box will appear. Select the desired folder and file, then press the
Open
button.
Delay
Condition = true
Condition = true
Condition = true
Condition = true
continously
exist
still exist
simple delay
no delay
Perform the action
Perform the action
Delay
Delay
Perform the action
Condition = true Perform the action
Time


