20
21
Note
-
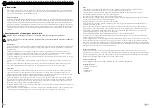
When the temperature is higher than the upper limit of the alarm temperature setting, the activation of
the upper limit alarm the symbol “ “ will flash.
-
When the temperature is lower than the lower limit of the alarm temperature, the lower limit alarm is
activated, and the symbol “ “ will flash.
Low battery
If the battery symbol “
” appears, the batteries in the remote sensor should be replaced as soon as
possible.
The weather forecast
The weather station calculates a weather forecast for the next 12 hours based on the air pressure trend.
Of course, this forecast cannot be compared to those of professional weather forecasting services
that are supported by satellites and powerful computers, but it does give an indication of the current
weather developments. Do take into account the weather forecast from your local weather forecasting
service and the weather forecast from your weather station. If there are differences between the infor-
mation displayed on your device and your local weather forecasting service, always follow the forecast
of the local weather forecasting service.
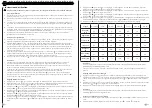
Press and hold the “ “ button for 2 seconds to enter the air pressure and weather settings. The pres-
sure unit will then flash. Use “ ” and “ ” to select the “hPa/mb”. to set “hPa/mb” or “inHg” as the
pressure unit.
Press the “ “ key to confirm the setting and switch to the weather. The weather displays will begin
flashing. Use “ ” and “ ” to set the appropriate weather conditions to make the weather forecast
more accurate.
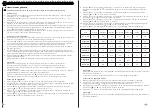
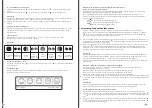
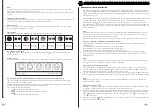
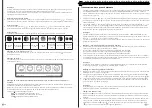
The weather station will display the following weather symbols:
-
The weather station can display the barometric pressure trend.
-
You may see the following displays:
The barometric pressure will rise.
The barometric pressure will remain constant.
The barometric pressure will fall.
Background lighting
If the product runs on batteries, tap the “
“ field. The backlight will turn on for 15 seconds.
When the product’s power supply is connected to the power adapter, the battery will automatically
disconnect the power and the backlight will always be on. Press the “ “ button to adjust the bright-
ness of the backlight. You can choose 5 modes: 4 different brightnesses for the backlight and switch
off the backlight. Users can choose according to their personal preferences between different types of
backlight brightness, or turn off the backlight. After switching the backlight off, press “
“ to switch
on the backlight for 15 seconds.
Sunny
Slightly Cloudy
Cloudy
Rainy
Heavy rainy
Snowy
1.
2.
3
1.
2.
Maintenance and Cleaning
-
Clean the weather station and the sensor with a clean and dry cloth. Make sure to replace the batteries
when needed.
Storage
-
Store the Weather Station and the Sensor in a clean and dry place. Do not store the device in extreme
high or extreme low temperatures.
Disposal - Recycle
-
Contribute to a cleaner living environment! Do not dispose of the Weather Station or the Sensor with
the household waste. For proper recycling, please contact your local authority or your household waste
disposal service for further details on your nearest designated collection point.
Service and Warranty
-
If you need service or information regarding your product, please contact the LifeGoods Customer
Support at [email protected]
-
LifeGoods provides a 2 year warranty on its products. To obtain service during the warranty period, the
product needs to be returned with a proof of purchase. Product defects have to be reported within 2
years from the date of purchase. This warranty does not cover: damages caused by misuse or incorrect
repair; parts subject to wear; defects that the customer was aware of at the time of purchase; damages
or defects caused by customer neglect; damages or defects caused by third parties.
Disclaimer
-
Changes reserved; specifications are subject to change without stating grounds for doing so.


