background image


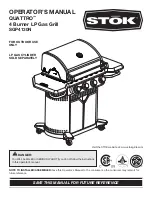
GSC3218JN Gas Grill 

GSC3218JN owner’s manual 


11


Fully-Assembled


OPERATING YOUR GRILL 

Your natural gas grill is designed to operate on natural gas only, at a pressure of seven inches water column (7” W.C.). Check with your gas utility for 
local gas pressure, because in some areas natural gas pressure varies. Also, check with your gas company or with local building codes for instructions 
to install gas supply line or call a licensed and qualified installer. 
 
It is recommended that an ON/OFF manual shut –off valve be installed at the gas supply source: 


Outdoors after the gas line exits outside wall and before quick disconnect or before gas supply line enters ground. 


Indoors in the branch gas line in an accessible location near the gas supply line. 


             Pipe sealing compound or pipe thread tape of the type resistant to the action of natural gas must be used on all male pipe threads. Apply compound or 

tape to at least the first three to four threads when making connections. 


NATURAL GAS CONNECTION: 


     Apply sealing compound or pipe thread tape of the type resistant to the action of natural gas must be used on all male pipe threads. Attach to side 

burner valve. Connect the other end of the flex hose to manual shut-off valve through a nipple.        


Connect a manual shutoff valve to gas supply line. 


During high pressure testing your gas grill and its individual shutoff valve must be disconnected 
from the gas supply piping system during any pressure testing of that system at least pressures in 
excess of 1/2 psi (3.5kPa). 
During low pressure testing your gas grill must be isolated from the gas supply piping system by 
closing its individual manual shutoff valve during any pressure testing of the gas supply piping 
system at test pressures equal to or less than 1/2 psi (3.5kPa). 
 

Warning

: Burner valves are pretested at the factory to operate on natural gas. If you wish to 

convert or change, be sure to contact your grill distributor or dealer FIRST!


Содержание GSC3218JN

Страница 1: ...r heating TOXIC fumes can accumulate and cause asphyxiation NOT to be used aboard boats or on recreational vehicles 5 Burner Natural Gas Grill PROP 65 WARNING Chemicals known to the state of California to cause cancer birth defects or other reproductive harm are created by the combustion of natural WARNING FOR YOUR SAFETY For Outdoor Use Only outside any enclosure SAVE THESE INSTRUCTIONS FOR FUTUR...

Страница 2: ...Warranty Program 16 WARNING FOR YOUR SAFETY If you smell gas 1 Shut off gas to the appliance 2 Extinguish any open flame 3 Open Lid 4 If odor continues immediately call your gas supplier or fire department WARNING FOR YOUR SAFETY 1 DO NOT store or use gasoline or other flammable vapors and liquids in the vicinity of this or any other appliance 2 When cooking with oil grease do not allow the oil gr...

Страница 3: ...from combustibles An asphalt or blacktop surface may not be acceptable for this purpose 9 Do not attempt to move the grill while it is lit 10 Do not leave a lit grill unattended especially keep children and pets away from grill at all times 11 This is not a tabletop grill Therefore do not place this grill on any type of tabletop surface 12 Do not use grill in high winds 13 Do not use the grill unl...

Страница 4: ...up rail 1pc 4 Cart back board 1pc 5 Cart doors 2pcs 6 Drawer assembly 1pc 7 Body assembly 1pc 8 Left shelf plate 1pc 9 Right shelf plate 1pc 10 Side burner frame 1pc 11 Heating plate 4pcs 12 Cooking grids 3pcs 13 Warming gird 1pc 14 Grease cup 1pc 15 Grease cup support 1pc 16 Motor support 1pc 17 Natural gas pipe 1pc ...

Страница 5: ...or your convenience A 6pcs G 4pcs B 12pcs H M4 Nut 4pcs C 4pcs I Side knob 1pc D 10pcs J 2pcs E 14pcs k M6 Nut 2pcs F 4pcs L Screwdriver 1pc M6 X 20mm Bolt M6 X 50mm Bolt Φ6 5 XΦ9 X1 2mm Lock washer M4 X 8mm Bolt M4 X 12mm Bolt Φ6 5 XΦ16 X1 0mm Washer M6 X 15mm Bolt Φ4 5 XΦ10 X0 8mm washer ...

Страница 6: ...parts are present before attempting to assemble Tighten all bolt connections by hand first then when the grill is fully assembled go back and tighten It will take about 30 to 40 minutes to assemble this grill Step 2 Install cart back board on cart assembly under back up rail as shown Step 1 Install back up rail onto cart assembly as shown ...

Страница 7: ...GSC3218JN Gas Grill GSC3218JN owner s manual 6 Step 3 Install cart doors in the front of cart assembly and install store basket behind door as shown Step 4 Install drawer into cart assembly as shown ...

Страница 8: ...GSC3218JN Gas Grill GSC3218JN owner s manual 7 Step 5 Install body assembly upon cart assembly as shown Step 6 Install side shelves on the both sides of cart as shown ...

Страница 9: ...s Grill GSC3218JN owner s manual 8 Step 7 Insert side valve into the hole of side burner knob set as shown Step 8 Install side burner frame on right side shelf and connect burner frame tube with side valve as shown ...

Страница 10: ...rill GSC3218JN owner s manual 9 Step 9 Insert side burner knob on right side shelf as shown Step 10 Open the lid place heating plates on body and put cooking grid upon heating plates and install warming grid as shown ...

Страница 11: ...18JN owner s manual 10 Step 11 Insert grease plate into cart assembly from the back of cart and install grease cup support and place grease cup on it as shown Step 12 Install motor support at the left side of gill body as shown ...

Страница 12: ...pe threads Apply compound or tape to at least the first three to four threads when making connections NATURAL GAS CONNECTION Apply sealing compound or pipe thread tape of the type resistant to the action of natural gas must be used on all male pipe threads Attach to side burner valve Connect the other end of the flex hose to manual shut off valve through a nipple Connect a manual shutoff valve to ...

Страница 13: ... the Main Burners 1 Remove cooking grid from burner you desired to light 2 Insert a lit match attached to the end of the Lighting Rod provided with the grill placing flame under heating plate near to burner ports 3 Press in valve knob and rotate counter clockwise to Hi setting and burner should light immediately If more than one burner is desired repeat procedure with each burner 4 Replace cooking...

Страница 14: ...with water and let thoroughly dry Cooking Grids The porcelain grates have a glass like composition that should be handled with care not to chip Use mild dishwashing detergent or baking soda and hot water solution Non abrasive scouring powder can be used on stubborn stains then rinse with water Heat Plates Clean residue with wire brush and wash with soapy water then rinse with water Grease Cup Peri...

Страница 15: ...gh heat Heat leftover marinade and pour over grilled steak to serve Hardcore Grilled Trout Ingredients 1 4 cup lemon or lime juice 2 tablespoons melted butter 2 tablespoons vegetable oil 2 tablespoons chopped parsley 1 tablespoon hot sauce 1 2 teaspoon ground ginger 1 2 teaspoon salt 4 brook trout about 1 pound each Prepare Combine lemon juice margarine oil parsley sesame seeds hot sauce ginger an...

Страница 16: ...cked length of burner Flame is yellow or orange New burner may have residual Burn grill for 15 minutes with Manufacturing oils the lid closed Spider webs or insect nest in venturi Clean venturi Food residue grease or seasoning Clean burner Salt on burner Poor alignment of valve to burner Assure burner venturi is venturi properly engaged with valve Flame blow out High or gusting winds Turn front of...

Страница 17: ...sion or discoloration due to misuse lack of maintenance hostile environment accidents alterations abuse or neglect This limited warranty does not cover any scratches dents corrosion or discoloring caused by heat abrasive or chemical cleaners nor chipping on porcelain enamel parts nor any components used in the installation of the gas grill Inability to provide proof of purchase or after the warran...

Отзывы: