12
How To ... REMOVE AND REPLACE THE
HEATSINK CONTROL BOARD ASSEMBLY
( Continued )
Step 6
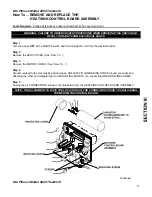
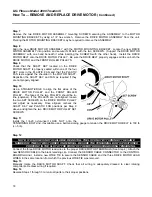
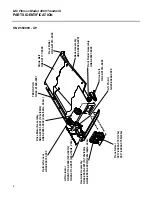
Use a socket wrench to loosen and remove the two SCREWS securing the GROUNDING WIRES to the
HEATSINK CONTROL BOARD ASSEMBLY.
Step 7
Lift off the PROTECTIVE COVER from the top of the CAPACITOR. Remove the
POSITIVE
and
NEGATIVE WIRE CONNECTORS
leading from the DRIVE MOTOR ASSEMBLY to the CAPACITOR.
Step 8
Remove the two MOUNTING SCREWS securing the HEATSINK CONTROL BOARD ASSEMBLY
to the MOTOR
PAN.
Step 9
Carefully lift the malfunctioning HEATSINK CONTROL BOARD ASSEMBLY
from
the machine and set
aside.
Step 10
Place the new HEATSINK CONTROL BOARD ASSEMBLY into position and reverse Steps
1
through
8
to return all
parts to their proper locations.
NOTE: THE CAPACITOR IS POLARIZED ( + RED, - BLACK ).
Содержание 4000
Страница 1: ...Model 4000 Treadmill Customer Support Services SERVICE MANUAL ...
Страница 15: ...10 Life Fitness Model 4000 Treadmill NOTES ...
Страница 40: ...21 Life Fitness Model 4000 Treadmill NOTES ...
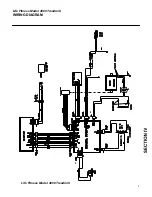
Страница 41: ...1 Life Fitness Model 4000 Treadmill WIRING DIAGRAM Life Fitness Model 4000 Treadmill ...
Страница 47: ...7 Life Fitness Model 4000 Treadmill NOTES ...

