29
ENTERTAINMENT
WiDi (Wireless Display) Setup
1
Set the external input of the projector to WiDi.
2
Run the WiDi(
)
program on your notebook.
3
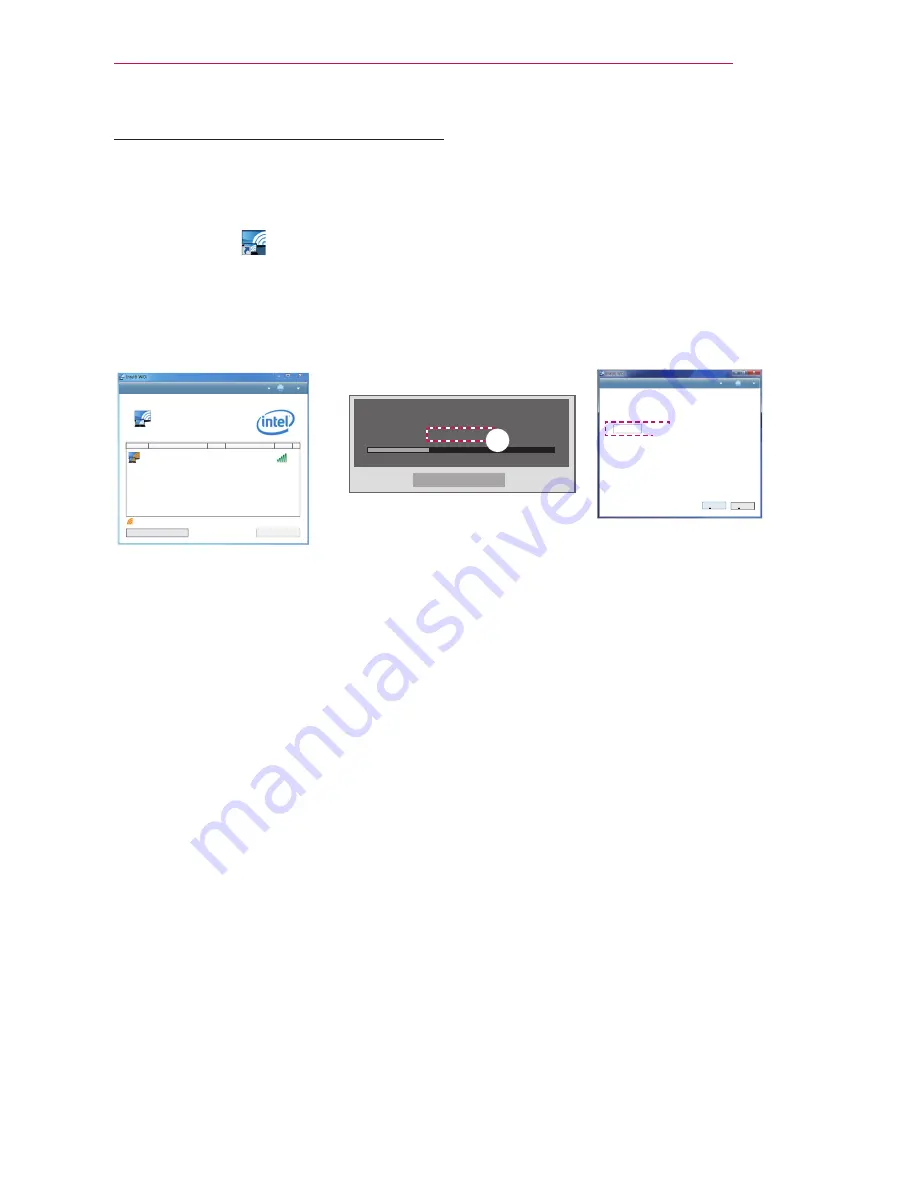
After running the WiDi program on your notebook, a list will show all available devices
that were detected. In the list, select the Projector you want and click Connect.
Enter the 4
-
digit number shown(
a
) on the screen (
b
) and then click Continue.
$POOFDUFEBEBQUFS
zaGuGGU
%FUFDUFEBEBQUFST
1SPQFSUJFT
)FMQ
{ GGGGGG
G
GGGuGGGGGGGGGGGGGGGG
G
GGGGGGGGGGGGGGGG
G
GGGGGpkGGGGGGGG
GG
GGtGGGGGGGGGGGGGGGGGGGGGGGGGGGGGz
snG~kGw
km^Y
ujGZUW
,QGLFDWHVDQDGDSWHU\RXKDYHSUHYLRXVO\FRQQHFWHGWR
zGGG
&RQQHFW
[Intel Notebook] Request connection
To connect, enter the PIN
My PIN****
Cancel
Remain: 92 second(s)
a
1SPQFSUJFT
)FMQ
'PVGTUGEWTKV[EQFG
7KLVLVWKHILUVWWLPH\RXĜUHFRQQHFWLQJWR/*:L'L3URMHFWRU
3OHDVHHQWHUWKHGLJLWVHFXULW\FRGH\RXVHHRQ\RXU3URMHFWRUVFUHHQ
&RQWLQXH
&DQFHO
b
Projector Screen
Notebook Screen
4
The Notebook screen will appear on the projector screen soon. Note that the wireless
connection speed will affect the quality of the video displayed on the notebook.
If the connection is poor, the intel WiDi connection may be lost or quality of the
video may be poor.
* For more information on Intel WiDi, visit http://intel.com/go/widi
* Only the Input, OK, Volume, and Mute buttons on the remote control are available in
WiDi mode.
* The M (Menu) button on the Control Panel of the projector is used as the external
input button during WiDi operation.
* If you change the input signal while watching in WiDi mode, the WiDi connection will
be disabled.


