Installation Manual
97
ENGLISH
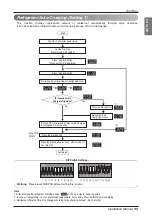
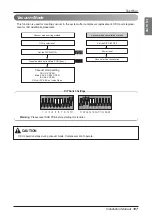
Start
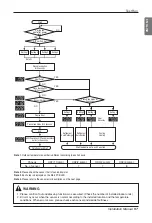
NO
NO
NO
NO
YES
YES
YES
YES
3 minutes
past after power
reset
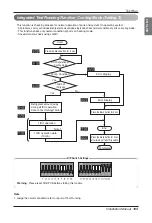
DIP switch set
Press black button
for 2 seconds
Sensor Normal
Heat Pump?
Press black button
for 5 seconds
Display Error
Press black button for 2 seconds
End
Data Reset and Wait
All DIP switches OFF and press black
button for 2 seconds
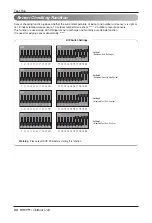
Setting 1
Setting 2
Setting 3
Setting 4
Note 3)
Press black button for
5 seconds
Setting 1
Setting 2
Setting 3
Setting 4
Refrigerant
Auto Recharge
Refrigerant
Auto decide
Cooling
Heating
: Heat
Recovery
Start Inspection of each Function
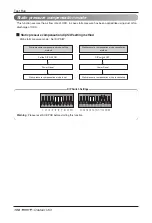
Note 1.
Outdoor temperature number is different according to each chassis.
Note 2.
Please check the sensor that is found abnormal.
Note 3.
Each step is displayed on the Main PCB LED.
Note 4.
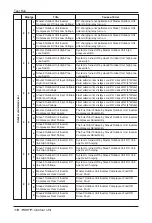
Please refer to the sensor error descriptions on the next page.
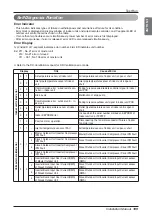
WARNING
1. Please confirm if auto addressing function was executed. (Check the number of installed indoor units)
2. Error may occur when the sensor is normal according to the installed location and the temperature
conditions. When error occurs, please check each sensor and decide faultiness.
Chassis
UX2(1 Comp)
UX2(2 comp)
UX3(2 comp)
UX3(3 comp)
No. of sensor
6
7
7
8
Test Run
Содержание Multi V ARUB Series
Страница 133: ......


