


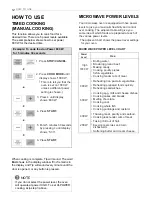


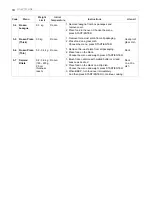


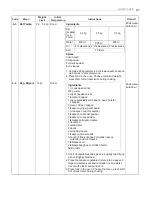

MICROWAVE POWER LEVELS
Your microwave oven is equipped with five power
levels to give you maximum flexibility and control
over cooking. The adjacent table will give you
some idea of which foods are prepared at each of
the various power levels.
t
The adjacent chart shows the power level settings
for your oven.
MICROWAVE POWER LEVEL CHART
Boiling water.
Browning ground beef.
Making candy.
Cooking poultry pieces,
fish & vegetables.
Cooking tender cuts of meat.
Reheating rice, pasta & vegetables.
Reheating prepared foods quickly.
Reheating sandwiches.
Cooking egg, milk and cheese dishes.
Cooking cakes and breads.
Melting chocolate.
Cooking veal.
Cooking whole fish.
Cooking puddings and custard.
Thawing meat, poultry and seafood.
Cooking less tender cuts of meat.
Taking chill out of fruit.
Keeping casseroles and main
dishes warm.
Softening butter and cream cheese.
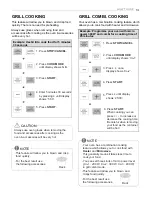
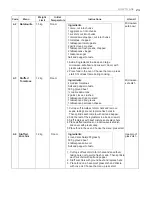
HOW TO USE
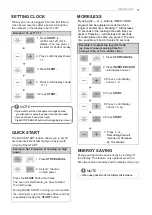
TIMED COOKING
(MANUAL COOKING)
This function allows you to cook food for a
desired time. There are 5 power levels available.
The example below shows how to set power
800 W for the desired time.
When cooking is complete, Tip will sound. The word
End
shows in the display window. 'End' remains in
the display and Tip will sound every minute until the
door is opened, or any button is pressed.
If you do not select the power level, the oven
will operate at power HIGH. To set HI-POWER
cooking, skip step 3 above.
HOW TO USE
12
NOTE
t
Power
Level
Use
High
1000 W
800 W
600 W
400 W
200 W
1. Press
STOP/CANCEL.
5. Enter 5 minutes 30 seconds
by pressing
+
until display
shows
.
'
0
3
:
5
'
2. Press
COOK MODE
until
display shows '1000 W’.
( This is to tell you that the
oven is set on 1000 W
unless a different power
setting is chosen. )
3. Press
+
until display
shows ‘
800 W
’.
Example: To cook food on Power 800 W
for 5 minutes 30 seconds
4. Press
START.
6. Press
START.


