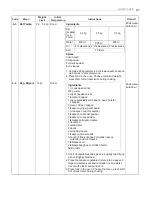
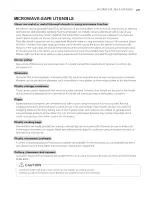
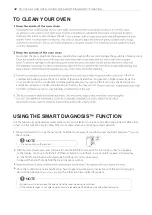
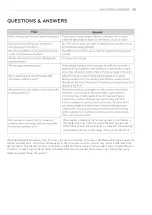
background image

32

STOP

TO CLEAN YOUR OVEN

times and may even damage the oven.

Steam or 

condensation build up inside the door is normal if foods are heated for a long period on higher power levels. this 
is not a malfunction. the condensation will eventually evaporate. Try covering the food or vary the heating levels 
and time to reduce any condensation forming in the door, this may also occur 

Disconnect the mains plug from the power outlet before cleaning the oven to eliminate the possibility of electric shock.

USING THE SMART DIAGNOSIS™ FUNCTION

Use this function if you need an accurate diagnosis by an LG Electronics service centre when the product malfunctions 
or fails. Use this function only to contact the service representative, not during normal operation.

1.

When instructed to do so by the call centre, hold the mouthpiece of your phone over the Smart Diagnosis™ logo on 
the controller.

2.

3.
4.

With the door closed, press and continue to hold the STOP/Cancel button for 3 seconds so that 'Loc' appears 
on the display. Continue to hold the STOP/Cancel button for a further 5 seconds until '5' appears in the display.
(so, the STOP/Cancel button will need to be held for 8 seconds continuously).
A tone will then emit from behind the Smart Diagnosis symbol.

Do not touch any other buttons. 

For best results, do not move the phone while the tones are being transmitted. 

If the call center agent is not able to get an accurate recording of the data, you may be asked to try again.

Max

10 mm

NOTE

t

NOTE

t

Once the countdown is over and the tones have stopped, resume your conversation with the call center agent, 
who will then be able to assist you in using the information transmitted for analysis.

t

TO CLEAN YOUR OVEN / USING THE SMART DIAGNOSIS™ FUNCTION 

Содержание MH633 SERIES

Страница 1: ...OWNER S MANUAL MICROWAVE OVEN Please read this owner s manual thoroughly before operating MH653 MH633 www lg com Copyright 2017 LG Electronics Inc All Rights Reserved MFL69733503_01 ...

Страница 2: ...he safest of all home appliances When the door is opened the oven automatically stops producing microwaves Microwave energy is converted completely to heat when it enters food leaving no left over energy to harm you when you eat your food A very safe appliance 8 BEFORE USE 8 Unpacking Installing 10 11 Setting Clock 11 More Less 11 Quick Start 11 Energy Saving 12 HOW TO USE 12 Timed Cooking 12 Micr...

Страница 3: ...IMPORTANT SAFETY INSTRUCTIONS READ CAREFULLY AND KEEP FOR FUTURE REFERENCE ...

Страница 4: ...4 ...

Страница 5: ... 5 ...

Страница 6: ...6 his model doesn t provide a temperature probe S Farm houses By clients in hotels motels and other residential environments Bed and breakfast type environments T ...

Страница 7: ... It means that the surfaces are liable to get hot during use 37 Do not place an object a book a box etc on the product The product may overheat or catch fire or the object may fall causing injury to persons Caution hot surface 7 ...

Страница 8: ...space or cupboard lower performance and reduced service life If possible please use the microwave oven in the counter top condition NOTE THIS OVEN SHOULD NOT BE USED FOR COMMERCIAL CATERING PURPOSES 3 Plug your oven into a standard household socket Make sure your oven is the only appliance connected to the socket If your oven does not operate properly unplug it from the electrical socket and then ...

Страница 9: ... of feeding bottles and baby food jars shall be stirred or shaken and the temperature checked before consumption in order to avoid burns 9 Button recognition may be hampered in the following circumstances Only the outside area of the button is pressed 10 The setting of the cooking time should be shorter than common microwave ovens 700 W 800 W due to the relatively high output power of the product ...

Страница 10: ...to start cooking which is selected press button one time t e s o t u o y s w o l l a e r u t a e f t r a t s k c i u q e h T 30 seconds intervals of HIGH power cooking with a press of the START button SMART DIAGNOSIS Hold the mouthpiece of a phone up to this icon when directed to by service centre personnel to help diagnose problems with the microwave oven when calling for service CONTROL PANEL BE...

Страница 11: ... feature only operates when the Microwave Oven standby and the display will go out Press STOP CANCEL 11 BEFORE USE 6 Press START Example To adjust the Inverter Cook ex Roast Chicken cooking time for a longer time or for a shorter time NOTE When using clock mode the display will remain on By using the or buttons TIMED COOK program can be adjusted to cook food for a longer or shorter time Pressing w...

Страница 12: ...les and main dishes warm Softening butter and cream cheese HOW TO USE TIMED COOKING MANUAL COOKING This function allows you to cook food for a desired time There are 5 power levels available The example below shows how to set power 800 W for the desired time When cooking is complete Tip will sound The word End shows in the display window End remains in the display and Tip will sound every minute u...

Страница 13: ...al wrapping paper or plastic package Otherwise the wrap will hold steam and juice close to the foods which can cause the outer surface of the foods to cook press At beep open the door and remove any portions that have thawed and turn press button 2 Press INVERTER DEFROST until display shows dEF1 3 Press until display shows 1 2 kg 4 Press START 1 Press STOP CANCEL 28 HOW TO USE 13 HOW TO USE GRILL ...

Страница 14: ...rmally 4 Press START Weight Initial Code Menu Instructions Utensil Limit Temperature 1 1 Jacket Potatoes 0 2 1 0 kg Room 1 Wash potatoes and dry with a paper towel 2 Pierce each potato 8 times with a fork 3 Place food on the Rack Choose the menu and weight press START 4 After cooking stand for 3 minutes Rack 180 220 g each 1 2 Roast Beef 0 5 1 5 kg Refrigerated Refrigerated 1 Brush beef with melte...

Страница 15: ...es with melted butter or oil and season as desired 2 Place food on a glass dish on the Rack Choose the menu and weight press START 3 When BEEP drain juices and turn food over immediately And then press START to continue cooking 1 5 Roast Vegetables Room Heat proof glass dish on the Rack 0 2 0 3 kg Ingredients Eggplants cut into 1 2 cm thickness Zucchinis cut into 1 2 cm thickness Onions cut into w...

Страница 16: ... be at room temperature and ready for use in a recipe Melt Butter 1 3 ea 100 150 g each Refrigerated 1 Remove lid and cover 2 Place food in the oven Choose the menu and weight press START 3 Ice cream will be soft enough to make scooping easier 1 Place food on a bowl 2 Place food in the oven Choose the menu and weight press START 3 After cooking stir to complete melting Microwave safe bowl 2 4 Melt...

Страница 17: ...en press START to continue cooking 3 3 Chicken 0 2 0 3 kg Frozen 1 Remove chicken nuggets from all packaging Rack Nuggets 2 Place food on the Rack Choose the menu and weight press START 3 When BEEP turn food over immediately And then press START to continue cooking DEFROST COOK Your oven s menu has been preprogrammed to automatically cook food Tell the oven what you want and how many items there a...

Страница 18: ...et stand for 30 60 minutes START START t t Remove fish meat 7KH OHQJWK RI GHIURVWLQJ WLPH YDULHV DFFRUGLQJ WR how solidly the food is frozen 7KH VKDSH RI WKH SDFNDJH DIIHFWV KRZ TXLFNO food will defrost Shallow packages will defrost more quickly than a deep block HSHQGLQJ RQ WKH VKDSH RI WKH IRRG FDQ EH defrosted more or less and poultry from its original wrapping paper or plastic package Otherwis...

Страница 19: ... VKDSH RI WKH IRRG FDQ EH defrosted more or less and poultry from its original wrapping paper or plastic package Otherwise the wrap will hold steam and juice close to the foods which can cause the outer surface of the foods to cook press At beep open the door and remove any portions that have thawed and turn press button 2 Press INVERTER DEFROST until display shows dEF1 3 Press until display shows...

Страница 20: ...red with plastic wrap or microwave safe lid The amount of keep warm food is suitable for 1 3 servings 3 POPULAR MENU Your oven s menu has been preprogrammed to automatically cook food Tell the oven what you want and how many items there are Then let your microwave oven cook your selections Example To cook 0 3 kg Kafta 3 Press until display shows 1 3 4 Press START 2 Press POPULAR MENU 5 Press until...

Страница 21: ... and juice close to the foods which can cause the outer surface of the foods to cook press At beep open the door and remove any portions that have thawed and turn press button 2 Press INVERTER DEFROST until display shows dEF1 3 Press until display shows 1 2 kg 4 Press START 1 Press STOP CANCEL 28 HOW TO USE Weight Initial Code Menu Instructions Utensil Limit Temperature POPULAR MENU INSTRUCTIONS 1...

Страница 22: ...ping paper or plastic package Otherwise the wrap will hold steam and juice close to the foods which can cause the outer surface of the foods to cook press At beep open the door and remove any portions that have thawed and turn press button 2 Press INVERTER DEFROST until display shows dEF1 3 Press until display shows 1 2 kg 4 Press START 1 Press STOP CANCEL 28 HOW TO USE Initial Temperature Weight ...

Страница 23: ...rap will hold steam and juice close to the foods which can cause the outer surface of the foods to cook press At beep open the door and remove any portions that have thawed and turn press button 2 Press INVERTER DEFROST until display shows dEF1 3 Press until display shows 1 2 kg 4 Press START 1 Press STOP CANCEL 28 HOW TO USE Initial Temperature Code Menu Instructions Utensil Weight Limit Stuffed ...

Страница 24: ...DQ EH defrosted more or less and poultry from its original wrapping paper or plastic package Otherwise the wrap will hold steam and juice close to the foods which can cause the outer surface of the foods to cook press At beep open the door and remove any portions that have thawed and turn press button 2 Press INVERTER DEFROST until display shows dEF1 3 Press until display shows 1 2 kg 4 Press STAR...

Страница 25: ...allow packages will defrost more quickly than a deep block HSHQGLQJ RQ WKH VKDSH RI WKH IRRG FDQ EH defrosted more or less and poultry from its original wrapping paper or plastic package Otherwise the wrap will hold steam and juice close to the foods which can cause the outer surface of the foods to cook press At beep open the door and remove any portions that have thawed and turn press button 2 P...

Страница 26: ... IRRG FDQ EH defrosted more or less and poultry from its original wrapping paper or plastic package Otherwise the wrap will hold steam and juice close to the foods which can cause the outer surface of the foods to cook press At beep open the door and remove any portions that have thawed and turn press button 2 Press INVERTER DEFROST until display shows dEF1 3 Press until display shows 1 2 kg 4 Pre...

Страница 27: ...an a deep block HSHQGLQJ RQ WKH VKDSH RI WKH IRRG FDQ EH defrosted more or less and poultry from its original wrapping paper or plastic package Otherwise the wrap will hold steam and juice close to the foods which can cause the outer surface of the foods to cook press At beep open the door and remove any portions that have thawed and turn press button 2 Press INVERTER DEFROST until display shows d...

Страница 28: ...ter defrosting let stand for 5 15 minutes POULTRY 2 dEF FISH 3 dEF BREAD 4 dEF Sliced bread Buns Baguette etc Separate slices and place between paper towel or flat plate Turn food over at BEEP After defrosting let stand for 1 2 minutes Fish Fillets Whole Steaks Turn food over at BEEP After defrosting let stand for 5 10 minutes Poultry Whole Cut up Breast boneless Cornish Hens Whole Turkey Breast T...

Страница 29: ...for 5 15 minutes POULTRY 2 dEF FISH 3 dEF BREAD 4 dEF Sliced bread Buns Baguette etc Separate slices and place between paper towel or flat plate Turn food over at BEEP After defrosting let stand for 1 2 minutes Fish Fillets Whole Steaks Turn food over at BEEP After defrosting let stand for 5 10 minutes Poultry Whole Cut up Breast boneless Cornish Hens Whole Turkey Breast Turn food over at BEEP Aft...

Страница 30: ... ...

Страница 31: ... ...

Страница 32: ...ucted to do so by the call centre hold the mouthpiece of your phone over the Smart Diagnosis logo on the controller 2 3 4 With the door closed press and continue to hold the STOP Cancel button for 3 seconds so that Loc appears on the display Continue to hold the STOP Cancel button for a further 5 seconds until 5 appears in the display so the STOP Cancel button will need to be held for 8 seconds co...

Страница 33: ...microwave oven If you use a product such as radio TV wireless LAN Bluetooth medical equipment wireless equipment etc Using the same frequency as the microwave oven the product may receive interference from these products This interference does not indicate a problem of the microwave or the product and is not a malfunction Therefore it is safe to use However medical equipment may receive interferen...

Страница 34: ...ments directly e reduced to avoid overheating connected to a low voltage power supply network which supplies buildings used for domestic purposes You can download a owner s manual at http www lg com TECHNICAL SPECIFICATIONS Power Input 230 V 50 Hz Microwave Output Power att IEC60705 rating standard Microwave Frequency 2450 MHz 387 Outside Dimension 476 mm Microwave Grill 900 att 0 att Combination ...

Страница 35: ......

Страница 36: ......

Отзывы: