background image

Operation

23

Programmed Playback 

WMA

MP3

CD

11

Insert a disc.

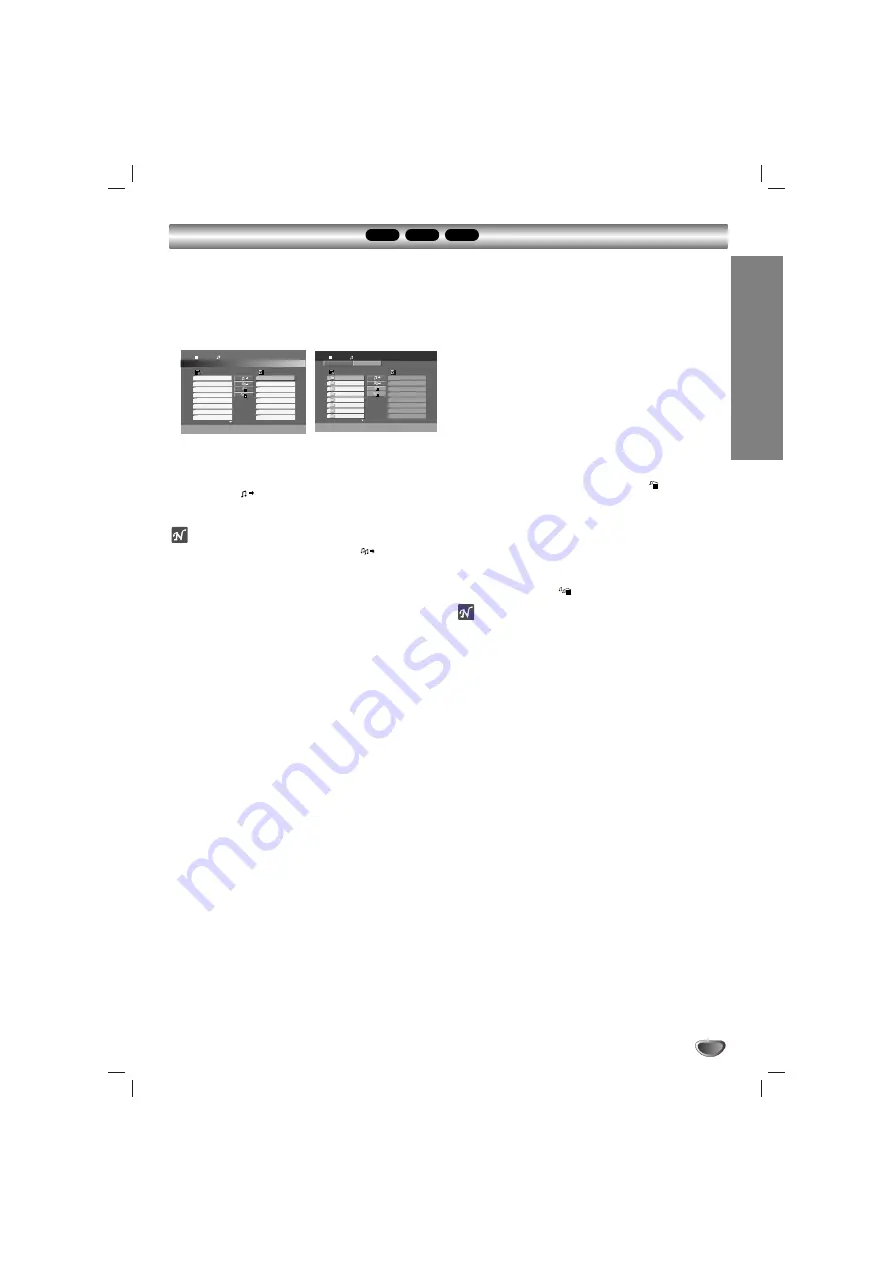
Audio CD and MP3/WMA Discs: 
Audio CD or MP3/WMA menu appears as below.

Audio CD Menu    

MP3/WMA Menu

2

2

Select a track on the “List”, then press PROGRAM
or select “

(Add)” icon then press ENTER to

place the selected track on the “Program” list.
Repeat to place additional tracks on the list.

ote

You can add all tracks in the disc. Select “

(Add All)” icon

then press ENTER.

3

3

Select the track you want to start playing on the
“Program” list. Press MENU to move to the next
page.

4

4

Press PLAY or ENTER to start. Playback begins in
the order in which you programmed the tracks.
Playback stops after all of the tracks on the
“Program” list have played once.

5

5

To resume normal playback from programmed play-
back, select a track of AUDIO CD (or MP3/WMA)
list and then press PLAY.

REPEAT PROGRAMMED TRACKS 

1. Press REPEAT when playing a disc. The repeat

icon appears.

2. Press REPEAT to select a desired repeat mode.

• TRACK: repeats the current track
• ALL: repeats all the tracks on programmed list.
• Off(No display): does not play repeatedly.

ERASING A TRACK FROM “PROGRAM” 

LIST

1. Use 

v V

to select the track that you wish to erase

from the Program list.

2. Press CLEAR. Alternatively, select “

(Delete)”

icon then press ENTER to place the selected track
on the Program list. Repeat to erase additional
tracks on the list.

ERASING THE COMPLETE PROGRAM 

LIST

Use 

v

/

V

to select “

(Del all)”,  then press ENTER.

ote

The programs are also cleared when the disc is removed.

The program function enables you to store your favorite tracks from any disc in the receiver memory. A program can
contain 300 tracks.

Program

List

Track1

Track2

Track3

Track4

Track5

Track6

Track7

Track8

Track8

Track3

Track12

Track7

Track6

Track9

Track1

Track10

0:00:00

1 / 12

Audio CD

Program

List

0:00:00

1 / 104

MP3   

JPEG

JPEG

Music Folder 1

Music Folder 2

Music Folder 3

Music Folder 4

Music Folder 5

Music Folder 6

Music Folder 7

Music Folder 8

Содержание LH-T750TF

Страница 1: ...S MANUAL MODEL LH T750TF Speakers LHS 75TFS LHS 75TFC LHS 75TFW Before connecting up operating or repairing this product please read this instruction booklet carefully and completely LH T750TF_BIDNLLK_6911 R P N MFL41266911 ...

Страница 2: ...ial Unpublished works Copyright 1992 1997 Dolby Laboratories All rights reserved Manufactured under license from Digital Theater Systems Inc US Pat No 5 451 942 5 956 674 5 974 380 5 978 762 and other worldwide patents issued and pending DTS and DTS Digital Surround are registered trademarks of Digital Theater Systems Inc Copyright 1996 2000 Digital Theater Systems Inc All rights reserved OTES ON ...

Страница 3: ...ame Playback 18 Search 18 Repeat 18 Repeat A B 19 Time Search 19 Marker Search 19 Zoom 19 Special DVD Features 20 Title Menu 20 Disc Menu 20 Changing the Audio Language 20 Changing the Audio Channel 20 Subtitles 20 DVD Audio Discs 20 Audio CD and MP3 WMA Disc 21 Playing an Audio CD and MP3 WMA Disc 21 Pause 21 Moving to another Track 21 Repeat Track All Off 21 Search 21 JPEG Disc Operation 22 View...

Страница 4: ...o level may be heard from the analog stereo output To avoid possible damage to the audio system turn down the volume before playing back such discs adjust the volume gradually and keep the volume level low To enjoy DTS Digital SurroundTM playback an external 5 1 channel DTS Digital SurroundTM decoder system must be connected to the digital output of the unit Disc related terms Title DVD only The m...

Страница 5: ...s depends on the operating environment For details please contact your nearest dealer Notes on Discs Disc Handling Do not touch the playback side of the disc Hold the disc by the edges so that fingerprints will not get on the surface Do not stick paper or tape on the disc Storing discs After playing store the disc in its case Do not expose the disc to direct sunlight or sources of heat or leave it...

Страница 6: ...ischarge may cause permanent damage to the unit AUDIO L R AV2 IN AV1 IN S VIDEO OUT connector FM Antenna connector AM Loop Antenna connectors SPEAKER connectors Power Cord MONITOR OUT connector OPTICAL IN connector COMPONENT VIDEO OUT terminals Connect to a TV with Y Pb Pr inputs FUNCTION PLAY Press and hold down this button about 3 seconds then press repeatedly to select other function MONO STERE...

Страница 7: ...er FM andAM bands 0 9 numerical buttons Select a service programme number directly or select numbered options in a menu XTS pro To enjoy more natural and realistic sound XTS To enjoy great sound effect AUDIO Selects an audio language DVD or an audio channel CD SOUND MODE Selects the sound mode SETUP Accesses or removes setup menu MENU Accesses the menu on a DVD disc SCAN bb BB Search backward or f...

Страница 8: ...VIDEO OUT jacks from the DVD CD Receiver to the corresponding in jacks on the TV using an Y Pb Pr cable C Progressive Scan connection If your television is a high definition or digital ready television you may take advantage of the DVD CD Receiver s progressive scan output for the highest video resolution possible If your TV does not accept the Progressive Scan format the picture will appear scram...

Страница 9: ...T VIDEO IN OUT AUDIO L AUDIO R VIDEO OUT IN AUDIO L AUDIO R VCR Additional VCR To AUDIO IN L R VIDEO IN AV2 To AUDIO IN L R VIDEO IN AV1 To AUDIO OUT L R VIDEO OUT To AUDIO OUT L R VIDEO OUT AV1 IN AV2 IN AUDIO L R FM Wire aerial supplied AM Loop aerial supplied AV1 IN AV2 IN Aerial Connections Connect the supplied FM AM aerial for listening to the radio Connect the AM Loop aerial to the AM aerial...

Страница 10: ...nal on the components to and to If the cables are reversed the sound will be distorted and will lack base If you use front speakers with low maximum input rating adjust the volume carefully to avoid excessive output on the speakers Do not remove the front cover of supplied speaker Front speaker Right Front speaker Left Center speaker Rear speaker Right surround Subwoofer Rear speaker Left surround...

Страница 11: ... degree Centre speaker The centre speakers and front speakers are ideally the same height But normally place it above or below the television Rear speakers Place left and right behind the listening area These speakers recreate sound motion and atmosphere required for surround sound playback For best results do not install the rear speakers too far behind the listening position and install them at ...

Страница 12: ... signals is played according to the way it was recorded Sound Mode You can enjoy surround sound simply by selecting one of the pre programmed sound fields according to the program you want to listen to When DVD is inserted You can change the Digital Audio Output mode by pressing the AUDIO button on the remote control during playback Although the DVD contents differ from disc to disc the following ...

Страница 13: ... pressed for 10 seconds the on screen display disappears A B Title Example On Screen Display during playing VCD Items Title Number Chapter Number Time search Audio language and Digital Audio Output mode Subtitle language Angle Sound Selection Method b B Numbers ENTER b B Numbers ENTER Numbers ENTER b B or AUDIO b B or SUBTITLE b B b B 1 3 1 12 0 20 09 ABC 1 ENG 1 3 Bypass Example On Screen Display...

Страница 14: ... items require additional steps 5 5 Press SET UP or PLAY to exit the setup menu LANGUAGE OSD Select a language for the Setup menu and on screen display Disc Audio Subtitle Menu Select the language you prefer for the audio track disc audio subtitles and the disc menu Original Refers to the original language in which the disc was recorded Other To select another language press number buttons to ente...

Страница 15: ...e it The video output will be restored to the standard setting and a picture will once again be visible on a conventional analog TV or monitor AUDIO Each DVD disc has a variety of audio output options Set the DVD CD Receiver s AUDIO options according to the type of audio system you use 5 1 Speaker Setup Select speaker settings including volume balance and distance or test the speaker settings Spea...

Страница 16: ...r rated scenes are not played unless an alternate scene is available on the disc The alternative must have the same rating or a lower one If no suitable alternative is found playback stops You must enter the 4 digit pass word or change the rating level in order to play the disc 4 4 Press ENTER to confirm your rating selection then press SET UP to exit the menu Password Security Code You can enter ...

Страница 17: ...DVD or Video CD which contains a menu Use the b B v V buttons to select the title chapter you want to view then press ENTER to start Press TITLE or DVD MENU to return to the menu screen Use the b B v V buttons to select an option you want then press ENTER to view the option Use the number buttons to select the track you want to view Press RETURN to return to the menu screen Menu setting and the ex...

Страница 18: ...y frame playback 1 1 Press PAUSE STEP during playback The DVD CD Receiver will now go into PAUSE mode 2 2 You can advance the picture frame by frame by press ing PAUSE STEP repeatedly on the remote control Search 1 1 Press m m or M M during playback The DVD CD Receiver will now go into SEARCH mode 2 2 Press m m or M M repeatedly to select the required speed mX2 mX4 mX8 mX16 mX100 backward or MX2 M...

Страница 19: ...e memorized To enter a mark follow these steps 1 1 During disc playback press MARKER when playback reaches the spot that you want to memorize The marker icon will appear on the TV screen briefly 2 2 Repeat step 1 to enter up to nine Marker points on a disc To Recall a Marked Scene 1 1 During disc playback press SEARCH The MARKER SEARCH menu will appear on the screen 2 2 Within 10 seconds press 1 1...

Страница 20: ...used for music either Advanced Resolution multi channel sound quality that is closer to the artist s master recording or for longer recordings Many DVD Audio discs contain on screen text such as artist biographies playlists or lyrics Some DVD Audio discs contain photo galleries or video clips ote To enjoy maximum sound quality and surround effect of DVD Audio you must use 5 1 channel analog audio ...

Страница 21: ...ll now go into SEARCH mode 2 Press m or M repeatedly to select the required speed mX2 mX4 mX8 backward or MX2 MX4 MX8 forward 3 To exit SEARCH mode press PLAY WMA MP3 CD WMA MP3 CD WMA MP3 CD WMA MP3 CD WMA MP3 CD MP3 WMA disc compatibility with this player is limited as follows Sampling frequency within 32 48 kHz MP3 within 24 48kHz WMA Bit rate within 8 320kbps MP3 32 192kbps WMA The DVD CD Rece...

Страница 22: ... PLAY or press PAUSE STEP again MOVING TO ANOTHER FILE Press SKIP or once while viewing a picture to advance to the next or previous file TO ROTATE PICTURE Press b B during showing a picture to rotate the picture clockwise or counter clockwise JPEG JPEG JPEG JPEG JPEG JPEG disc compatibility with this player is limited as follows Depending upon the size and number of JPEG files it could take a lon...

Страница 23: ...en playing a disc The repeat icon appears 2 Press REPEAT to select a desired repeat mode TRACK repeats the current track ALL repeats all the tracks on programmed list Off No display does not play repeatedly ERASING A TRACK FROM PROGRAM LIST 1 Use v V to select the track that you wish to erase from the Program list 2 Press CLEAR Alternatively select Delete icon then press ENTER to place the selecte...

Страница 24: ...ty with this player is limited as follows Available resolution size of the DivX file is under 720x576 W x H pixel The file name of the DivX subtitle is available by 20 40 characters different by language If there is impossible code to express in the DivX file it may be displayed as _ mark on the dis play If the number of the screen frame is over 30 per 1 second this unit may not operate normally I...

Страница 25: ...akers Right ote Certain speaker settings are prohibited by the Dolby Digital licensing agreement Size Since the speaker settings are fixed you cannot change them Volume Press b B to adjust the output level of the selected speaker 5dB 5dB Distance If you connected speakers to your DVD CD Receiver setting the distance lets the speakers know how far the sound has to travel to reach your set listening...

Страница 26: ...e system of your TV normal colour picture may not be displayed AUTO Select when DVD CD Receiver is connected with Multi system TV NTSC Select when DVD CD Receiver is connected with NTSC TV PAL Select when DVD CD Receiver is connected with PAL TV Controlling the TV Your remote control is capable of operating your DVD CD Receiver as well as limited functions of LG TV Follow the instructions below to...

Страница 27: ...the FULL message will appear in the display window for a moment and then a preset number will flash To change the preset number follow the steps 5 6 as above Listening to the radio Preset radio stations in the DVD CD Receiver s memory first see Presetting radio stations on the left 1 1 Press BAND until AM MW or FM appears in the display window The last received station is tuned in 2 2 Press PR D D...

Страница 28: ...the func tion changes in the following sequence AV 1 2 for selecting the analog signal from AV1 2 AUDIO IN L R VIDEO IN Connectors AV 1 OPT for selecting the optical digital signal from AV1 VIDEO IN OPTICAL IN Connector otes The Optical input function is available only when the other unit s Sampling Frequency is 32 96kHz You can also select the input source by pressing FUNC button on the front pan...

Страница 29: ... Byelorussian 6669 Cambodian 7577 Catalan 6765 Chinese 9072 Corsican 6779 Croatian 7282 Czech 6783 Danish 6865 Dutch 7876 English 6978 Esperanto 6979 Estonian 6984 Faroese 7079 Fiji 7074 Language Code Finnish 7073 French 7082 Galician 7176 Georgian 7565 German 6869 Greek 6976 Greenlandic 7576 Guarani 7178 Gujarati 7185 Hausa 7265 Hebrew 7387 Hindi 7273 Hungarian 7285 Icelandic 7383 Indonesian 7378...

Страница 30: ...isc is dirty The speakers and components are connected poorly The DVD CD Receiver is located too close to the TV Correction Plug the power cord securely into the wall outlet Insert a disc Check that the DVD or audio CD indicator in the DVD display is lit Select the appropriate video input mode on the TV so the picture from the DVD CD Receiver appears on the TV screen Connect the video cable into t...

Страница 31: ... the remote sensor of the DVD CD Receiver The remote control is too far from the DVD CD Receiver There is an obstacle in the path of the remote control and the DVD CD Receiver The batteries in the remote control are flat Nothing is displayed on the front panel display Correction Connect the antenna securely Adjust the antennas and connect an external antenna if necessary Tune in the station manual...

Страница 32: ...utput Y 1 0 V p p 75 Ω negative sync RCA jack x 1 Pb Pr 0 7 V p p 75 Ω RCA jack x 1 Tuning Range 87 5 108 0 MHz Intermediate Frequency 10 7 MHz Signal to Noise Ratio 60 dB Mono Frequency Response 140 10 000 Hz Tuning Range 522 1 620 kHz or 520 1 720 kHz Intermediate Frequency 450 kHz Stereo mode 100W 100W 6Ω at 1 kHz THD 10 Surround mode Front 100W 100W THD 10 Centre 100W Surround 100W 100W 6Ω at ...

Отзывы: