Содержание Dle1501 series

Страница 1: ...L DRYER Read this owner s manual thoroughly before operating the appliance and keep it handy for reference at all times DLE1501 DLG1502 MFL67731056 Rev 06_071117 www lg com Copyright 2015 2017 LG Electronics Inc All Rights Reserved ...

Страница 2: ...ryers 20 Connecting Electric Dryers 25 Special Electrical Requirements 25 Final Installation Check 26 Installation Test Duct Check 28 OPERATION 28 Using the Dryer 29 Check the Lint Filter Before Every Load 29 Sorting Laundry 29 Loading the Dryer 30 Control Panel 32 Cycle Guide 33 Cycle Modifier Buttons 33 Option Buttons 34 Special Functions 35 SMART FUNCTIONS 35 Smart ThinQ Application 36 Smart Di...

Страница 3: ...ns Keep your ducts clean to help increase efficiency and reduce long drying times caused by blocked ducts Smart Diagnosis Should you experience any technical difficulty with your dryer it has the capability of transmitting data via your telephone to the Customer Information Center The call center agent records the data transmitted from your machine and uses it to analyze the issue providing a fast...

Страница 4: ...installer Do not install a clothes dryer with flexible plastic venting materials If flexible metal foil type duct is installed it must be of a specific type identified by the appliance manufacturer as suitable for use with clothes dryers Flexible venting materials are known to collapse be easily crushed and trap lint These conditions will obstruct clothes dryer airflow and increase the risk of fir...

Страница 5: ...two or more people This appliance is not designed for maritime use or for mobile installations such as in RVs trailers or aircraft Store and install the appliance where it will not be exposed to temperatures below freezing or exposed to outdoor weather conditions This appliance must be positioned near to an electrical power supply Do not under any circumstances cut or remove the third ground prong...

Страница 6: ...not install near another heat source such as a stove oven or heater Keep area around the exhaust opening and adjacent surrounding areas free from the accumulation of lint dust and dirt The appliance must not be supplied through an external switching device such as a timer or connected to a circuit that is regularly switched on and off by a utility OPERATION Repair or immediately replace all power ...

Страница 7: ...ng oil or other flammable or explosive substances as they give off vapors that could ignite or explode Do not use heat to dry articles containing foam rubber or similarly textured rubber like materials Do not store plastic paper or clothing that may burn or melt on top of the dryer during operation Always check the inside of the appliance for foreign objects Gas appliances can cause minor exposure...

Страница 8: ...lectrician or service personnel if you are in doubt whether the appliance is properly grounded Do not modify the plug provided with the appliance if it will not fit the outlet have a proper outlet installed by a qualified electrician The appliance must be grounded In the event of a malfunction or breakdown grounding will reduce the risk of electric shock by providing a path of least resistance for...

Страница 9: ...ng Rack Side vent kit Pedestal or Pedestal washer sold separately NOTE For your safety and extended product life use only authorized components The manufacturer is not responsible for product malfunction or accidents caused by the use of unauthorized components or parts The images in this manual may be different from the actual components and accessories that are subject to change by the manufactu...

Страница 10: ...un Product Specifications The appearance and specifications listed in this manual may vary due to constant product improvements Dryer Models DLE1501 DLG1502 Description Dryer Electrical requirements Please refer to the rating label for detailed information Gas requirements NG 4 10 5 inch 10 2 26 7 cm WC LP 8 13 inch 20 4 33 1 cm WC Dimensions 27 W X 29 1 2 D X 40 3 16 H 50 1 4 D with door open 68 ...

Страница 11: ...r dryer at temperatures below 45 F 7 C At lower temperatures the dryer might not shut off at the end of an automatic cycle This can result in longer drying times The dryer must not be installed or stored in an area where it will be exposed to water and or weather Check code requirements that limit or do not permit installation of the dryer in garages closets mobile homes or sleeping quarters Conta...

Страница 12: ...t before installing with a pedestal kit 3 7 6 cm 48 in 2 310 cm2 24 in 2 155 cm2 3 7 6 cm 21 1 4 54 cm 18 min 45 7 cm 14 max 35 6 cm 50 1 4 127 5 cm 29 1 2 75 cm 5 12 7cm 1 2 5 cm 1 2 5 cm 27 68 6 cm 5 12 7cm 1 2 5 cm 14 max 35 6 cm 18 min 45 7 cm 29 1 2 75 cm Required spacing For side or bottom venting 2 inch 5 1 cm of spacing is allowed Installation Spacing for Cabinet For cabinet installation w...

Страница 13: ...mize vibration noise and unwanted movement the floor must be a perfectly level solid surface 1 Position the dryer in the final location Check levelness of dryer from side to side Repeat from front to back Place level here Place level here 2 Use an adjustable wrench to turn the leveling feet Unscrew the legs to raise the dryer or screw in the legs to lower it Raise or lower with the leveling feet u...

Страница 14: ...uctions here are for changing the door swing from a right to a left side hinge If the door has been reversed and it is necessary to change it back use care when following these instructions Some of the illustrations and the left right references will be reversed and you will need to read the instructions carefully WARNING Be sure to support the weight of the door before installing the hinge screws...

Страница 15: ... the door frame Remove the two plastic cover caps Reinstall the hinges and cover caps on the opposite sides from which they were removed Hinge assembly Cover cap 5 With the hinges and cover caps in the new locations remount the inner door frame onto the outer door frame with the screws removed in step 3 above WARNING Be sure to support the weight of the door before installing the hinge screws 6 Re...

Страница 16: ...ls Press the adapter duct onto the blower housing and secure to the base of the dryer as shown Adapter Duct Bracket Knockout 3 Preassemble a 4 inch 10 2 cm elbow to the next 4 inch 10 2 cm duct section and secure all joints with duct tape Be sure that the male end of the elbow faces AWAY from the dryer Insert the elbow duct assembly through the side opening and press it onto the adapter duct Secur...

Страница 17: ... duct must be UL listed Use of other materials for transition duct could affect drying time DO NOT use sheet metal screws or other fasteners which extend into the duct that could catch lint and reduce the efficiency of the exhaust system Secure all joints with duct tape Do not exceed the recommended duct length limitations noted in the chart Failure to follow these instructions may result in exten...

Страница 18: ...For personal safety this dryer must be properly grounded This dryer must be plugged into a 120 VAC 60 Hz grounded outlet protected by a 15 ampere fuse or circuit breaker Where a standard 2 prong wall outlet is encountered it is your personal responsibility and obligation to have it replaced with a properly grounded 3 prong wall outlet ELECTRIC SHOCK HAZARD Failure to follow safety warnings could r...

Страница 19: ...he type of gas being used natural gas or propane gas If necessary the correct nozzle for the LP nozzle kit order part number 383EEL3002D should be installed by a qualified technician and the change should be noted on the dryer All connections must be in accordance with local codes and regulations Gas dryers MUST exhaust to the outdoors NOTE In the Commonwealth of Massachusetts This product must be...

Страница 20: ... wire only or as required by local codes Allow sufficient slack in wiring so the dryer can be moved from its normal location when necessary The power cord pigtail connection between the wall receptacle and the dryer terminal block IS NOT supplied with the dryer Type of pigtail and gauge of wire must conform to local codes and with instructions on the following pages WARNING A 4 wire connection is ...

Страница 21: ...h hole 3 Thread a 30 amp 240 volt 4 wire UL listed power cord with 10 AWG minimum copper conductor through the strain relief Terminal Block UL Listed Strain Relief UL Listed 4 Wire Power Cord 4 Transfer the dryer s ground wire from behind the green ground screw to the center screw of the terminal block 5 Attach the two hot leads of the power cord to the outer terminal block screws 6 Attach the whi...

Страница 22: ...1 2 5 cm Ground Wire 5 12 7 cm 2 Remove the terminal block access cover on the upper back of the dryer 3 Install a UL listed strain relief into the power cord through hole 4 Thread the 4 wire 10 AWG minimum copper power cable prepared in step 1 through the strain relief Terminal Block UL Listed Strain Relief UL Listed 4 Wire Power Cord 5 Transfer the dryer s ground wire from behind the green groun...

Страница 23: ...hrough hole 3 Thread a 30 amp 240 volt 3 wire UL listed power cord with 10 AWG minimum copper conductor through the strain relief Terminal Block UL Listed Strain Relief UL Listed 3 Wire Power Cord 4 Attach the two hot leads black and red of the power cord to the outer terminal block screws 5 Attach the neutral white wire to the center terminal block screw 6 Connect the external ground if required ...

Страница 24: ... upper back of the dryer 3 Install a UL listed strain relief into the power cord through hole 4 Thread the 3 wire 10 AWG minimum copper conductor power cable prepared in step 1 through the strain relief Terminal Block UL Listed Strain Relief UL Listed 3 Wire Power Cord 5 Attach the two hot leads black and red of the power cord to the outer terminal block screws 6 Attach the neutral white wire to t...

Страница 25: ...st be at least 25 sq in 163 cm It is important that the clearance of the duct from any combustible construction be at least 2 inch 5 cm and when venting the dryer to the outdoors the dryer should be installed with a clearance of at least 1 inch 2 5 cm at the sides and back of the dryer Please be aware that venting materials are not supplied with the dryer You must obtain the venting materials nece...

Страница 26: ...ect the accuracy of the results 2 Press and hold the Temp and Signal buttons and then press the POWER button On models with a glass touch control panel press the POWER button then IMMEDIATELY press and hold the Temp and Signal buttons This button sequence activates the installation test The code will display if the activation is successful 3 Press the START PAUSE button The dryer will start the te...

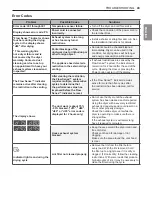
Страница 27: ...ments Error Code Check the error code before you call for service Error Code Possible Causes Solutions tE1 or tE2 Temperature sensor failure Turn off the dryer and call for service HS Humidity sensor failure Turn off the dryer and call for service PS PF or nP Electric dryer power cord is not connected correctly or house power supply is incorrect Check the power supply or the connection of the powe...

Страница 28: ...indicator for the desired cycle is lit The preset temperature dry level and option settings for that cycle will be shown Default settings for the selected cycle can now be changed if desired Refer to the Cycle Setting and Options page for details NOTE Not all options or modifiers are available on all cycles Refer to the Cycle Guide page for default settings and available options A different chime ...

Страница 29: ... with do not wash Heat setting High Low Medium No heat air Grouping Similar Items For best results sort clothes into loads that can be dried with the same drying cycle Different fabrics have different care requirements and some fabrics will dry more quickly than others Loading the Dryer WARNING To reduce the risk of fire explosion electric shock injury to persons and death when using this applianc...

Страница 30: ...lect additional cycle options Press and hold any button marked with an asterisk for 3 seconds to activate a special function 5 More Time Less Time Buttons Use these buttons with the Time Dry and other Manual Dry cycles to adjust the drying time Press the More Time button to increase the selected manual cycle time by 1 minute press the Less Time button to decrease the cycle time by 1 minute 6 Cycle...

Страница 31: ...utton is pressed 11 Flow Sense Duct Blockage Sensing System Indicator The Flow Sense duct blockage sensing system detects and alerts you to blockages in the ductwork that reduce exhaust flow from the dryer Maintaining a clean exhaust system improves operating efficiency and helps minimize service calls saving you money 12 Custom PGM If you have a special combination of settings that you use freque...

Страница 32: ...ing will be shown in the display Manual Dry Cycles Use Manual Dry cycles to select a specific amount of drying time and a drying temperature When a Manual Dry cycle is selected the Estimated Time Remaining display shows the actual time remaining in your cycle You can change the actual time in the cycle by pressing the More Time or Less Time buttons NOTE To protect your garments not every dryness l...

Страница 33: ... The dryer features several additional cycle options to customize cycles to meet individual needs Certain option buttons also feature a special function that can be activated by pressing and holding that option button for 3 seconds Adding Cycle Options to a Cycle 1 Turn on the dryer and press the Cycle buttons to select the desired cycle 2 Use the cycle modifier buttons to adjust the settings for ...

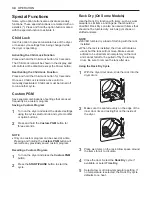
Страница 34: ...stom program can be saved at a time Pressing and holding the Custom PGM button will overwrite any previously saved custom program Recalling a Custom Program 1 Turn on the dryer and press the Custom PGM button 2 Press the START PAUSE button to start the cycle Rack Dry On Some Models Use the Rack Dry function with items such as wool swearters silk items and lingerie that should be dried flat Rack Dr...

Страница 35: ...downloaded cycle until a new cycle is downloaded Venting Tips Provides venting tips Smart Diagnosis This function provides useful information for diagnosing and solving issues with the appliance based on the pattern of use Settings Set the product nickname and delete product NOTE Press in the LG Smart ThinQ application for a more detailed guide on how to use the Tag On function To operate the NFC ...

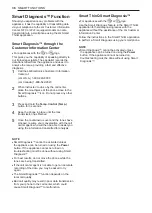
Страница 36: ...e your conversation with the call center agent who will then be able to assist you using the information transmitted for analysis NOTE Smart Diagnosis cannot be activated unless the appliance can be turned on using the Power button If the appliance cannot be turned on troubleshooting must be done without using Smart Diagnosis For best results do not move the phone while the tones are being transmi...

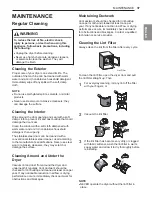
Страница 37: ...ed according to the manufacturer s specifications Never use steel wool or abrasive cleansers they may scratch or damage the surface Cleaning Around and Under the Dryer Vacuum lint and dust from around the dryer and underneath it regularly Vent ductwork should be checked for lint buildup and cleaned at least once per year If any noticeable reduction in airflow or drying performance occurs immediate...

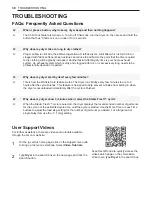
Страница 38: ...rinkle Care feature works The dryer runs briefly every few minutes for up to 3 hours after the cycle finishes This feature is designed to help prevent wrinkles from setting in when the dryer is not unloaded immediately after the cycle is finished Q Why does my dryer show 3 minutes when I select the Steam Fresh cycle A When the Steam Fresh cycle is selected the dryer displays the recommended number...

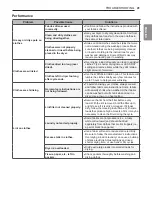
Страница 39: ...er outage has occurred Reset circuit breaker or replace fuse Do not increase fuse capacity If the problem is a circuit overload have it corrected by a qualified electrician NOTE Due to the design of electric dryers it is possible for a circuit problem to allow an electric dryer to run without heat Gas supply or service is turned off Confirm that the house gas shutoff and the dryer gas shutoff valv...

Страница 40: ...ected by a qualified electrician NOTE Due to the design of electric dryers it is possible for a circuit problem to allow an electric dryer to run without heat Dryer is overloaded Divide extra large loads into smaller loads for better drying performance and efficiency Dryer is underloaded If you are drying a very small load add a few extra items to ensure proper tumbling action If the load is very ...

Страница 41: ...r up to 3 hours to help prevent wrinkling Clothes are shrinking Garment care instructions are not being followed To avoid shrinking your clothes always consult and follow fabric care instructions Some fabrics will naturally shrink when washed Other fabrics can be washed but will shrink when dried in a dryer Use a low or no heat setting Lint on clothes Lint filter not cleaned properly Remove the li...

Страница 42: ...DRY and or shorter TIME DRY time settings Clothes have damp spots after a Sensor Dry cycle Very large load or very small load Single large item such as a blanket or comforter If items are too tightly packed or too sparse the sensor may have trouble reading the dryness level of the load Use a Time Dry cycle for very small loads Large bulky items such as blankets or comforters can sometimes wrap the...

Страница 43: ...splay The Flow Sense indicator remains active after clearing the restriction in the venting After clearing the restriction the Flow Sense system requires multiple consecutive cycles to determine that the performance value has improved before the Flow Sense indicator is reset If the Flow Sense indicator remains active for more than five cycles after the restriction has been cleared call for service...

Страница 44: ... states do not allow the exclusion or limitation of incidental or consequential damages or limitations on how long an implied warranty lasts so the above exclusion or limitation may not apply to you This warranty gives you specific legal rights and you may also have other rights that vary from state to state THIS LIMITED WARRANTY DOES NOT COVER Service trips to deliver pick up or install or repair...

Страница 45: ...udes use of parts not approved or specified by LG Filter is clogged Clean the lint filter Not heating long dry time Duct is clogged Clean the hood and duct Not heating long dry time Excessive duct length and or multiple elbows Keep exhaust ducts as short as possible using as few elbows and bends as possible Not heating long dry time Improperly connected power cord or electrical outlet issue Reconn...

Страница 46: ...46 MEMO ...
Страница 47: ...DORA Lea detenidamente el manual del propietario antes de poner el electrodoméstico en funcionamiento y consérvelo a mano en todo momento para su referencia www lg com Copyright 2015 2017 LG Electronics Inc Todos los Derechos Reservados ...

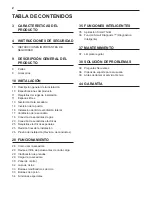
Страница 48: ...0 Conexión de secadoras eléctricas 25 Requisitos eléctricos especiales 25 Revisión final de la instalación 26 Prueba de instalación Revisión de conductos 28 FUNCIONAMIENTO 28 Cómo usar la secadora 29 Revise el filtro de pelusa antes de cada carga 29 Clasificación de prendas 29 Carga de la secadora 30 Panel de control 32 Guía de ciclos 33 Botones modificadores de ciclo 33 Botones de opción 34 Funci...

Страница 49: ...s para ayudar a aumentar la eficacia y reducir los tiempos de secado prolongados causados por conductos bloqueados Smart Diagnosis Si experimenta dificultades técnicas con su secadora esta cuenta con la capacidad de transmitir datos por teléfono al Centro de Información al Cliente El agente del centro de atención registra los datos que transmite su máquina y los utiliza para analizar el problema l...

Страница 50: ... realizada por un técnico calificado No instale la secadora de ropa con materiales de ventilación de plástico flexibles Si se instala un conducto flexible metálico tipo lámina de aluminio este debe ser de un tipo específico avalado por el fabricante como apto para el uso con secadoras de ropa Es sabido que los materiales de ventilación flexibles se colapsan se aplastan con facilidad y atrapan pelu...

Страница 51: ...cto requieren de dos o más personas Este artefacto no ha sido diseñado para ser usado en embarcaciones o instalaciones móviles tales como casas rodantes remolques o aeronaves Almacene e instale el artefacto donde no esté expuesto a temperaturas bajo cero ni a la intemperie Debe posicionar este artefacto cerca de una fuente de suministro eléctrico En ninguna circunstancia debe cortar o quitar la te...

Страница 52: ...ra la salud y peligro de incendio No instale la secadora cerca de un elemento que genere calor como una estufa un horno o un calentador Mantenga el área alrededor de la abertura de escape y las áreas adyacentes libres de acumulación de pelusa polvo y tierra El electrodoméstico no debe ser suministrado a través de un interruptor externo como un temporizador o conectado a un circuito que sea encendi...

Страница 53: ... ensuciado con estas sustancias ya que estas emiten vapores que pueden inflamarse o explotar No use calor para secar prendas que contengan espuma de caucho o materiales de textura similar al caucho No guarde plásticos papel o ropa que puedan quemarse o derretirse sobre la secadora en funcionamiento Siempre revise el interior del aparato para verificar que no haya objetos extraños Los aparatos de g...

Страница 54: ... está seguro si el artefacto está adecuadamente conectado a tierra No modifique el enchufe que viene con el artefacto Si no cabe en el contacto pida que un electricista calificado instale un contacto apropiado El artefacto debe estar conectado a tierra En caso de funcionamiento defectuoso o avería la conexión a tierra reduce el riesgo de choque eléctrico al establecer una ruta de menor resistencia...

Страница 55: ...Rejilla de secado Kit de ventilación lateral Pedestal o pedestal lavador se vende por separado NOTA Para su seguridad y con el fin de ampliar la vida útil del producto utilice solo componentes autorizados El fabricante no es responsable del mal funcionamiento del producto ni de accidentes causados por el uso de componentes o piezas no autorizados Las imágenes de este manual podrían ser diferentes ...

Страница 56: ...a apariencia y las especificaciones detalladas en este manual podrían variar debido a mejoras constantes en el producto Modelos de secadoras DLE1501 DLG1502 Descripción Secadora Requisitos eléctricos Consulte la etiqueta de datos de servicio para más información Requisitos de gas Gas natural 4 a 10 5 pulgadas 10 2 a 26 7 cm de columna de agua Gas licuado de petróleo 8 a 13 pulgadas 20 4 a 33 1 cm ...

Страница 57: ... a temperaturas inferiores a 45 F 7 C A temperaturas más bajas la secadora puede no apagarse al final de un ciclo automático Esto puede dar lugar a tiempos de secado más prolongados La secadora no se debe instalar ni almacenar en una zona donde quede expuesta al agua o a la intemperie Verifique los requisitos de códigos que limitan o no permiten la instalación de la secadora en garajes armarios ca...

Страница 58: ...cto con un kit de pedestal 3 7 6 cm 48 in 2 310 cm2 24 in 2 155 cm2 3 7 6 cm 21 1 4 54 cm 18 min 45 7 cm 14 max 35 6 cm 50 1 4 127 5 cm 29 1 2 75 cm 5 12 7cm 1 2 5 cm 1 2 5 cm 27 68 6 cm 5 12 7cm 1 2 5 cm 14 max 35 6 cm 18 min 45 7 cm 29 1 2 75 cm Separación requerida Para la ventilación en las partes lateral o inferior se permite una separación de 2 pulgadas 5 1 cm Separación para instalación en ...

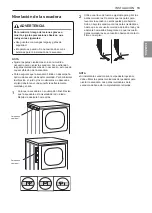
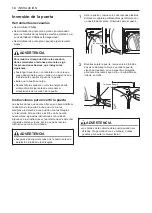
Страница 59: ...imientos no deseados el piso deberá tener una superficie perfectamente nivelada y sólida 1 Coloque la secadora en su ubicación final Revise que la secadora esté nivelada de lado a lado Repita de adelante hacia atrás Coloque un nivel aquí Coloque un nivel aquí 2 Utilice una llave de tuercas ajustable para girar las patas niveladoras Desenrosque las patas para levantar la secadora o enrósquelas para...

Страница 60: ...e ofrecen son para modificar la abertura de la puerta de una posición con las bisagras a la derecha a una posición con las bisagras a la izquierda Si la puerta se invirtió y debe hacerlo nuevamente siga estas instrucciones con cuidado Algunas de las ilustraciones y las referencias de derecha izquierda estarán al revés por lo que debe leer las instrucciones con sumo cuidado ADVERTENCIA Asegúrese de...

Страница 61: ... dos tapones de cubierta plásticos Reinstale las bisagras y los tapones de cubierta en los lados opuestos a los de donde fueron removidos Montaje de bisagra Tapón de cubierta 5 Con las bisagras y los tapones de cubierta en la nueva ubicación vuelva a montar el marco de la puerta interior en el marco de la puerta exterior con los tornillos removidos en el paso 3 ADVERTENCIA Asegúrese de soportar el...

Страница 62: ...s de gas Introduzca a presión el conducto adaptador en la carcasa del ventilador y fíjelo a la base de la secadora como se indica Conducto adaptador Soporte Tapa de agujero preperforado 3 Ensamble un codo de 4 pulgadas 10 2 cm a la siguiente sección de conducto de 4 pulgadas 10 2 cm y asegure todas las conexiones con cinta adhesiva para conductos Asegúrese de que el extremo macho del codo apunte h...

Страница 63: ...dos por UL El uso de otros materiales para el conducto de transición afectará el tiempo de secado NO utilice tornillos para chapa metálica ni ningún otro tipo de sujetadores que se extiendan dentro del conducto y puedan atrapar pelusa y así reducir la eficiencia del sistema de escape Asegure todas las uniones con cinta adhesiva para conductos No exceda las limitaciones recomendadas de longitud de ...

Страница 64: ...ta secadora debe estar conectada a tierra adecuadamente Esta secadora se debe enchufar a una toma de corriente conectada a tierra de 120 V CA de 60 Hz protegida por un fusible o cortacircuitos de 15 amperios En caso de contar con una toma de corriente de pared estándar de 2 patas es su responsabilidad y obligación reemplazarla por una toma de corriente de 3 patas con su debida conexión a tierra PE...

Страница 65: ...l tipo de gas que se usará gas natural o propano Si fuera necesario un técnico calificado deberá instalar la boquilla correcta para el kit de boquilla para LP número de la pieza para pedidos 383EEL3002D y se deberá tomar nota de este cambio en la secadora Se deben realizar todas las conexiones según los códigos y las regulaciones locales Las secadoras de gas DEBEN tener escape al exterior NOTA En ...

Страница 66: ...re de cobre o según lo requieran las leyes locales Disponga de suficiente dotación de cableado de manera de poder mover la secadora de su ubicación normal cuando sea necesario NO se provee el cable flexible de alimentación que conecta el receptáculo de la pared y el bloque de bornes de la secadora El cable de conexión flexible y el calibre del alambre deben cumplir con los códigos locales y con la...

Страница 67: ... 240 voltios de 4 hilos homologado por UL con un conductor de cobre N 10 AWG como mínimo por el aliviador de tensión Bloque de bornes Aliviador de tensión homologado por UL Cable de alimentación de 4 hilos homologado por UL 4 Transfiera el alambre de conexión a tierra de la secadora desde detrás del tornillo de conexión a tierra de color verde al tornillo central del bloque de bornes 5 Conecte los...

Страница 68: ...r trasera de la secadora 3 Instale un aliviador de tensión homologado por UL en el orificio por el que pasa el cable de alimentación 4 Pase el cable de alimentación de cobre de 4 hilos N 10 AWG como mínimo que preparó en el paso 1 por el aliviador de tensión Bloque de bornes Aliviador de tensión homologado por UL Cable de alimentación de 4 hilos homologado por UL 5 Transfiera el alambre de conexió...

Страница 69: ...entación de 30 amperios 240 voltios de 3 hilos homologado por UL con un conductor de cobre N 10 AWG como mínimo por el aliviador de tensión Bloque de bornes Aliviador de tensión homologado por UL Cable de alimentación de 3 hilos homologado por UL 4 Conecte los dos conductores vivos negro y rojo del cable de alimentación a los tornillos exteriores del bloque de bornes 5 Conecte el alambre neutro bl...

Страница 70: ... UL en el orificio por el que pasa el cable de alimentación 4 Pase el cable de alimentación de 3 hilos conductores de cobre N 10 AWG como mínimo que preparó en el paso 1 por el aliviador de tensión Bloque de bornes Aliviador de tensión homologado por UL Cable de alimentación de 3 hilos homologado por UL 5 Conecte los dos conductores vivos negro y rojo del cable de alimentación a los tornillos exte...

Страница 71: ...espacio libre entre el conducto y cualquier material de construcción combustible sea de al menos 2 pulgadas 5 cm y que cuando la secadora ventile al exterior se la instale dejando un espacio libre de como mínimo 1 pulgada 2 5 cm a ambos lados y en la parte trasera de la secadora Tenga en cuenta que los materiales de ventilación no se proveen con la secadora Debe obtener los materiales de ventilaci...

Страница 72: ... de los resultados 2 Presione y mantenga presionados los botones Temp y Signal y luego presione el botón POWER En los modelos con un panel de control táctil de vidrio presione el botón POWER y luego en forma INMEDIATA presione y mantenga presionados los botones Temp y Signal Esta secuencia de botones activa la prueba de instalación Se visualizará el código si la activación fue exitosa 3 Presione e...

Страница 73: ...el código de error antes de llamar al servicio técnico Código de error Causas posibles Soluciones tE1 o tE2 Falla del sensor de temperatura Apague la secadora y llame al servicio técnico HS Falla del sensor de humedad Apague la secadora y llame al servicio técnico PS PF o nP El cable de alimentación de la secadora eléctrica no está conectado correctamente o el suministro eléctrico de la casa no es...

Страница 74: ...tura preseleccionada nivel de secado y configuración de opciones para dicho ciclo se mostrarán Ahora la configuración por defecto para el ciclo seleccionado puede ser cambiada si así lo desea Consulte la página de Configuración de Ciclo y Opciones para más detalles NOTA No todas las opciones o los modificadores están disponibles para todos los ciclos Consulte la página Guía de ciclos para obtener ...

Страница 75: ...ado permanente resistente a las arrugas No secar usado junto a no lavar Ajuste de calor High Alta Low Baja Medium Medio Sin calor aire Conjuntos de prendas similares Para lograr mejores resultados clasifique las prendas en cargas que puedan secarse con el mismo ciclo de secado Los diferentes tipos de tejidos tienen diferentes requisitos de cuidado y algunos tejidos se secarán más rápido que otros ...

Страница 76: ... mantenga presionado cualquier botón marcado con un asterisco por 3 segundos para activar una función especial 5 Botones More Time Less Time Más tiempo Menos tiempo Use estos botones con el ciclo de Secado con temporizador y otros ciclos de Secado manual para ajustar el tiempo de secado Presione el botón More Time para aumentar el tiempo del ciclo manual seleccionado en intervalos de 1 minuto pres...

Страница 77: ...E es presionado 11 Indicador del sistema de detección de bloqueo del conducto Flow Sense El sistema de detección de bloqueo del conducto Flow Sense detecta y alerta en el caso de que haya bloqueos en los conductos que reduzcan el flujo de escape de la secadora El mantenimiento de un sistema de escape limpio mejora la eficacia de funcionamiento y ayuda a minimizar las llamadas al servicio técnico l...

Страница 78: ...a temperatura en el ajuste recomendado para cada ciclo El tiempo restante estimado se mostrará en la pantalla Ciclos de Secado manual Use los ciclos de Secado manual para seleccionar una cantidad específica de tiempo de secado y una temperatura de secado Cuando se selecciona un ciclo de Secado manual la pantalla Tiempo restante estimado muestra el tiempo efectivo restante de su ciclo Puede modific...

Страница 79: ...ones de ciclo adicionales para personalizar los ciclos y satisfacer las necesidades individuales Algunos botones de opciones también incorporan una función especial que puede activarse al mantener presionado el botón de dicha opción durante 3 segundos Para añadir opciones de ciclo a un ciclo determinado 1 Apague la secadora y presione los botones de Cycle para seleccionar el ciclo deseado 2 Use lo...

Страница 80: ...se un programa personalizado por vez Si mantiene presionado el botón de Custom PGM sobrescribirá el programa personalizado previamente guardado Recordar un programa personalizado 1 Encienda la secadora y presione el botón Custom PGM 2 Presione el botón de START PAUSE para iniciar el ciclo Rack Dry Secado sobre rejilla en algunos modelos Use la función de Secado sobre rejilla con prendas como suéte...

Страница 81: ...tiene el ciclo descargado hasta que se descarga un nuevo ciclo Consejos de ventilación Ofrece consejos de ventilación Smart Diagnosis Esta función brinda información útil para diagnosticar y resolver problemas con el producto conforme a su patrón de uso Configuración Configure el apodo del producto y borre el producto NOTA Presione en la aplicación LG Smart ThinQ para obtener una guía más detallad...

Страница 82: ...nversación con el agente del centro de atención que podrá entonces ayudarlo a usar la información transmitida para un análisis NOTA Smart Diagnosis no puede activarse a menos que el electrodoméstico se encienda usando el botón Power Si no es posible encender el electrodoméstico entonces la resolución de problemas debe llevarse a cabo sin usar Smart Diagnosis Para obtener resultados óptimos no muev...

Страница 83: ...asivos ni de lana metálica pueden rayar o dañar la superficie Limpieza alrededor de la secadora y debajo de ella Aspire la pelusa y el polvo alrededor de la secadora y debajo de ella con regularidad Se debe revisar que los conductos de ventilación no tengan acumulación de pelusa y se deben limpiar al menos una vez por año Si se percibe una reducción notoria del flujo de aire o del desempeño de sec...

Страница 84: ...a secadora funciona por poco tiempo cada pocos minutos durante un período de hasta 3 horas después de que finaliza el ciclo Esta función está diseñada para ayudar a prevenir la formación de arrugas cuando la secadora no se descarga de inmediato luego de que el ciclo finaliza P Por qué mi secadora indica 3 minutos cuando selecciono el ciclo Steam Fresh R Cuando se selecciona el ciclo Steam Fresh la...

Страница 85: ...e corriente o remplace el fusible No aumente la potencia nominal del fusible Si el problema es una sobrecarga del circuito llame a un electricista calificado para que lo solucione NOTA A causa del diseño de las secadoras eléctricas es posible que un problema de circuito permita que la secadora funcione sin calor El suministro o el servicio de gas están apagados Verifique que las válvulas de corte ...

Страница 86: ...lucione NOTA A causa del diseño de las secadoras eléctricas es posible que un problema de circuito permita que la secadora funcione sin calor La secadora está sobrecargada Divida las cargas grandes en cargas más pequeñas para realizar el secado La secadora tiene muy poca carga Si está secando una carga muy pequeña añada algunas prendas adicionales para asegurar una acción de giro apropiada Si la c...

Страница 87: ...ara ayudar a prevenir la formación de arrugas La ropa se encoge No se siguen las instrucciones de cuidado de la prenda Para evitar que la ropa se encoja consulte y respete siempre las instrucciones de cuidado de los tejidos Algunos tejidos se encogen naturalmente cuando se los lava Otros tejidos se pueden lavar pero se encogen cuando se secan en una secadora Use un ajuste de calor bajo o sin calor...

Страница 88: ...l SECADO CON TEMPORIZADOR La ropa tiene manchas de humedad después de un ciclo de Secado con sensor Carga muy grande o muy pequeña Una única prenda grande como una manta o colcha Si las prendas están muy apretadas o son demasiado escasas el sensor puede tener problemas para leer el nivel de sequedad de la carga Use un ciclo de Secado con temporizador para las cargas muy pequeñas Las prendas más gr...

Страница 89: ...ense permanece activo después de haber limpiado la obstrucción en el sistema de ventilación Luego de haber limpiado la obstrucción el sistema Flow Sense requiere múltiples ciclos consecutivos para determinar que el valor de rendimiento ha mejorado antes de que el indicador Flow Sense vuelva a iniciarse Si el indicador Flow Sense permanece activo durante más de cinco ciclos tras haber limpiado la o...

Страница 90: ...n la exclusión o limitación de daños incidentales o emergentes o limitaciones a la duración de la garantía implícita por lo que la exclusión o limitación anteriormente mencionadas podrían no corresponder en su caso Esta garantía le otorga derechos legales específicos y es posible que usted cuente con otros derechos que varían según el estado ESTA GARANTÍA LIMITADA NO CUBRE LO SIGUIENTE Viajes del ...

Страница 91: ...tiempo de secado prolongado El conducto está tapado Limpie la campana y el conducto La secadora no calienta tiempo de secado prolongado Conducto demasiado largo y o con múltiples codos Mantenga los conductos de escape lo más cortos que sea posible y use la menor cantidad de codos y curvas como le sea posible La secadora no calienta tiempo de secado prolongado Cable de alimentación mal conectado o ...

Страница 92: ...LG Customer Information Center Register your product Online www lg com For inquiries or comments visit www lg com or call 1 800 243 0000 U S A 1 888 542 2623 CANADA ...

Отзывы: