background image

●●●●

aria

24IP

DIGITAL KEY TELEPHONE SYSTEM USER’S GUIDE

30

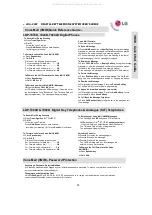
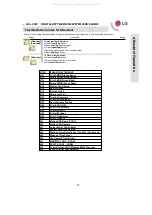
085: No Answer Prompt
086: Reserved
087: Reserved
088: Remote VMIB Control Main Menu Prompt 
089: Remote VMIB Sub-menu for digit 1 in Main Menu Prompt
090: Reserved
091: Reserved
092: Reserved
093: Remote VMIB Sub-menu for digit 2 in Main Menu Prompt
094: Remote VMIB Sub-menu for digit 3 in Main Menu Prompt
095: Remote VMIB Sub-menu for digit 

in Main Menu Prompt

096: Leave Message after Tone Prompt (mailbox)
097: Message Waiting Prompt (SLT mailbox)
098: Recordable Default Greeting Prompt for Mailboxes
099~100: Reserved 

071: VMIB MOH
072: Reserved 
073: Invalid Number Prompt    
074: Time out Prompt
075: Retry Prompt            

076: Transfer to Attendant Prompt    

077: Reserved 
078: Leave Message Prompt     
079: Record Start Prompt 
080: Authorization Code Prompt     
081: Busy Prompt 
082: Reserved 
083: Station Off-net Forward Prompt      
084: DND Prompt

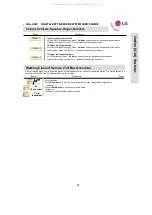
System Greetings (cont)

The System Prompt messages are 071~100

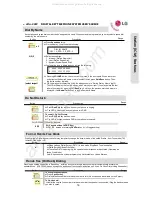
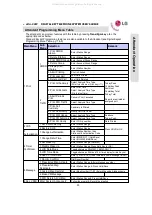
Button

Procedure

To store system speed numbers,

Press 

Trans/Pgm

button.

Dial 

Speed key 

.

Dial speed number bin. 

If required, Press desired outside line or CO Group button. (If this setting is applied, the 

speed dial will only use this line/line group. To skip, just go to the next step)

Dial the phone numbers to be stored.

Dial 

Hold/Save 

button. 

Enter Speed Dial NAME (to 16 characters). 

Hold/Save

.

To use system speed numbers,

Press 

Speed key 

.

Dial speed number bin.

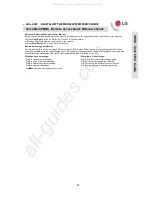
A group of speed dial numbers can be stored within the system for access by allowed stations. These numbers provide 
speedy access to often used outgoing CO dialing numbers. 

System Speed 

Dial Range:

2000~2499

System Speed Dial Entry

Range


2000~2499

(Ph Number)


2000~2499

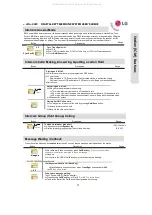
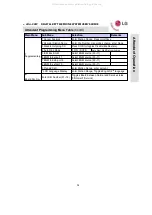
To activate temporary COS change, (to ICM only, no CO access, COS 7)

Press 

Trans/Pgm

button.  

Dial 

0 2 1

Enter the station range.

Press 

Hold/Save 

button. 

Button

Procedures

The System Attendant can change the class of service of another Station to Class of Service 7 (COS 7) to prevent 
unauthorized use of that station.

To remove temporary COS change, (restore to original COS)

Press 

Trans/Pgm

button.  

Dial 

0 2 2

Enter the station range.

Press 

Hold/Save 

button. 

Temporary COS Change  

Range

0 2 1                     

(Station range)

0 2 2                     

(Station range)

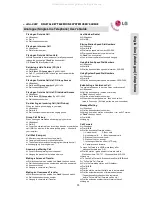
Button

Procedure

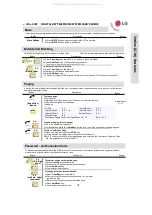
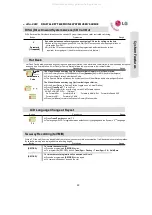
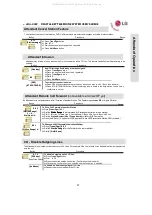
This feature allows the attendant to set the Time/Date without entering Admin Programming. 

Press 

Trans/Pgm

button.

Dial  

0 4 1

Enter Date as MMDDYY (6 digits) and press 

Hold/Save 

button.

Enter Time as military format (4 digits) and press 

Hold/Save 

button. 

If there is no need to change date or time, press 

Hold/Save 

button to go to the next step.

Time and Date Setting (Attendant Clock Set)

0 4 1               

(MMDDYY)

(HHMM 

(24hr)

)    

Range

A

tten
d

a

n

t O

p

er
a

tio

n

All manuals and user guides at all-guides.com

Содержание Aria-24IP

Страница 1: ...ation Attendant Operation Single Line Telephone Analogue Operation Single Line Telephone Analogue Operation Single Line Telephone Analogue Operation Digital Key Telephone Digital Key Telephone System System CTS Ltd 19082008 24IP New LDP Keyphone Operation New LDP Keyphone Operation Digital Key Telephone Digital Key Telephone System System Computer Telephone Services Ltd NZ 0800 366363 info cts co ...

Страница 2: ...n in this guide does not imply it is operational on your system Some features require specific hardware or software installation Please check with your aria dealer for further details A list of authorised aria Dealers near you can be found at www lgaria co nz through the Who Sells Aria link The The aria aria 24 24 IP Key Service Unit With side covers IP Key Service Unit With side covers All manual...

Страница 3: ...p On Call Wait Conference Calling Dial By Name Do Not Disturb Forced Hands Free Mode Hands Free On Hook Dialing Intercom Answer Mode Intercom Calls Making Answering Putting Calls on Hold Intercom Group Hunt group Calling Message Waiting Call Back Mute Outside Call Blocking Paging Password Authorisation Code Ringing Options Station Name Programming Step Calling ICM CO Voice Over Volume Controls Spe...

Страница 4: ...lying 2nd Language Overriding a Key Telephone in Do Not Disturb Paging Port BGM Selection by Attendant Pre Selected Message Editing SMDR Records Management Station Name Editing by Attendant System Greetings for DISA and Hunt Groups System Speed Dial Entry Temporary Class of Service Change Time Date Setting Attendant Clock Set Time Date Format Traffic Analysis Transferring an Outside Line to Anothe...

Страница 5: ...om Dialing Error Intercom Receiving Intercom Talk CO Line Busy CO Dialing Co Talk Checking Messages Paging Call Log Received Call Dialed Call Lost Call Log Lost Call Answer Lost Call Delete Current Lost Call Delete All Lost Call Save Lost Call Name Tel Navigation Menu Commonly Used Telephony Acronyms DOCUMENT REVISION Customised for Computer Telephone Services Ltd 21 FEB 2008 g p 1st 24IP user gui...

Страница 6: ... finish the conference only for conference initiator Leaving a Message Waiting Indication If you dial a station that is unattended or in Do Not Disturb you can leave a message waiting indication Dial the desired intercom station Busy tone or DND tone is heard Press Call Back key The called party s Call Back key LED will flash To answer a Message Waiting Indication Press flashing Call Back key and ...

Страница 7: ... Hold Save key Enter Time HHmm and press Hold Save button If there is no need to change date or time do not dial current date time and press Hold Save button Entering Account Code To enter Acc Code prior to a call Press Acc Code flexible button Dial the account code 1 12 digits to end digit entry Access the Line To enter Acc Code during a call Press Acc Code flex Key conversation may continue OR D...

Страница 8: ...nes for ICM Ringing Dial 01 15 9 CO Ring Extended tones for ICM Ringing Dial 01 15 8 ICM Ring 1 ON 0 OFF 7 Ear Mic Headset For Large Display phones SMS scrolling speed 6 Scroll Speed 5 SMS Notice Display ISDN enblock Off for NZ 1 ON 0 OFF 4 Enblock Mode Displays any SMS received while Station unavailable 3 SMS Message Display 1 Hands free 2 Tone 3 Private Dial 1 3 2 Answer Mode Ring Tone Dial 1 4 ...

Страница 9: ...only 3 Register Bluetooth Retrieve Station Data for Relocate New Port 2 Relocation In Load Station Data for Relocate before moving 1 Relocation Out SYSTEM Requires Station be a Hot Desk Dummy Station Hot desk Logout Requires Station be a Hot Desk Dummy Station 0 Hot desk Login VMIB plays current time date 2 Listen Time Date VMIB m box greeting Record Greeting 1 Record User Greeting 6 VMIB Announce...

Страница 10: ...ange OK to set 4 Password PGM Tone Mode Back goes back Next to change OK to set 3 MODE H T P PGM Hands free Tone Private 4 CO Melody 3 CO Ring 2 ICM Melody 1 ICM Ring Ring Type 01 15 Back goes back Next to change OK to set Ring Type 01 15 Back goes back Next to change OK to set Ring Type 01 15 Back goes back Next to change OK to set Ring Type 01 15 Back goes back Next to change OK to set 2 Ring PG...

Страница 11: ...all The Transferring party hangs up the call will be connected Range 700 727 Unscreened OR Screened Transfer Sta or DSS key Dial By Name Button Procedures To Call another Station using Dial By Name Press SPEED key Twice Dial 1 ICM Scroll through volume Station Name List and Press Hold Save at the desired Name OR Hot Key to the 1st Letter of the Name using the 2 digit Alpha Scheme see Storing Using...

Страница 12: ...se this function e g Centrex Call transfer This feature may disconnect an outside line and re seize dial tone if programmed or it can be used to send a recall to line when the system is connected with a PBX or Enhanced Feature Analogue Line Flash Softkey Making an Outside CO Line Call Lift handset or press Speaker key Press outside line button pool button or dial CO line access code Dial desired p...

Страница 13: ...Press Speed key Dial speed number bin to be erased Press Hold Save button To Re Edit speed numbers Press Trans Pgm button Press Speed key Dial speed number bin to be edited Over write the number then press Hold Save Edit the Name if required as per alpha scheme below Press Hold Save button System Speed bins 2000 2499 Additional Speed Dial Entries Pause P is Call Back key Flash F is Dnd Fwd key Sec...

Страница 14: ... Number Dial station number or press DSS button or intercom group Confirmation tone is heard and Dnd Fwd key is flashing Hang up To activate call forward to VMIB Lift handset or press Speaker key Dial 4 9 Dial desired Call Forward code 1 4 Dial VMIB selection code to receive the call Hang up NB Requires VMIB Access Mailbox Greeting recorded Range Sta No 700 727 ICM Group 620 629 Call Forward A cal...

Страница 15: ...red If you dial a busy station you may alert it to your call by leaving a message wait indication Range Conference Calling Button Procedures Range To establish a conference Call desired party internal or outside Press CONF soft key the called party is put on exclusive hold Call the next party Press CONF soft key twice once if adding additional parties Conference is established To add another party...

Страница 16: ...ve Do Not Disturb Press Dnd Fwd key while on hook The LED is extinguished and DND at your phone is removed Range For Keysets without a DND Key Dial 5 3 instead of pressing Dnd Fwd key on off toggle setting Do Not Disturb For LDP 7004 7008 series Keysets 5 5 3 Forced Hands Free Mode Button Procedures When calling a Digital Keyset DKTU in tone mode Ring Back Tone is supplied Dial Forced Hands Free C...

Страница 17: ... bursts of tone and one way announcement is heard Lift handset to talk in HF mode 3 bursts of tone and announcement is heard Reply with Hands free mode or lift handset for privacy Placing An ICM Call on Hold You may put an intercom call on hold by pressing Hold Save button To retrieve intercom call on hold Hang Up the held call will recall Range Off hook Button Procedures Range To make an intercom...

Страница 18: ...6 10 0 6 1 0 Internal Zones 01 10 A station which is allowed to access page facilities can connect and make voice announcement to any or all of the system external internal page zones To answer paging meet me page Go to the nearest key telephone Lift handset and dial or Hold Save button and you will be connected to the paging party Page Code Speak Off hook Off hook To join a Conference Page When r...

Страница 19: ... will see your name instead of your station number when you call Button Procedures Range Dialing an extension number and the station is busy After hearing ICM busy tone dial the last digit of the next extension number in the same 10 s group ex If station 712 is busy dial digit 4 to call station 714 It can be used for CO line call by pressing Speed key last digit When an extension is busy you can m...

Страница 20: ...the Handset press Volume button to control the speakerphone volume Adjust the volume from 00 12 or increase decrease the bar meter Button Procedures A toll call may be made from a toll barred station using the authorisation code of a non barred station The Station returns to its normal Class of Service Toll Barred after one call is made Walking Class of Service Toll Bar Over ride Lift handset Dial...

Страница 21: ...oom Press Trans Pgm 4 3 Room Number 1 9 Dial a 5 digit Access Code if required An access code is optional Press Hold Save Key To Deactivate a Conference Room Press Trans Pgm 4 4 Room Number 1 9 To Join a Conference Room An internal Station user may Dial the conference room Code Room Number 571 579 An external Party must enter via a pre programmed DDI with the Conference Room as the Destination To ...

Страница 22: ...ut The LCD will prompt for a verity of log out with Call Forward options AGENT LOGOUT WITH Options No Forward Set Forward to Sta Forward to Mobile Ext Forward to Speed 000 Forward to VM Forward to VMIB Press Hold Save to return the Station to Dummy Station mode Authorisation Code Hot Desk Facility allows user who does not require a permanent station to be allocated a virtual station which is enabl...

Страница 23: ... Hang up Button Procedures Range Voice Board VMIB Features The Aria s VMIB Voice Messaging Interface Board provides many useful voice facilities To listen to a recorded message Press the flashing Call Back key LCD shows MSG VMIB no of msgs The recorded message is heard with the time and date Soft keys Next Repeat Delete Add Rewind Call Back are available Pressing Hold Save button the current messa...

Страница 24: ...ding ATD DND Attendant ATD Camp On Attendant Record VMIB User Greeting Listen Time Date Listen Station Number Listen Station Status Record Page MSG Erase User Greeting Erase Page MSG Answer Machine Ring Answer Machine Speaker DVM One Touch Record DVM Pause Resume LCD Display Language MPB Version Display Background Music Register Station Name Speakerphone Headset Headset Ring Mode Account Code DDI ...

Страница 25: ... SLT Telephones To Record Out Going Greeting Press Trans Pgm key SLT Dial 3 Dial 6 1 Follow the voice Prompts Press Hold Save when you have finished recording your greeting SLT press Recall or Hook flash To Retrieve your Voice Mail VMIB Messages The flashing CALL BK button and LCD will alert a VMIB message or Dial 6 7 5 6 7 on some systems If required enter you Authorisation Code Password The Time...

Страница 26: ...ll be asked to enter your authorisation code The system will respond with the number of messages in your voice mail if the correct code was entered NB ver 3 5 SW Authorisation code is followed by key When you have a message When there is no message Dial 1 to retrieve your messages Dial 1 to listen to the current message again Dial 2 to listen to the next message Dial 2 to listen to or change your ...

Страница 27: ...f another Station Press Trans Pgm 0 9 1 Dial the Station Range Station Range Station Range Station Range to be forwarded or Station number twice for one station Dial 1 4 for the Forward type 1 Unconditional 2 Busy 3 No Ansr 4 Busy No Ansr Dial the Station Number Hunt Group Number or for VMIB Destination Press Hold Save option for VMIB requires Sta has VMIB access and Station OGM recorded To Remove...

Страница 28: ...de Press Hold Save when the desired choice is displayed 1 5 Button Procedure To set ICM box music Press Trans Pgm button Dial 0 7 5 Dial the music channel 01 11 Press Hold Save button The attendant can select the music channel source for an ICM box Door Phone Intercom Box BGM Selection Range 0 7 5 00 11 Button Procedure LCD Language Apply 2nd Language To change the LCD language at attendant Press ...

Страница 29: ...all stations in the range Press Hold Save button 0 1 1 1 Station range 0 1 1 3 Acc Group Range 0 1 1 2 Station range 0 1 1 4 Acc Group Button Procedure Press Trans Pgm button Dial 0 7 2 Dial the station number and enter the name using the code shown Press Hold Save button Also see the Alpha Entry Scheme described on pg 13 Q 11 Z 12 13 1 10 A 21 B 22 C 23 2 20 D 31 E 32 F 33 3 30 G 41 H 42 I 43 4 4...

Страница 30: ... to be stored Dial Hold Save button Enter Speed Dial NAME to 16 characters Hold Save To use system speed numbers Press Speed key Dial speed number bin A group of speed dial numbers can be stored within the system for access by allowed stations These numbers provide speedy access to often used outgoing CO dialing numbers System Speed Dial Range 2000 2499 System Speed Dial Entry Range 2000 2499 Ph N...

Страница 31: ... button Dial 0 1 2 4 Attendant Traffic Report 0 1 2 5 Call Summary Report 0 1 2 6 Call Hourly Report 0 1 2 7 Hardware Unit Usage Summary Report 0 1 2 8 CO Traffic Report 0 1 2 9 CO Traffic Hourly Report Press Hold Save button Traffic Analysis The system can monitor and print various system activate based on the attendant s request The traffic monitoring program is activated only when enabled and w...

Страница 32: ...ght Weekend Mode Program 074 DELETE CONF ROOM 048 MONITOR CONF ROOM 047 Use Network Time Date 046 Wake up Time Cancel 043 Wake up Time Registration One time Continuous 042 System Date Time Setting 041 Authorization Code Cancel 031 Station COS Restore 022 Station COS Down COS 7 021 Print CO Hourly 0129 Print CO Summary 0128 Print H W Usage 0127 Print All Hourly 0126 Print Call Summary 0125 Print AT...

Страница 33: ...ter 1 ON 0 OFF to set time date from Exchange ISDN 6 Use PX Time Date Hourly Call Print is set 6 Print Call Hourly Summary is Printed 5 Print Call Summary Select Analysis Time Type 4 Print ATD Traffic Periodic Print Cancelled 3 Abort Periodic Print Enter Print Time Select Analysis Time Type Prints at set time 2 Print All Periodic Enter Station Range 2 Restore COS Press HOLD or OK Enter Station Ran...

Страница 34: ...BGM source 00 11 8 BGM to ext port 3 Select BGM source 00 11 7 BGM to Extn port 2 Select BGM source 00 11 6 BGM to Ext port 1 Select BGM source 00 11 5 ICM Box BGM Auto Day Night etc switching 1 ON 0 OFF 4 Auto Ring Mode Press CO Btn toggles Disable Enable state 3 Disable Outgoing CO Enter Sta Number Use alpha scheme enter Name 2 Register Station Name Enter Station Range Press Hold Save 1 Cancel F...

Страница 35: ...l Forward can be set Dial the extension number that will receive the call Hang up Placing an Outside Call Lift handset Dial 1 Dial the desired number Placing an Intercom Call Lift handset Dial intercom number Placing an Outside Call on Hold While connected to an extension call briefly depress and release the hook switch flash the hook switch OR Flash 5 6 0 for System Hold Retrieving a Held Outside...

Страница 36: ...ed to another system you can use this feature to Transfer a call back to an extension on the other system Your installer will tell you if you need this feature While connected to an extension call flash the hook switch Dial 5 5 1 Hearing new dial tone from the other system dial the extension number on the required system When the station answers See Screened Transfer speak or hang up See Unscreene...

Страница 37: ...he handset Deleting Your Message Lift handset Dial 3 After hearing confirmation tone dial 6 6 Deleting Paging Message Lift handset Dial 3 After hearing confirmation tone dial 6 7 To activate Call Forward to Internal Voice Mail Lift handset Dial 4 9 Dial Call Forward type number 1 4 Dial Hang up Analogue Single Line Telephone User s Guide Voice Announcement cont To deactivate Call Forward to Intern...

Страница 38: ...set Earphone Speaker Speed Button Dnd Fwd Button Speaker Button Hold Save Button 3 Soft Button LCD Display 10 11 12 13 14 15 16 17 Ring LED Trans Pgm Button Flexible Call back Button Volume Button MIC Menu Phonebook Same operate as Speed 8 11 12 13 3 4 5 6 7 2 9 14 15 16 17 10 LDP Keysets All manuals and user guides at all guides com ...

Страница 39: ... telephone status dialing directories and test message information Illuminates when the phone is ringing This button is used to set up a conference call or transfer a call The remaining XX Flex buttons can be assigned to a feature A station can initiate a call back request to another busy station Once that station becomes idle the station that left the call back request is signaled The volume butt...

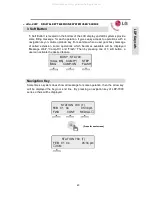
Страница 40: ...ill be displayed Message Wait Camp On and Flash Then by pressing one of 3 soft button a user can activate the desired feature 3 Soft Button Navigation Key Sometimes a system does show all message for some operation then the arrow key will be displayed the begin or end line By pressing a navigation key of LDP 7000 series others will be displayed BUSY STA 700 CALL BK CAMP STEP MSG CAMP ON FLASH STAT...

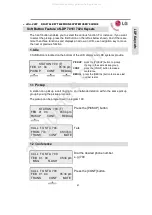
Страница 41: ...to make a conference REDIAL press the REDIAL button to make a last number redial 1 1 Pickup CALL TO STA 704 FROM 700 05 37pm TRANS CONF MUTE A station can pickup a call ringing to an unattended station within the same pickup group by using the pickup procedure The pickup can be programmed in program 190 Press the PICKUP button Talk STATION 700 T FEB 01 04 05 34 pm PICKUP CONF REDIAL STATION 700 T ...

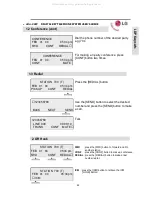
Страница 42: ...4 pm FWD CONF REDIAL Dial the phone number of the desired party e g 704 CONFERENCE FEB 01 04 05 34 pm CONF MUTE For making a 3 party conference press CONF button two times LDP Keysets 2 Off Hook STATION 700 T FEB 01 04 05 34 pm FWD CONF REDIAL FWD press the FWD button to forward a call to another station CONF press the CONF button to make a conference REDIAL press the REDIAL button to make a last ...

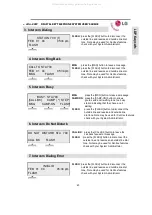
Страница 43: ... the CAMP ON button to allows you to send a call waiting tone to a busy station indicating that they have a call waiting FLASH press the FLASH button to disconnect the outside line and reseize and outside line dial tone Note may be used for Centrex features check with your System Administrator LDP Keysets 7 Intercom Dialing Error INVALID FEB 01 04 05 34 pm FLASH FLASH press the FLASH button to dis...

Страница 44: ... DND press the DND button to prevent other parties from disturbing you 11 CO Dialing CO Talk 123456789 LINE 125 00 00 03 TRANS CONF MUTE 123456789 LINE 125 00 00 03 RECORD FLASH ACNR TRANS press the TRANS button to transfer the incoming call to another station CONF press the CONF button to make a conference MUTE press the MUTE button to mute the handset speakerphone or headset but does not affect ...

Страница 45: ...ssage 13 Paging PAGE FROM STA 703 20 AUG 04 11 51am MEET ME NEXT press the NEXT button to move to the next message REPEAT press the REPEAT button to hear the message again DELETE press the DELETE button to erase the message MEET ME press the MEET button to answer the current paging LDP Keysets Press the Call Log button To programme a key Trans Pgm Flexi key Trans Pgm 5 7 Hold Save 3 LOST CALL OK R...

Страница 46: ...OK button 123456789 LINE 125 00 00 03 TRANS CONF MUTE 1 1 RECEIVED CALL 2 DIALED CALL OK LDP Keysets 14 2 Dialed Call 123456789 02 01 09 02 BACK OK Press the OK or OK button Press the OK or OK button 123456789 LINE 125 00 00 03 TRANS CONF MUTE 2 1 RECEIVED CALL 2 DIALED CALL OK NOTE Return to the previous BACK All manuals and user guides at all guides com a l l g u i d e s c o m ...

Страница 47: ... the following item DEL CUR DEL ALL SAVE NAME TEL 14 3 1 ANSWER 0123456789 LINE XXX 00 00 03 TRANS CONF MUTE Press the ANSWER button you can make a call to CLI 0123456789 03 10 16 02 CNT 01 BACK SELECT ANSWER 14 3 2 DELETE CURRRENT STATION 100 T FEB 01 04 05 34 pm PICKUP CONF REDIAL Press the DEL CUR button current message is erased 0123456789 03 10 16 02 CNT 01 BACK SELECT DEL CUR LDP Keysets NOT...

Страница 48: ...K SELECT NAME TEL Press the or HOLD button speed dial is registered 0123456789 03 10 16 02 CNT 01 BACK SELECT NAME TEL See the page 39 To save CLI press the SAVE button 0123456789 03 10 16 02 CNT 01 BACK SELECT SAVE On the contrary to check the number of the selected name press the NAME TEL button 14 3 3 Lost Call cont NOTE NOTE Return to the previous BACK Select the DEL ALL button by pressing SEL...

Страница 49: ... MOBILE EXTENSION PGM OK 5 CONFERENCE ROOM PGM 6 HOT DESK PROGRAM OK 3 SPEED PROGRAM 4 MOBILE EXTENSION PGM OK 1 BASIC PROGRAM 2 ADVANCED PROGRAM OK 5 CONFERENCE ROMM PGM 6 HOT DESK PROGRAM OK 1 BASIC PROGRAM 2 ADVANCED PROGRAM OK LDP Keysets Refer to the Programming Menu Table For LDP Keyset Navigation Key on Page 9 for details of the Menu Features Below is a guide on the general method of using ...

Страница 50: ...ment Account Code or Authorization Code Displays on a calling Station s LCD the reason for a persons called Station absence Absent Text Message The flexible button for CO line access function about CO group POOL or CO Group The flexible button for CO line access function about all accessible CO lines LOOP or LOOP The flexible button for CO line access function about one CO line COL The fixed butto...

Страница 51: ...o specific station DSS Domain Name System of the Internet protocol DNS Do Not Disturb DND Digital Key Telephone Unit DKTU Direct Inward System Access of a CO incoming call via Auto Announcement DISA Direct Inward Dialing the public telephone network service of CO incoming call to a specific destination DID or DDI Digital European Cordless Telephone DECT The Call Ringing or routing state according ...

Страница 52: ...ge Detail Record provides detailed station log information about incoming outgoing CO call SMDR Simplified Message Desk Interface SMDI Single Line Telephone SLT The serial communication interface protocol RS 232C A call distribution method of hunt group Ring Group Ring Back Tone RBT Public Switched Telephone Network PSTN Primary Rate Interface ISDN PRI Preferred Line Answer PLA The service allowin...

Страница 53: ... aria 24IP DIGITAL KEY TELEPHONE SYSTEM USER S GUIDE 53 NOTES All manuals and user guides at all guides com ...

Страница 54: ... Gentech NZ Limited Private Bag 14927 Panmure Auckland NOTES ARIA INSTALLED BY INSTALL DATE Please Note your first level of support is your Aria Dealer A list of Aria Dealers can be found at www lgaria co nz at the who sells aria link Computer Telephone Services Ltd NZ 0800 366363 info cts co nz All manuals and user guides at all guides com ...

Отзывы: