Notes:
•
View the printer IP address on the printer home screen. The IP address appears as four sets of
numbers separated by periods, such as 123.123.123.123.
•
If you are using a proxy server, then temporarily disable it to load the Web page correctly.
2
Click
Apps
>
Device Quotas
>
Configure
.
3
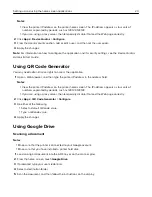
From the User Accounts section, add or edit a user, and then set the user quota.
4
Apply the changes.
Note:
For information on how to configure the application and its security settings, see the
Device Quotas
Administrator’s Guide
.
Using QR Code Generator
You may need administrative rights to access the application.
1
Open a Web browser, and then type the printer IP address in the address field.
Notes:
•
View the printer IP address on the printer home screen. The IP address appears as four sets of
numbers separated by periods, such as 123.123.123.123.
•
If you are using a proxy server, then temporarily disable it to load the Web page correctly.
2
Click
Apps
>
QR Code Generator
>
Configure
.
3
Do either of the following:
•
Select a default QR code value.
•
Type a QR code value.
4
Apply the changes.
Using Google Drive
Scanning a document
Notes:
•
Make sure that the printer is connected to your Google account.
•
Make sure that you have installed a printer hard disk.
1
Load an original document into the ADF tray or on the scanner glass.
2
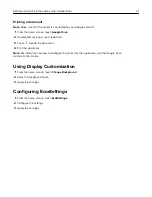
From the home screen, touch
Google Drive
.
3
If prompted, type your user credentials.
4
Select a destination folder.
5
Scan the document, and then follow the instructions on the display.
Setting up and using the home screen applications
20
Содержание XC6100 Series
Страница 1: ...XC6100 Series User s Guide January 2016 www lexmark com Machine type s 7563 Model s 196 197 ...
Страница 66: ...2 Open door A 3 Remove the waste toner bottle Maintaining the printer 66 ...
Страница 69: ...2 Open door A 3 Remove the waste toner bottle Maintaining the printer 69 ...
Страница 73: ...3 Remove the pick roller 4 Unpack the new pick roller Maintaining the printer 73 ...
Страница 80: ...4 Remove the waste toner bottle 5 Open door A1 6 Remove the transfer belt Maintaining the printer 80 ...
Страница 90: ...2 Open door G 3 Remove the staple cartridge 4 Unpack the new staple cartridge Maintaining the printer 90 ...
Страница 92: ...2 Open door G 3 Pull out the staple cartridge holder Maintaining the printer 92 ...
Страница 111: ...2 Open door G 3 Pull out the staple cartridge holder Clearing jams 111 ...
Страница 162: ...4 Remove the paper bail 5 Remove the standard bin insert Upgrading and migrating 162 ...

