


2
Make sure the paper path is clear.
Note:
If a cut form or envelope is loaded in the printer, press
FormFeed
to remove it.
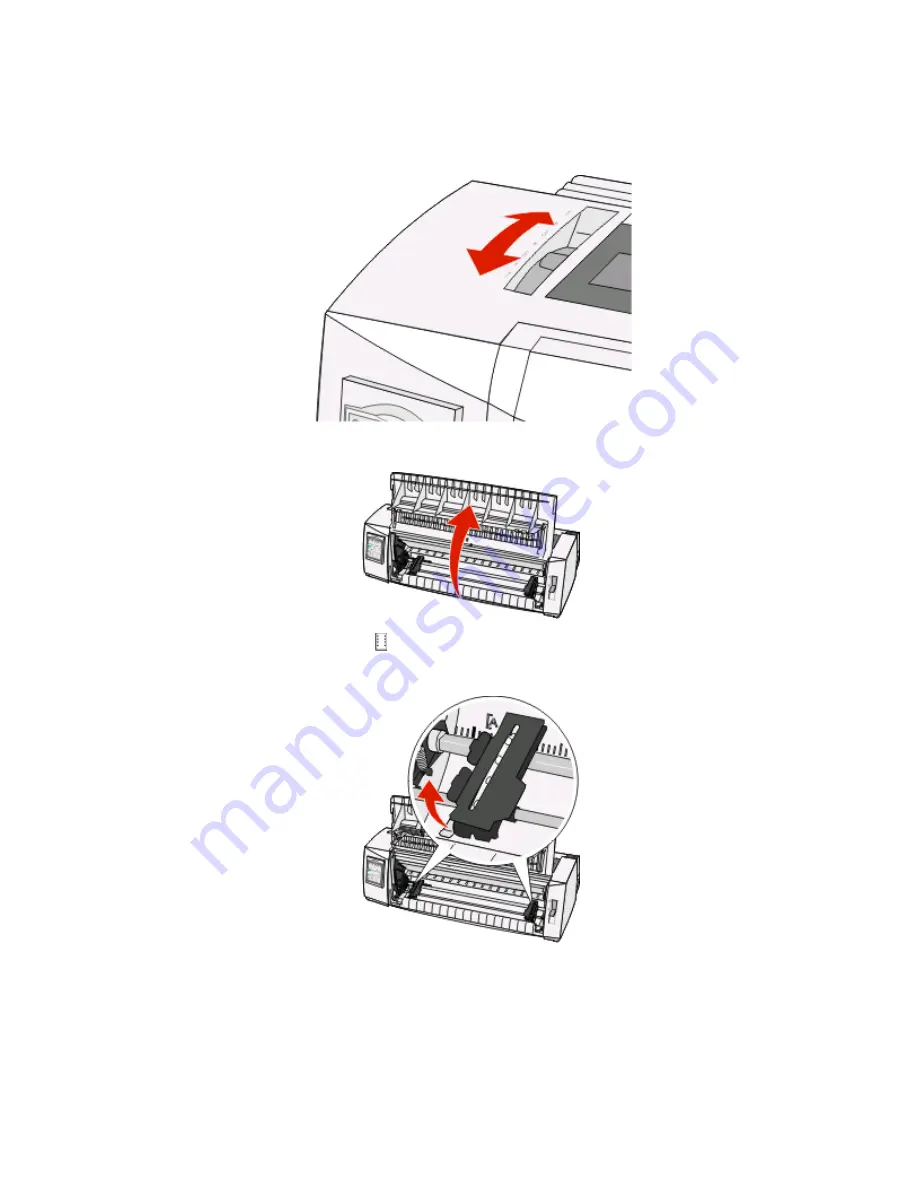
3
Set the forms thickness lever to a setting corresponding with the paper thickness you are using.
4
Pull the front cover up.
5
Move the paper select lever down to the position.
6
Pull the left and right tractor locking levers up to unlock the tractors.
Loading paper
27
Содержание 2500 Series
Страница 5: ...Notices 76 Edition notice 76 Power consumption 79 Index 83 Contents 5 ...
Страница 6: ...6 ...


