159
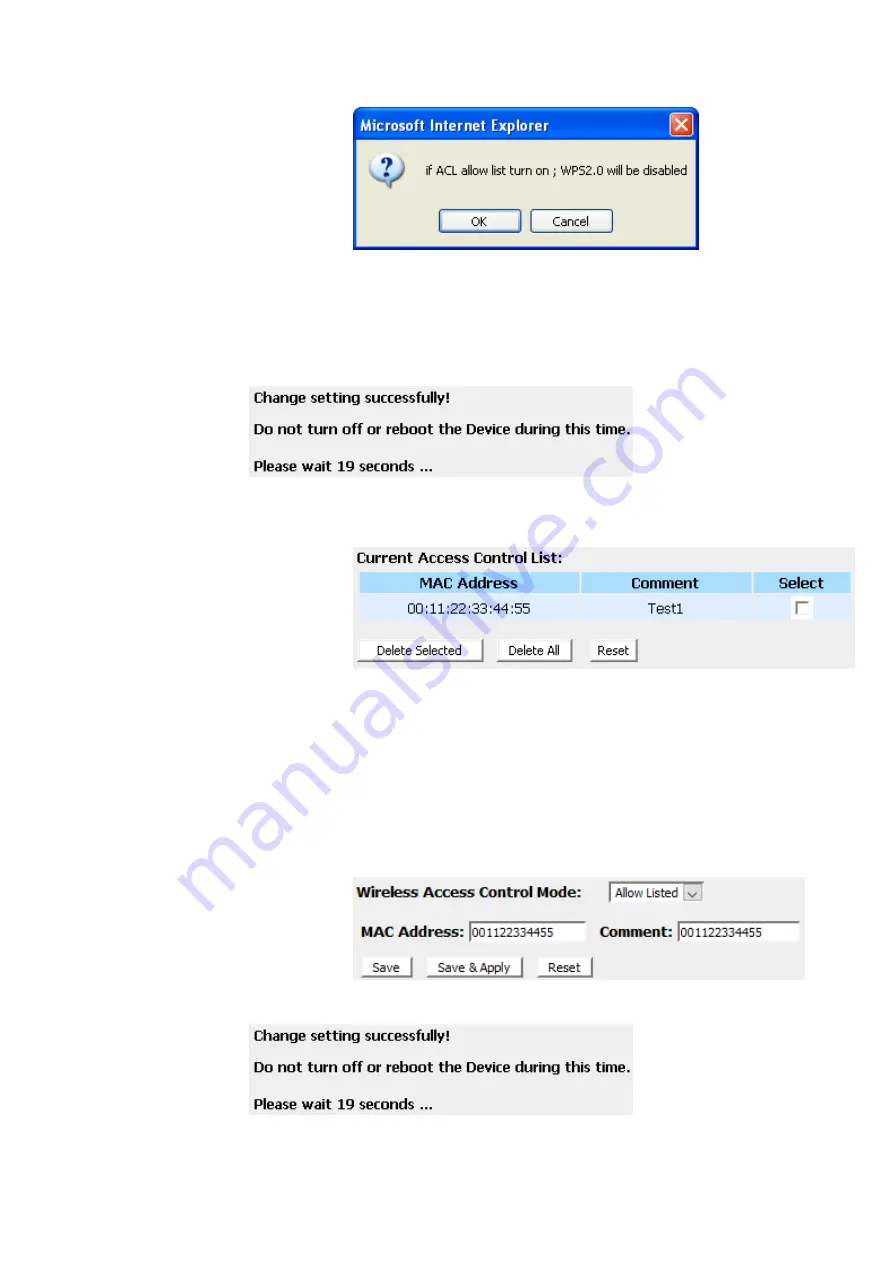
6. Change setting successfully!
Please wait 20 seconds….
7. The MAC Address that you created has been added in the
Current Access Control List
.
Deny Listed
When 'Deny Listed' is selected, these wireless clients on the list
will not be able to connect the Access Point.
1. From the Wireless Access Control Mode drop-down list,
select
Deny Listed
setting.
2. Enter the
MAC Address
.
3. Enter the
Comment
.
4. Click
Save & Apply
button.
5. Change setting successfully!
Please wait 20 seconds….
Содержание WGR-8031
Страница 1: ...1 LevelOne User Manual WGR 8031 Version v1 0_20160321...
Страница 15: ...15 2 Single RIGHT click on Local Area connection then click Properties...
Страница 16: ...16 3 Double click on Internet Protocol TCP IP...
Страница 18: ...18 For Windows Vista 32 64 1 Click on Start Control Panel View network status and tasks...
Страница 19: ...19 2 In the Manage network connections click on Manage network connections to continue...
Страница 20: ...20 3 Single RIGHT click on Local Area connection then click Properties...
Страница 23: ...23 For Windows 7 32 64 1 Click on Start Control Panel in Category View View network status and tasks...
Страница 24: ...24 2 In the Control Panel Home click on Change adapter settings to continue...
Страница 25: ...25 3 Single RIGHT click on Local Area Connection then click Properties...
Страница 26: ...26 4 Double click on Internet Protocol Version 4 TCP IPv4...
Страница 28: ...28 For Windows 8 8 1 32 64 1 Move the mouse or tap to the upper right corner and click on Settings...
Страница 29: ...29 2 Click on Control Panel...
Страница 31: ...31 5 Single RIGHT click on Ethernet then click Properties...
Страница 32: ...32 6 Double click on Internet Protocol Version 4 TCP IPv4...
Страница 35: ...35 3 Single RIGHT click on Ethernet then click Properties...
Страница 36: ...36 4 Double click on Internet Protocol Version 4 TCP IPv4...
Страница 45: ...45 Wireless Configuration 5GHz 6 Enter SSID 7 Click on Next...
Страница 50: ...50 2 Double click Network Connections...
Страница 56: ...56...
Страница 107: ...107 14 Change setting successfully Do not turn off or reboot the Device during this time Please wait 20 seconds...
Страница 119: ...119 23 Change setting successfully Please wait 20 seconds...
Страница 128: ...128 8 Click on Turn on network discovery and file sharing...
Страница 129: ...129 9 Click on No make the network that I am connected to a private network...
Страница 130: ...130 10 AP s icon will show up Double click on it...
Страница 131: ...131 11 Users could also Click Add a wireless device if the icon is not there Click next...
Страница 132: ...132 12 Enter AP s Self PIN Number and click next...
Страница 133: ...133 13 Choose a name that people who connect to your network will recognize...
Страница 134: ...134 14 Enter the Passphrase and then click Next...
Страница 135: ...135 15 A User Account Control screen pops up click Continue 16 AP is successfully configured by WCN...
Страница 137: ...137 18 The SSID field of Wireless Basic Settings page will also be modified with the value assigned by WCN...
Страница 148: ...148 Figure 9 Wireless Network page...
Страница 162: ...162 6 Change setting successfully Please wait 20 seconds...
Страница 177: ...177 22 Change setting successfully Please wait 20 seconds...
Страница 186: ...186 8 Click on Turn on network discovery and file sharing...
Страница 187: ...187 9 Click on No make the network that I am connected to a private network...
Страница 188: ...188 10 AP s icon will show up Double click on it...
Страница 189: ...189 11 Users could also Click Add a wireless device if the icon is not there Click next...
Страница 190: ...190 12 Enter AP s Self PIN Number and click next...
Страница 191: ...191 13 Choose a name that people who connect to your network will recognize...
Страница 192: ...192 14 Enter the Passphrase and then click Next...
Страница 193: ...193 15 A User Account Control screen pops up click Continue 16 AP is successfully configured by WCN...
Страница 195: ...195 18 The SSID field of Wireless Basic Settings page will also be modified with the value assigned by WCN...
Страница 213: ...213 1 From the head menu click on TCP IP 2 From the left hand menu click on WAN Setting The following page is displayed...
Страница 224: ...224...
Страница 225: ...225 8 Change setting successfully Please wait 20 seconds...
Страница 228: ...228...
Страница 230: ...230 2 From the left hand menu click on WAN Setting The following page is displayed...
Страница 234: ...234 RADVD 1 From the head menu click on IPV6 2 From the left hand menu click on RADVD The following page is displayed...
Страница 235: ...235...
Страница 247: ...247...
Страница 253: ...253 2 From the left hand menu click on Port Forwarding The following page is displayed...
Страница 263: ...263...
Страница 267: ...267...
Страница 277: ...277 2 From the left hand menu click on Deny Of Service The following page is displayed...
Страница 282: ...282 8 Change setting successfully Please wait 20 seconds...
Страница 284: ...284 6 Firmware update has been update complete The following page is displayed...
Страница 298: ......
Страница 305: ...305 For example from the Network Connections window you should see the Internet Gateway Device...


